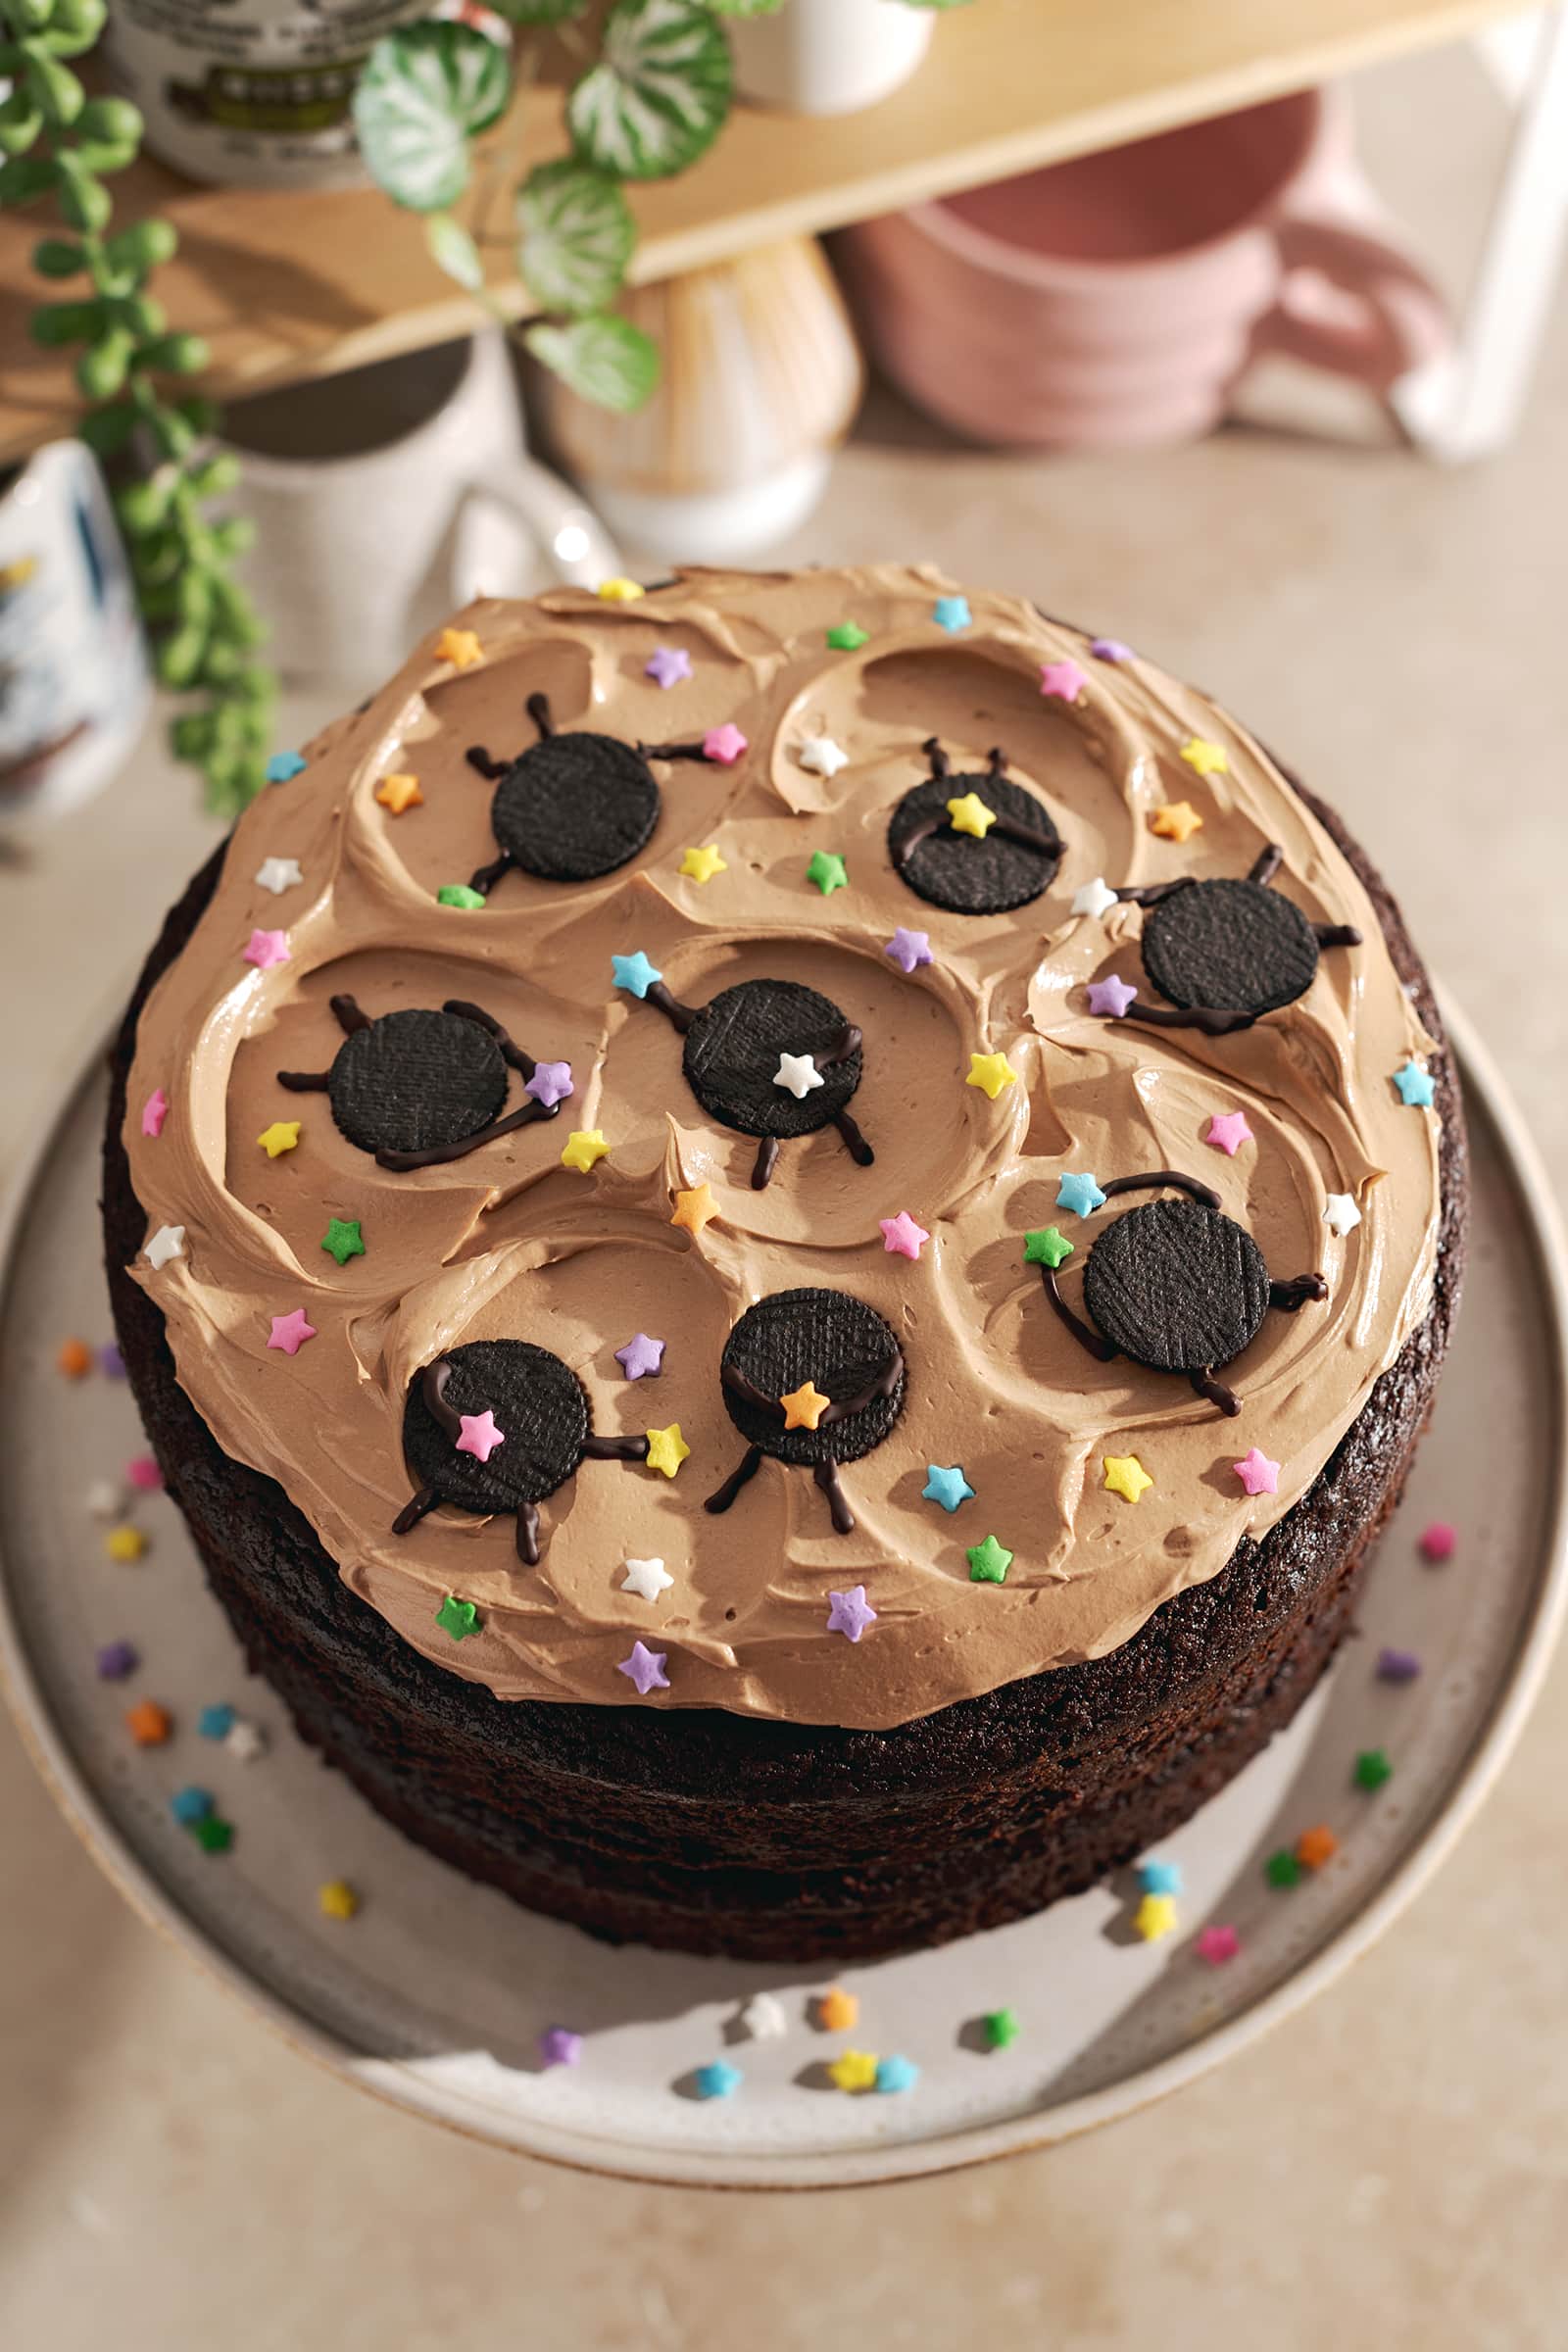
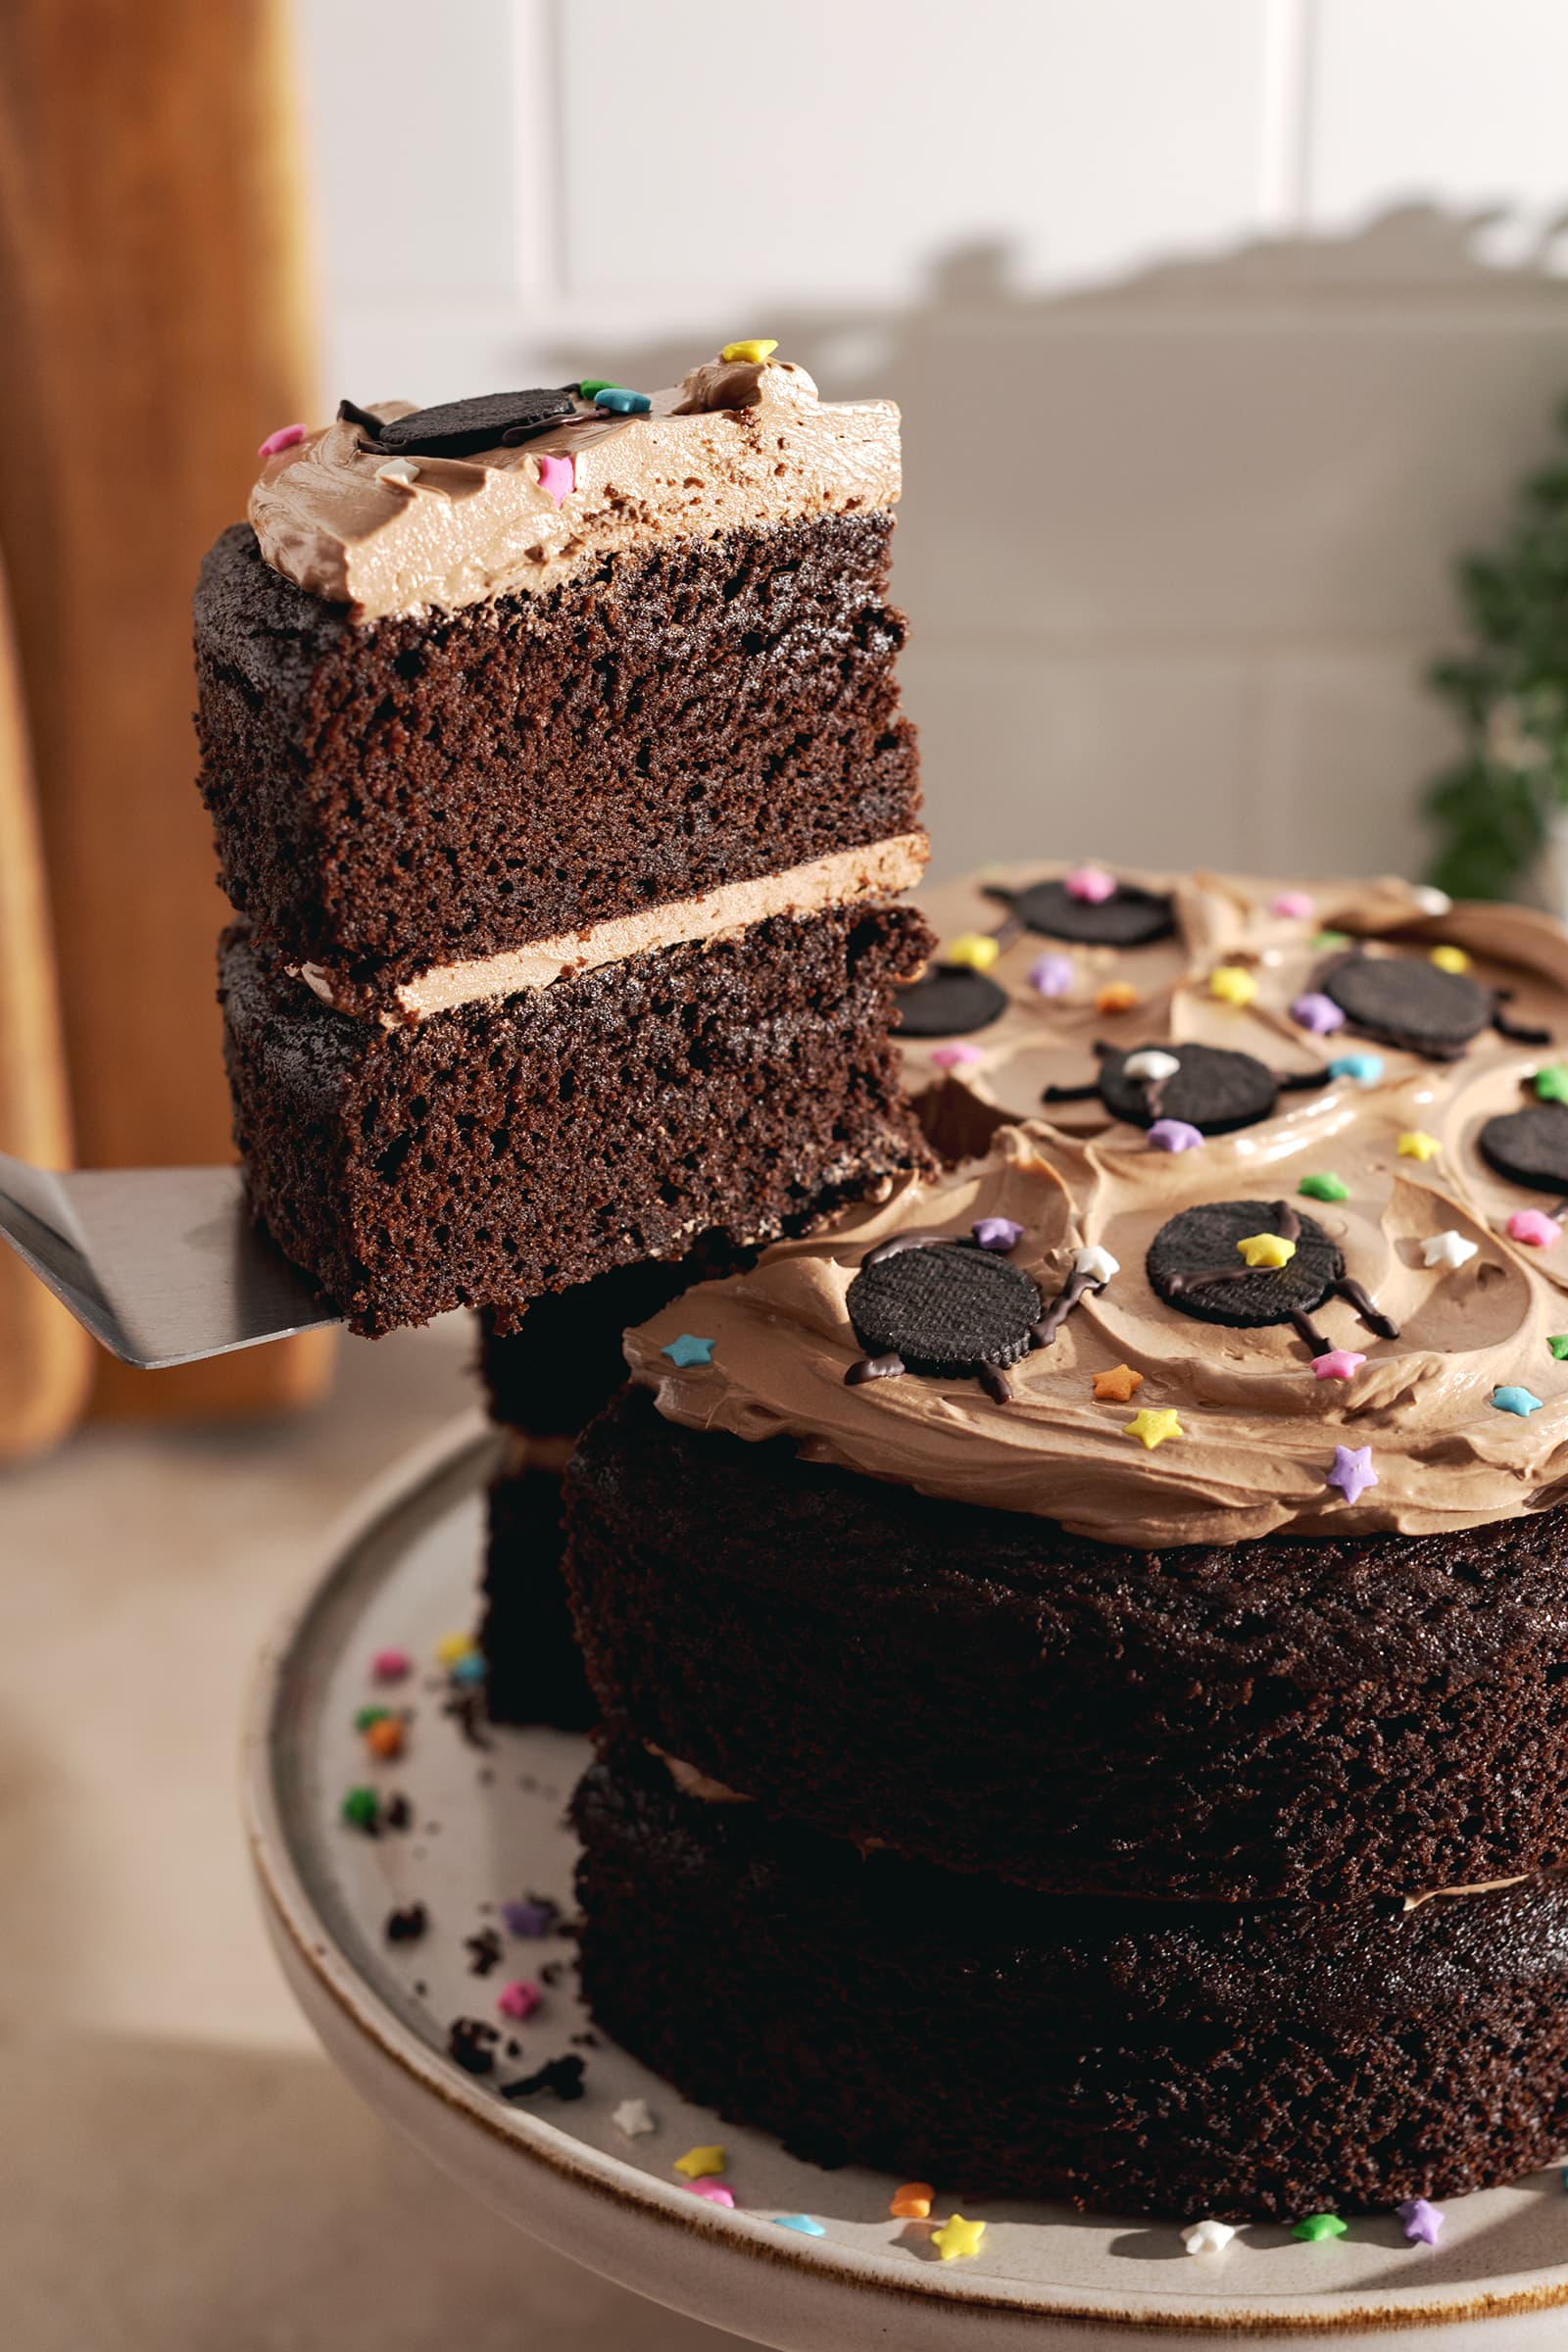
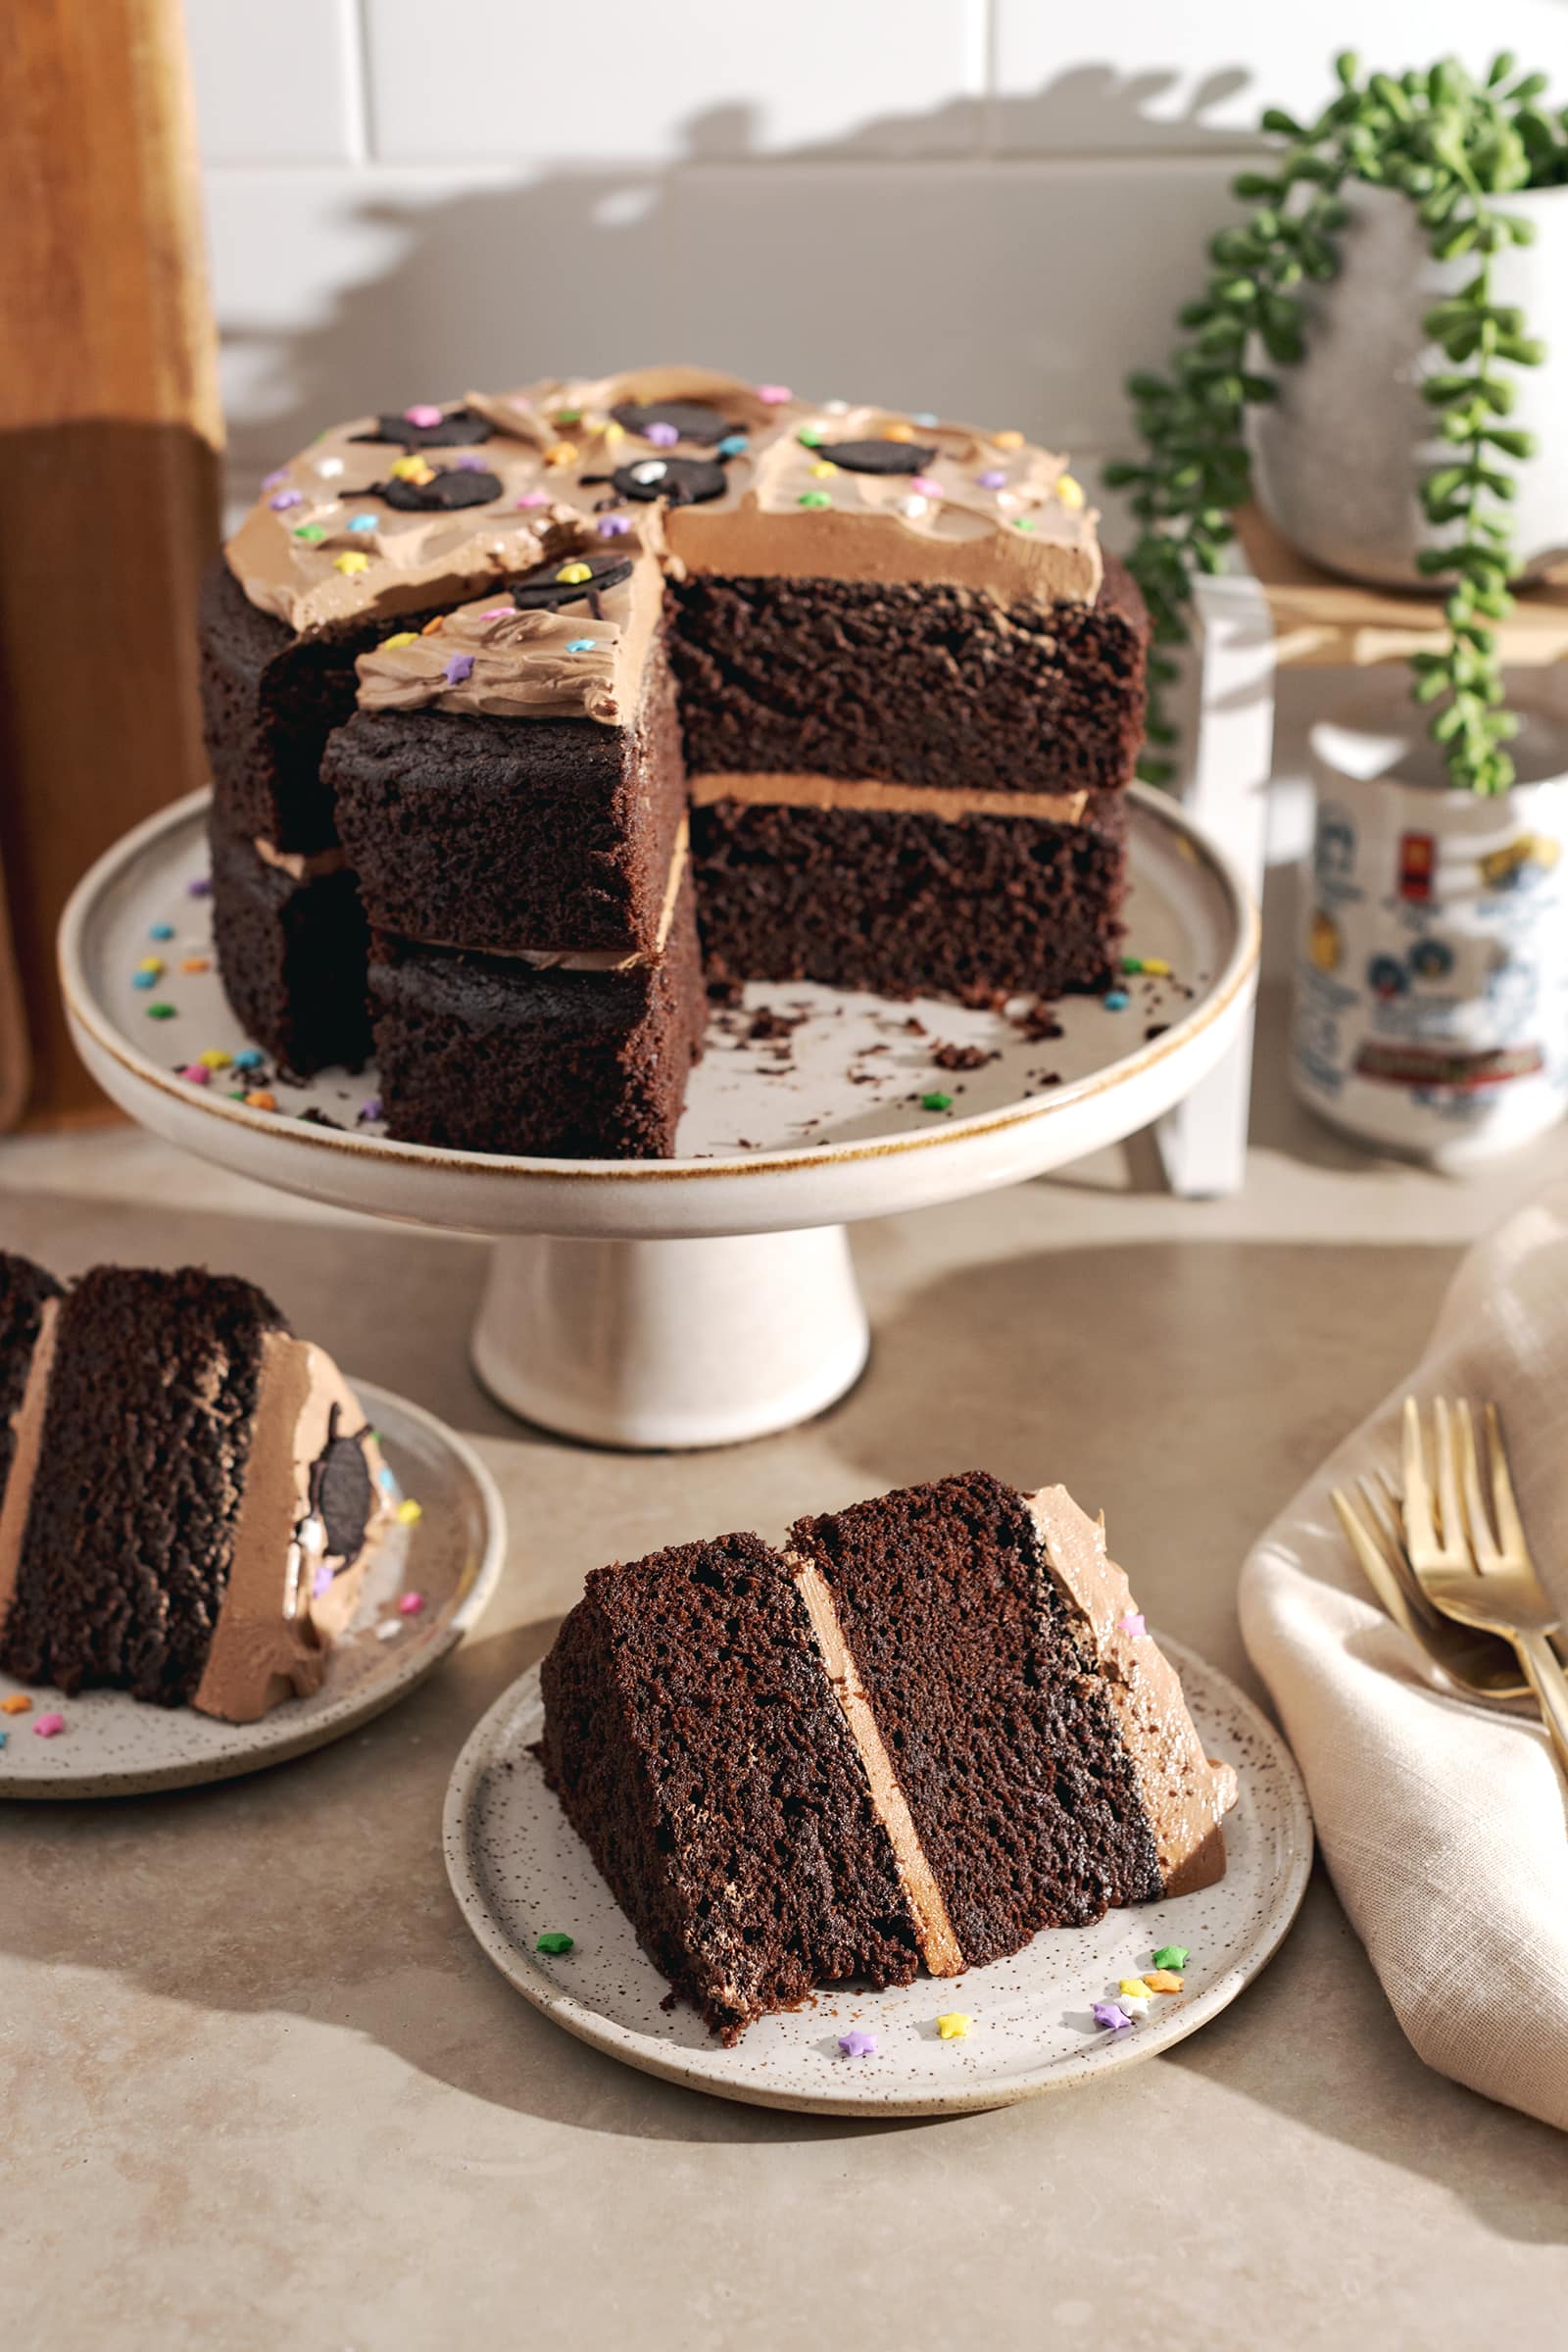
This soot sprite cake is inspired by the candy-loving soot sprites from Studio Ghibli's Spirited Away film. It's a simple, rich and delicious chocolate cake with a silky chocolate buttercream frosting. It's decorated with mini oreo "soot sprites" and rainbow star sprinkles.
Jump to:
As a big Studio Ghibli fan, I needed to make a cake inspired by my favourite films. Soot sprites (or Susuwatari) are endearing little critters that appear in Spirited Away and My Neighbour Totoro. They only appear briefly but these candy-loving dust bunnies stole the audience's heart.
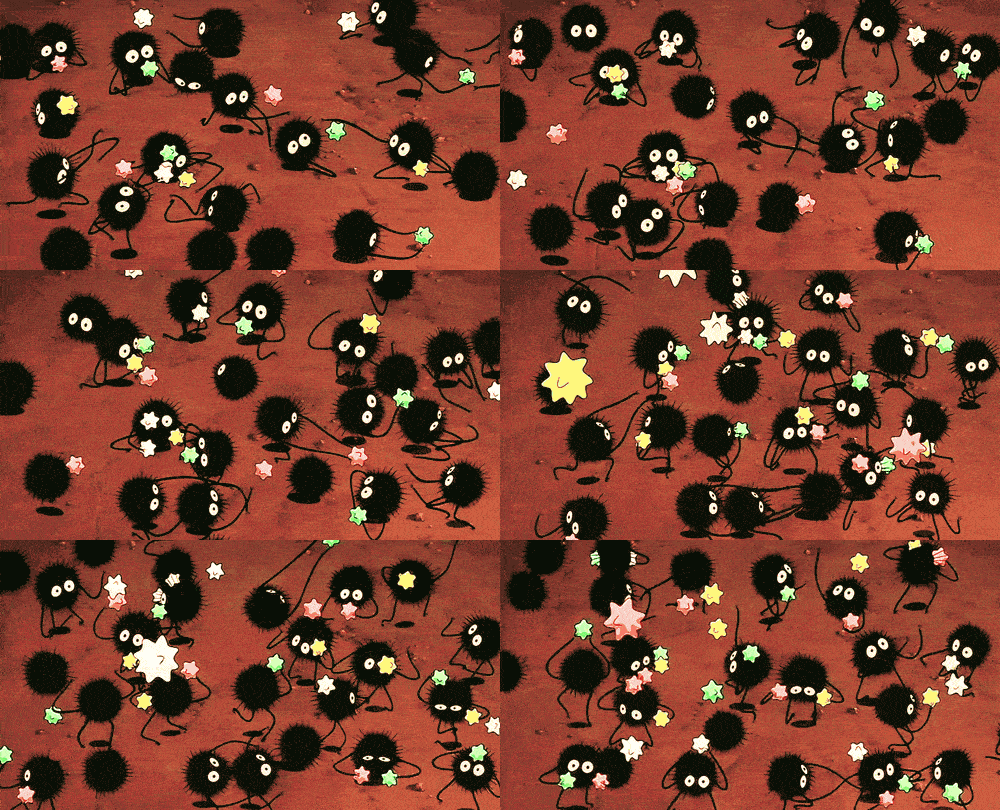
This soot sprite cake is a delicious chocolate cake decorated in soot sprites. The great thing is that even if you're not a Studio Ghibli fan or if you're just looking for a basic, no-fuss chocolate cake recipe, this cake is still perfect for you!
At the same time, you can also apply the same soot sprite decoration idea to any other cake or baked goods you make. Adorning brownies or cookies with these guys would be adorable.
Why you'll love this recipe
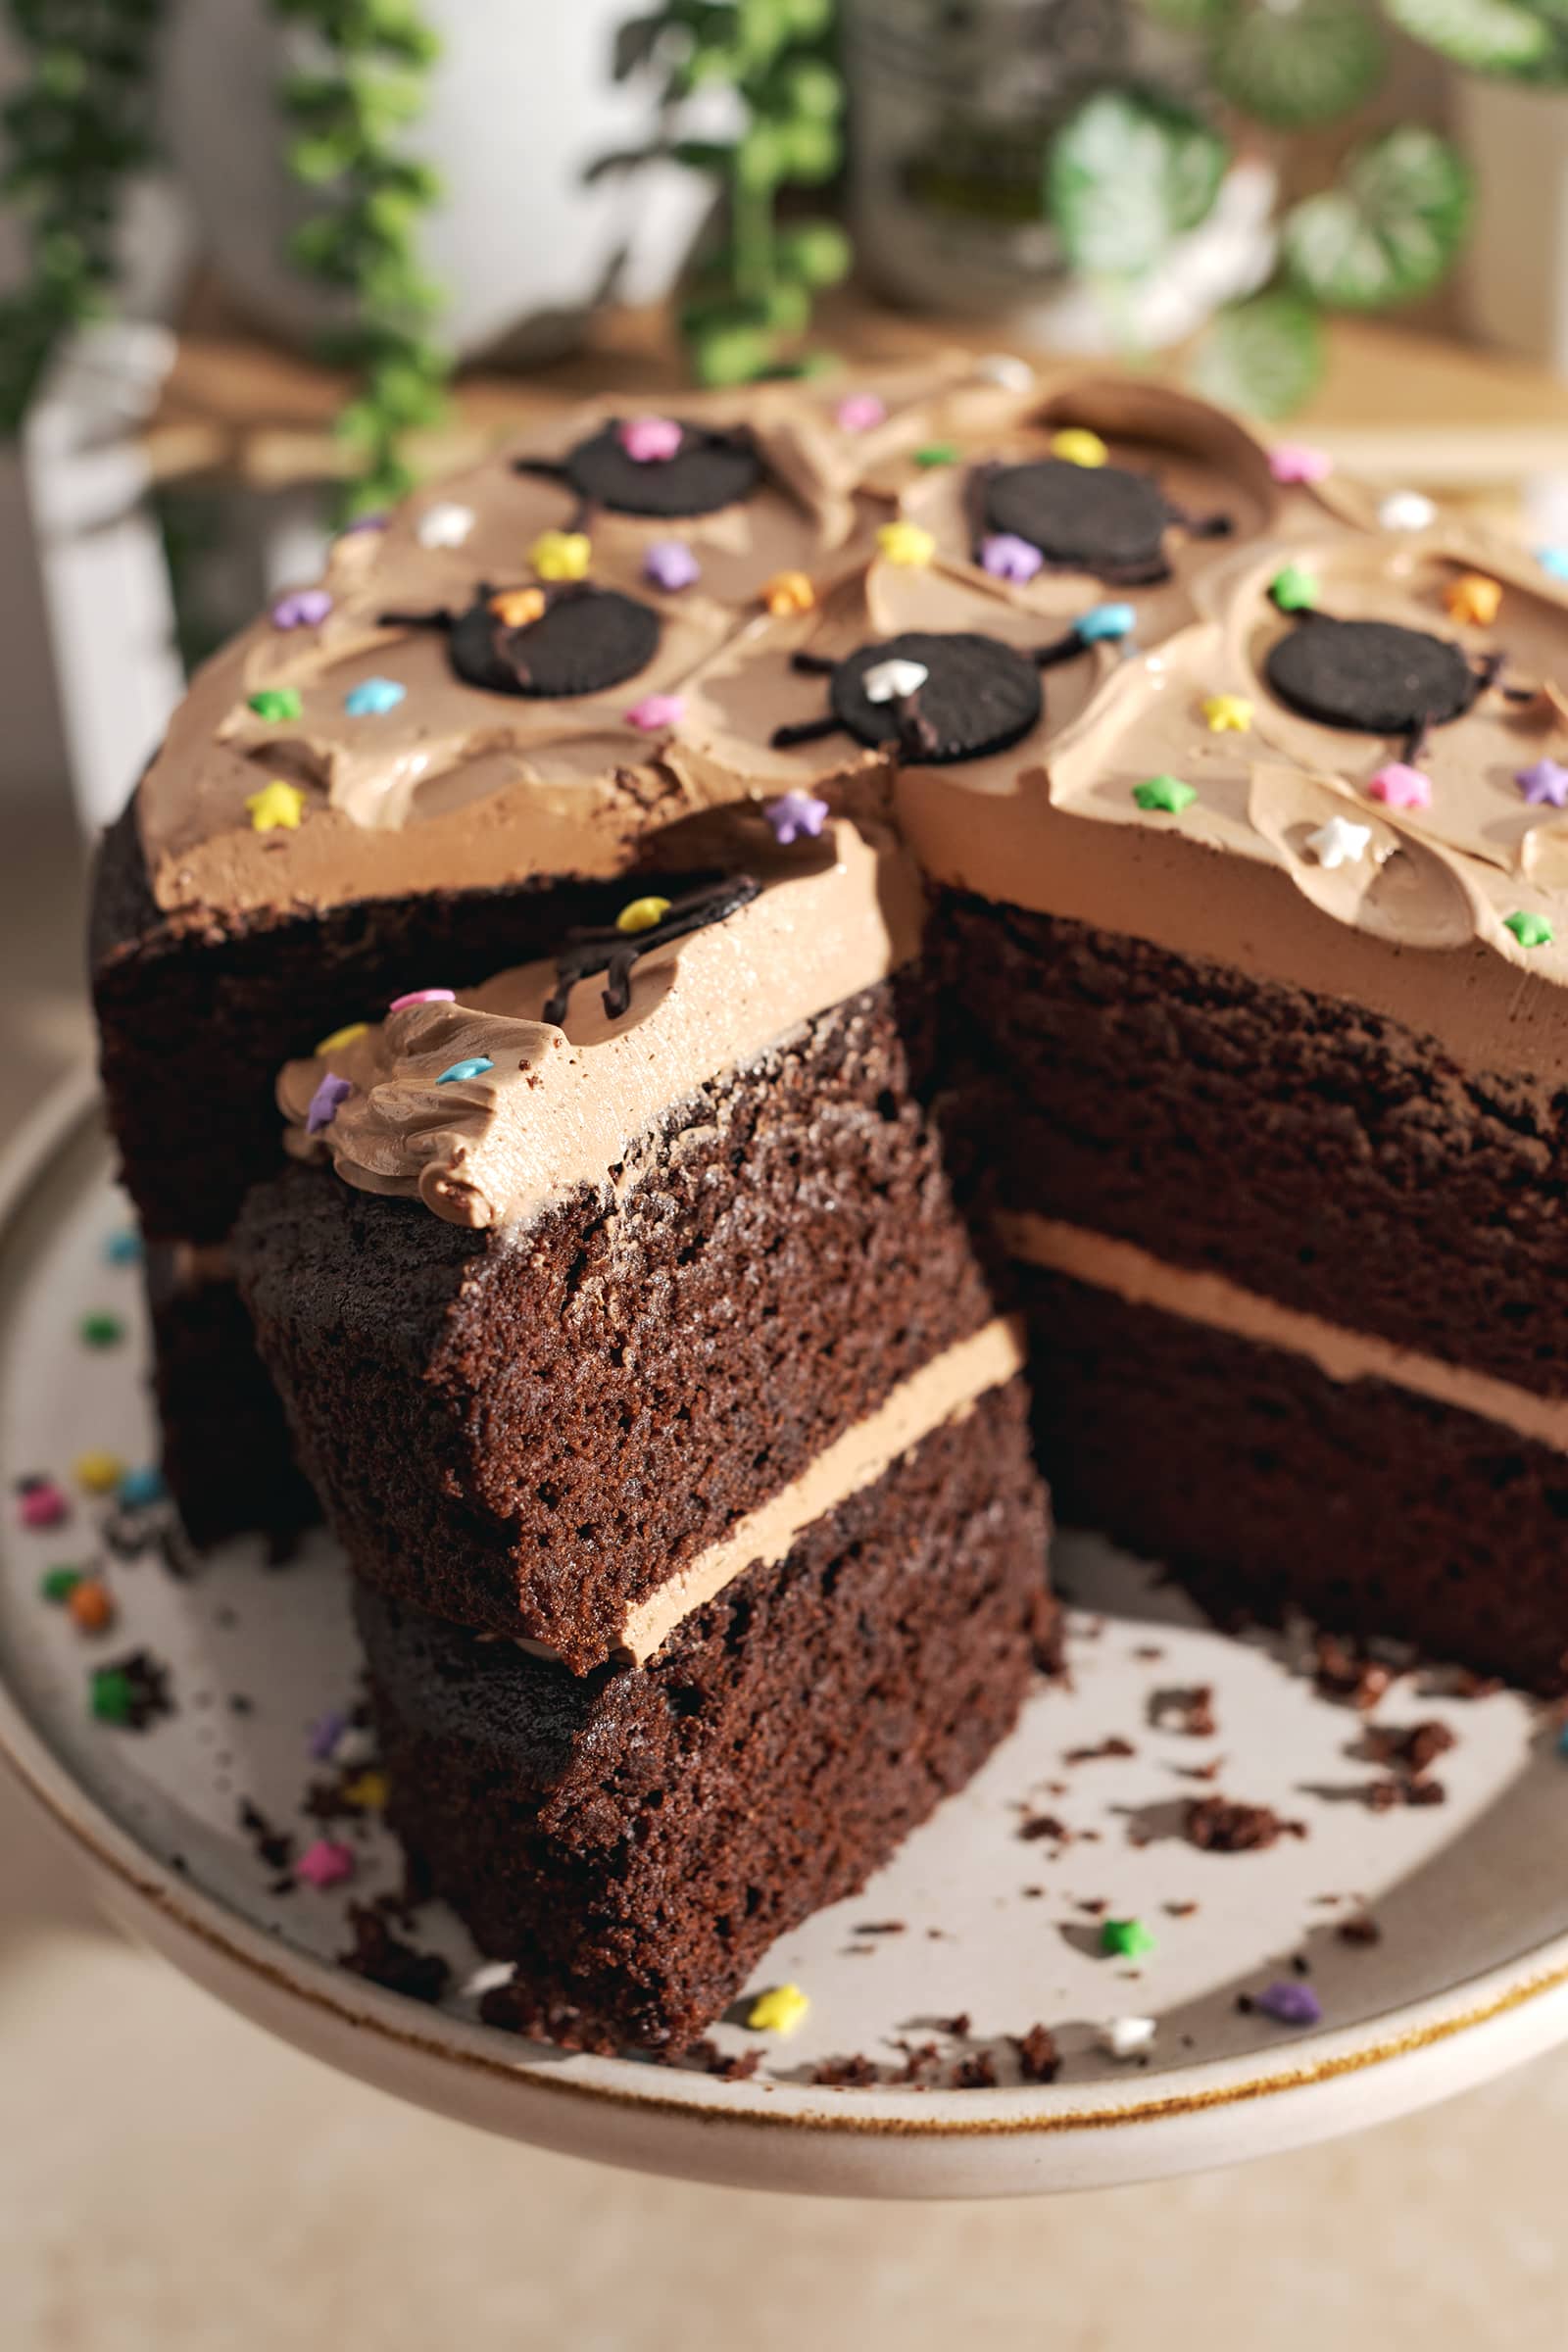
- The chocolate cake is soft, fluffy, rich, and decadent - everything you could want it to be!
- The chocolate buttercream frosting is silky smooth and easy to make. It's American buttercream but with my preferred butter-to-sugar ratio that makes it smooth but not cloyingly sweet.
- This cake is not too sweet thanks to the dark chocolate balancing out the sweetness.
- It's a cute soot sprite decoration idea that you can apply to any cake.
Tools
- Electric hand mixer - This is a kitchen and baking essential. If you bake often or want to get into baking, I highly recommend picking one up. It makes mixing cake batter very easy and it's absolutely essential for making buttercream frosting.
- 8" round cake pans - This recipe is scaled for a two-layer cake so you'll need two cake pans. I prefer light-coloured cake pans for an even bake.
- Offset spatula - Optional but helpful for frosting cakes.
- Piping bag - You'll need a small piping bag to pipe the tiny arms and legs details on the soot sprites. You can also use the corner of a ziploc bag if you don't have a piping bag.
Ingredients
- All-purpose flour
- Cocoa powder - Use natural cocoa powder, not dutch-processed cocoa powder. If you're not sure which one you have, you probably have natural cocoa powder as it's the most commonly found kind in grocery stores. Sift it if it's clumpy before using it.
- Baking powder
- Baking soda
- Salt
- Unsalted butter - You'll need melted butter for the cake layers and softened butter for the frosting.
- Oil - This makes cakes more soft and moist than just butter alone.
- Granulated sugar
- Brown sugar
- Eggs - Use large eggs. Take them out of the fridge ahead of time to let them come to room temperature before using them. This ensures it combines seamlessly into the batter without making the butter harden.
- Milk - Use any dairy or non-dairy milk you prefer. I always use a plant-based milk like oat milk or almond milk since that's what I have on hand. It should also be at room temperature before using it.
- Powdered sugar
- Dark chocolate - The warm melted chocolate will make the buttercream extra silky and smooth. You'll also use it to draw the arms and legs. I used a bittersweet 70% dark chocolate but you can use any kind you like.
- Vanilla extract
- Mini oreos - Mini oreos are the perfect size for these soot sprites. They can be found in snack packages, most likely next to the regular-sized oreos in the grocery store. You can halve them and use the side with no cream filling or use the entire oreo - up to you!
- Rainbow star sprinkles - Soot sprites love konpeito, a traditional Japanese hard candy, but star sprinkles are a perfect alternative for this cake. You can also add googly eye sprinkles if you'd like!

How to make a soot sprite cake
For the chocolate cake
Prep - Preheat oven to 350°F and line the bottom of two 8" cake pans with a round of parchment paper. Set aside.
Mix flour mixture - In a medium bowl, stir together flour, cocoa powder, baking powder, baking soda, and salt. Set aside.
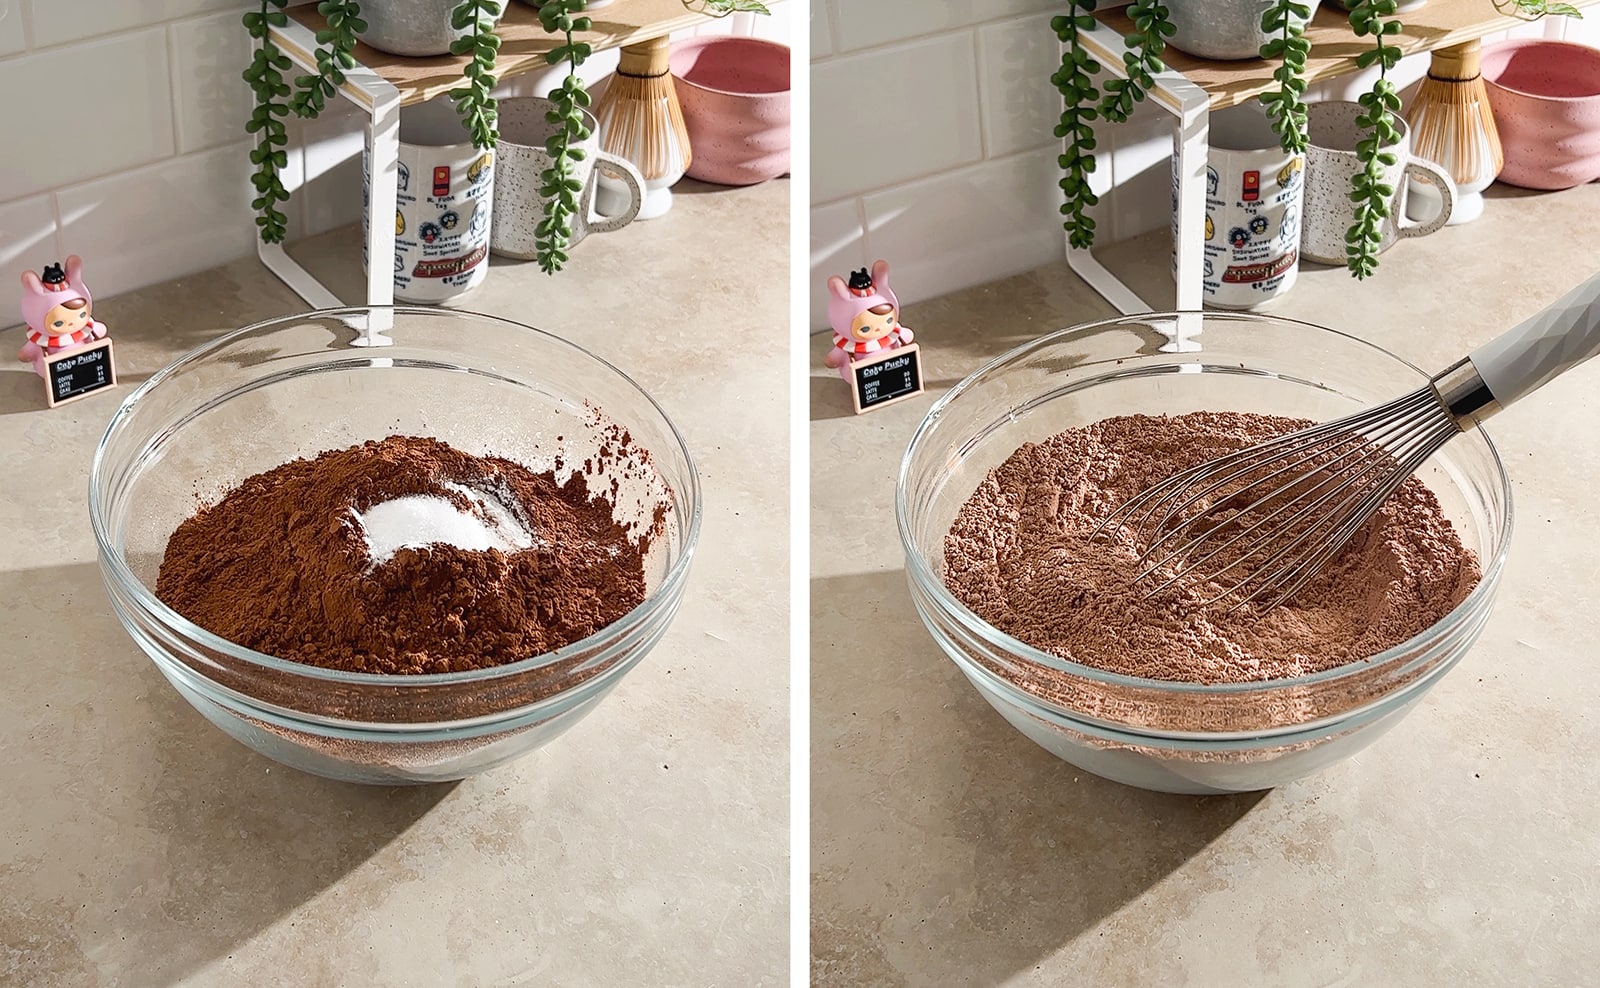
Mix wet mixture - In a large mixing bowl, whisk together melted butter, oil, granulated sugar, and brown sugar. Whisk in the eggs until combined.

Alternate adding flour mixture and milk - Add half of the flour mixture and whisk until almost combined. Add half of the milk and whisk again until barely incorporated. Repeat with the remaining flour mixture and milk and whisk until just combined. Don't overmix.

Bake - Divide the batter into your two lined cake pans until about ¾ full. Bake cakes for 40-45 minutes or until a toothpick inserted in the middle comes out almost clean with some crumbs.
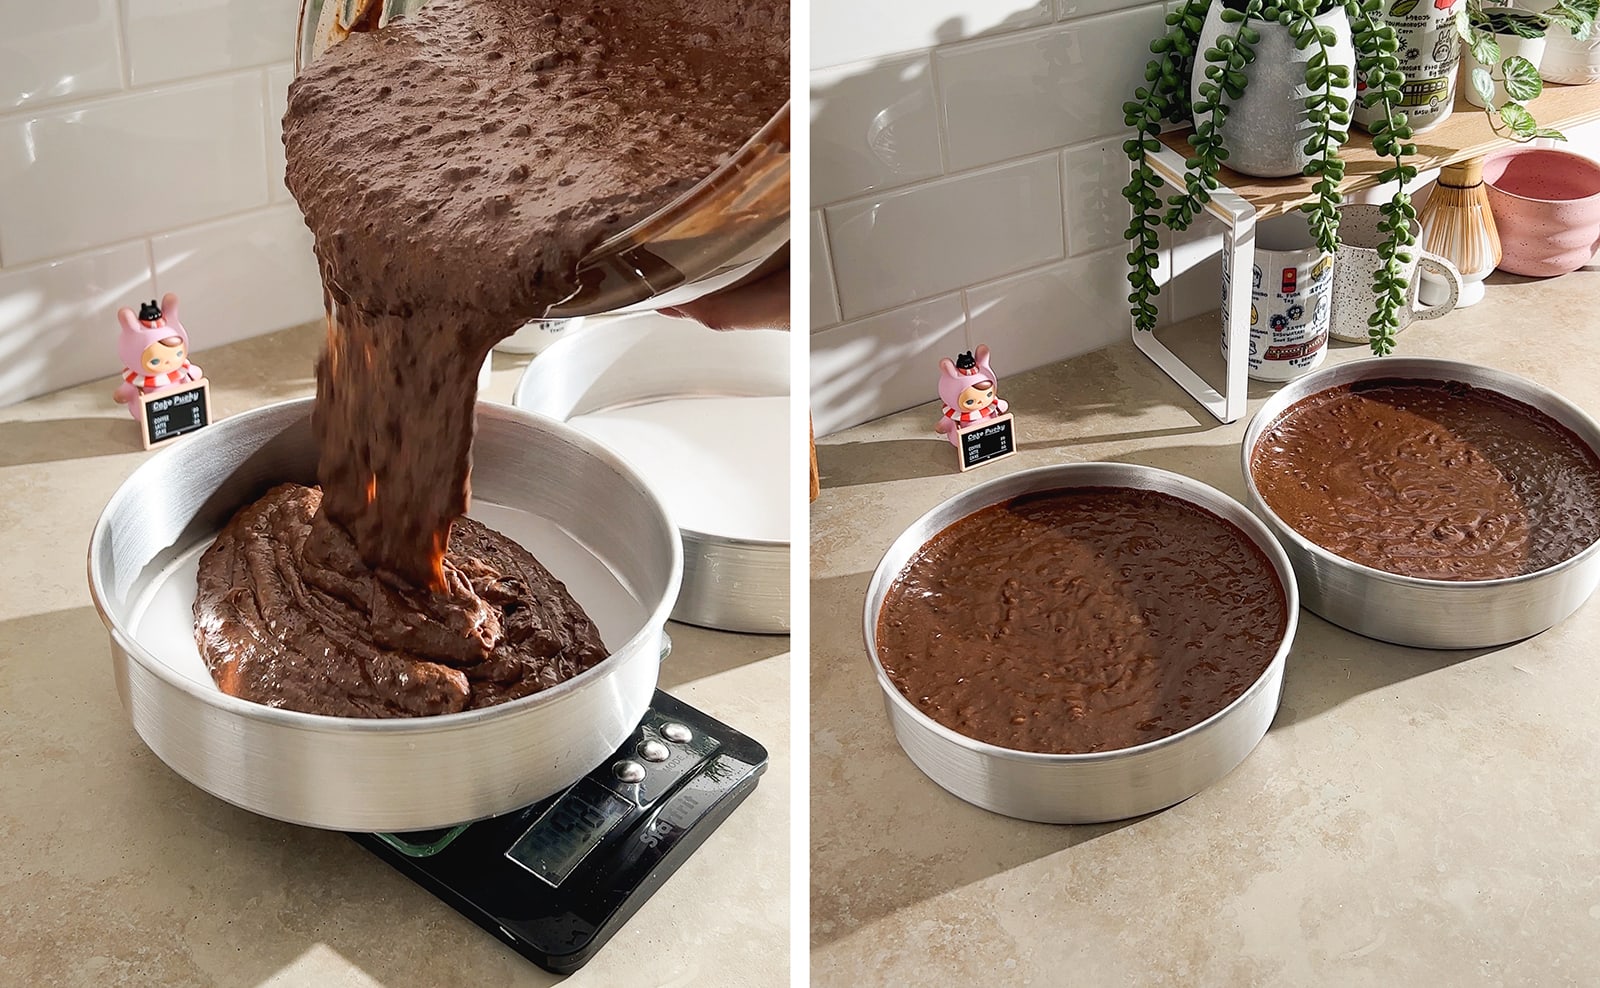
Cool - Let the cakes cool in the pans for about 30-60 minutes. Run an offset spatula around the edges of the cakes and invert the pans to release the cakes. Let cakes cool completely on a wire rack before frosting.

For the chocolate buttercream frosting
Cream butter and sugar - In a large mixing bowl, use an electric hand mixer to beat softened butter until very creamy and pale in colour, about 5 minutes. Add powdered sugar and beat again until fluffy, about 3 minutes.

Whip in melted chocolate - Pour in the melted chocolate and vanilla extract and beat again for another 5 minutes until silky and creamy.
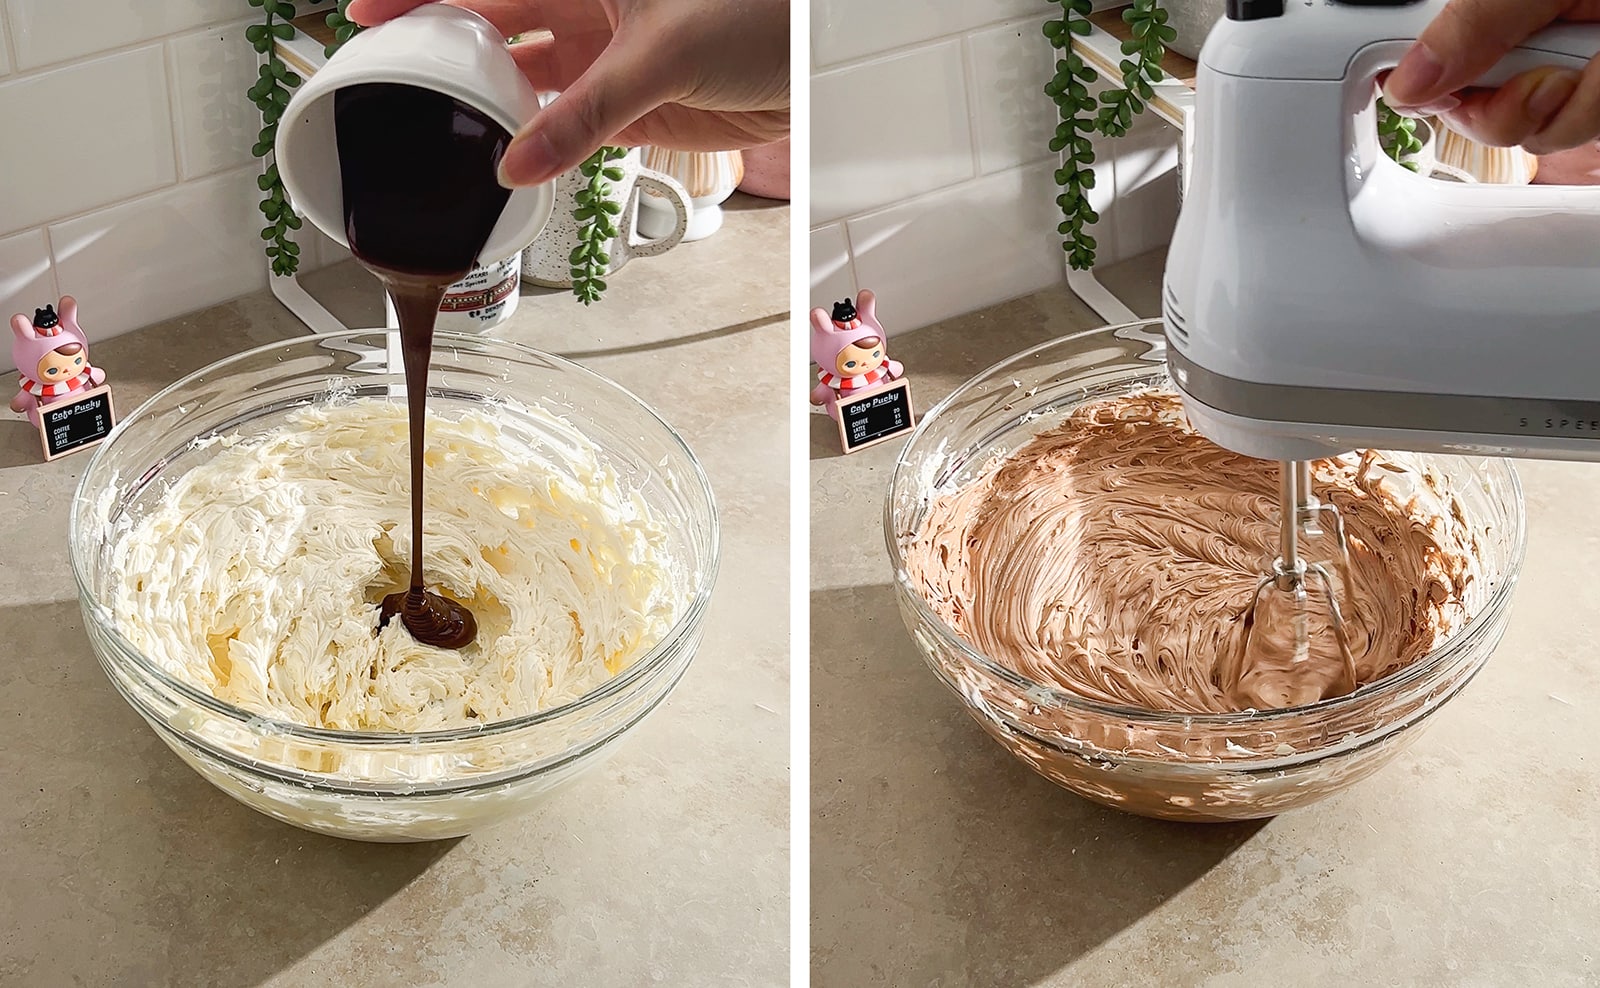
Assemble the cake
Level cake layers - Use a sharp serrated knife to level the cake layers if needed.
Frost cake - Place the first cake layer down on a cake stand or serving plate. Add a generous amount of frosting and use an offset spatula to smooth evenly, without going all the way to the edges. Place the second cake layer on top. Pile the rest of the frosting on top and smooth evenly. Use your offset spatula to make "swoops" in the frosting.
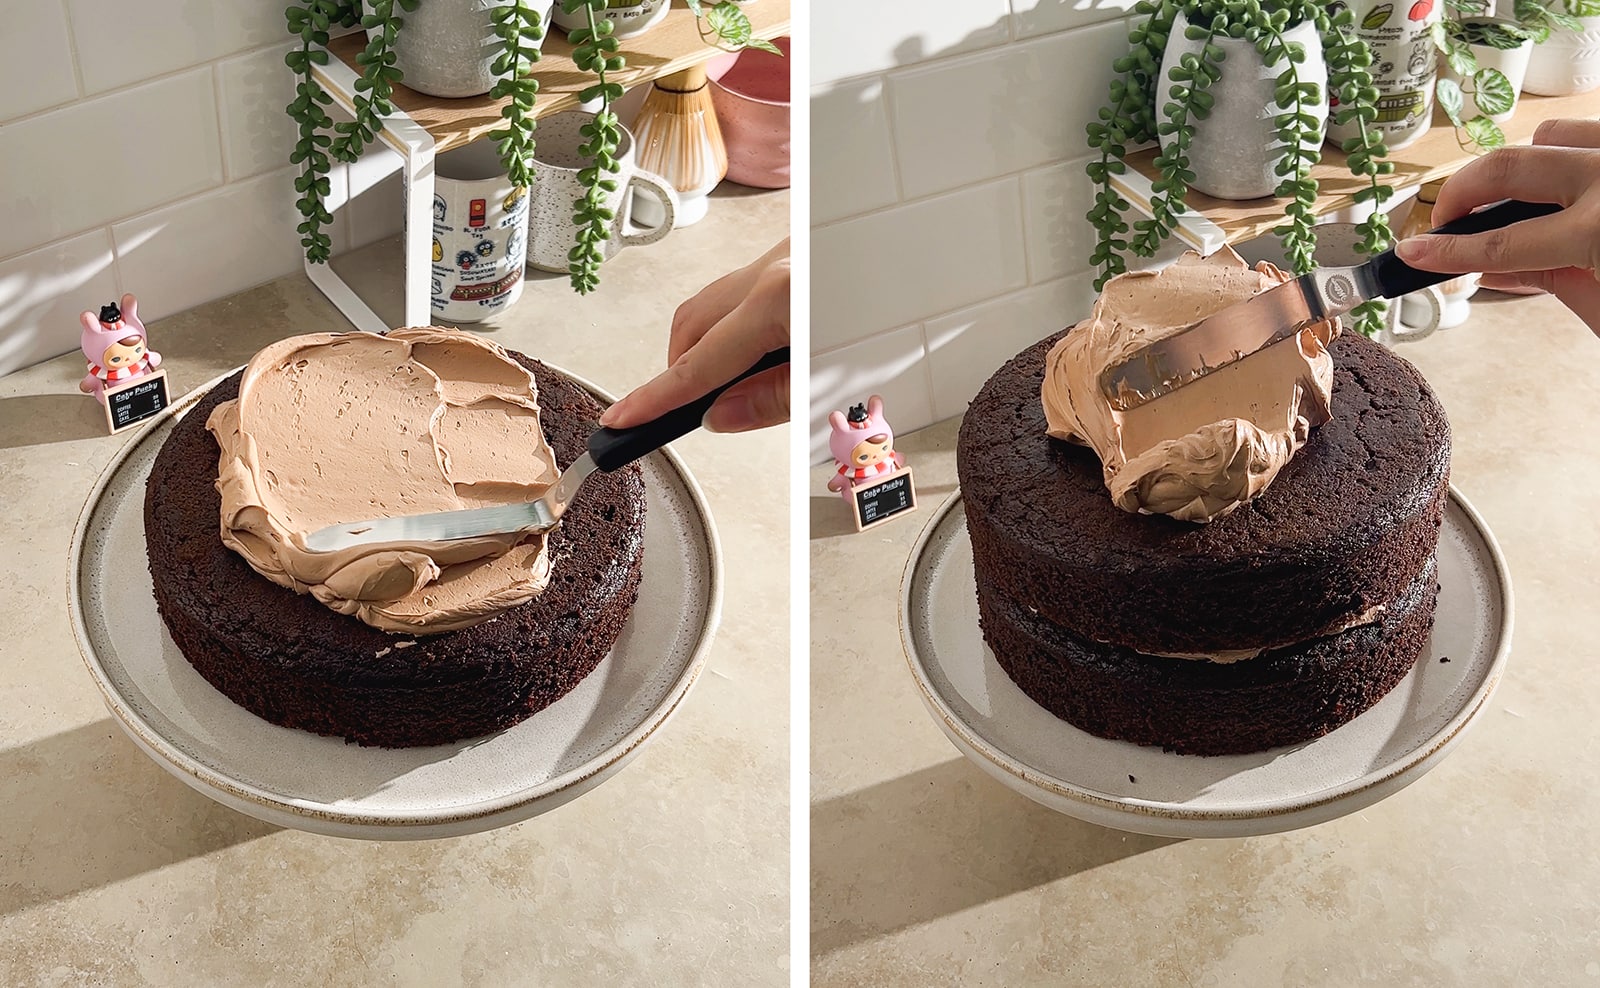
Decorate - Gently press mini oreos on top of the frosting. Transfer melted chocolate to a small piping bag and snip off the tip. Pipe long arms and legs on the oreos. Use tweezers to place down star sprinkles on the soot sprites' hands and more on the frosting.
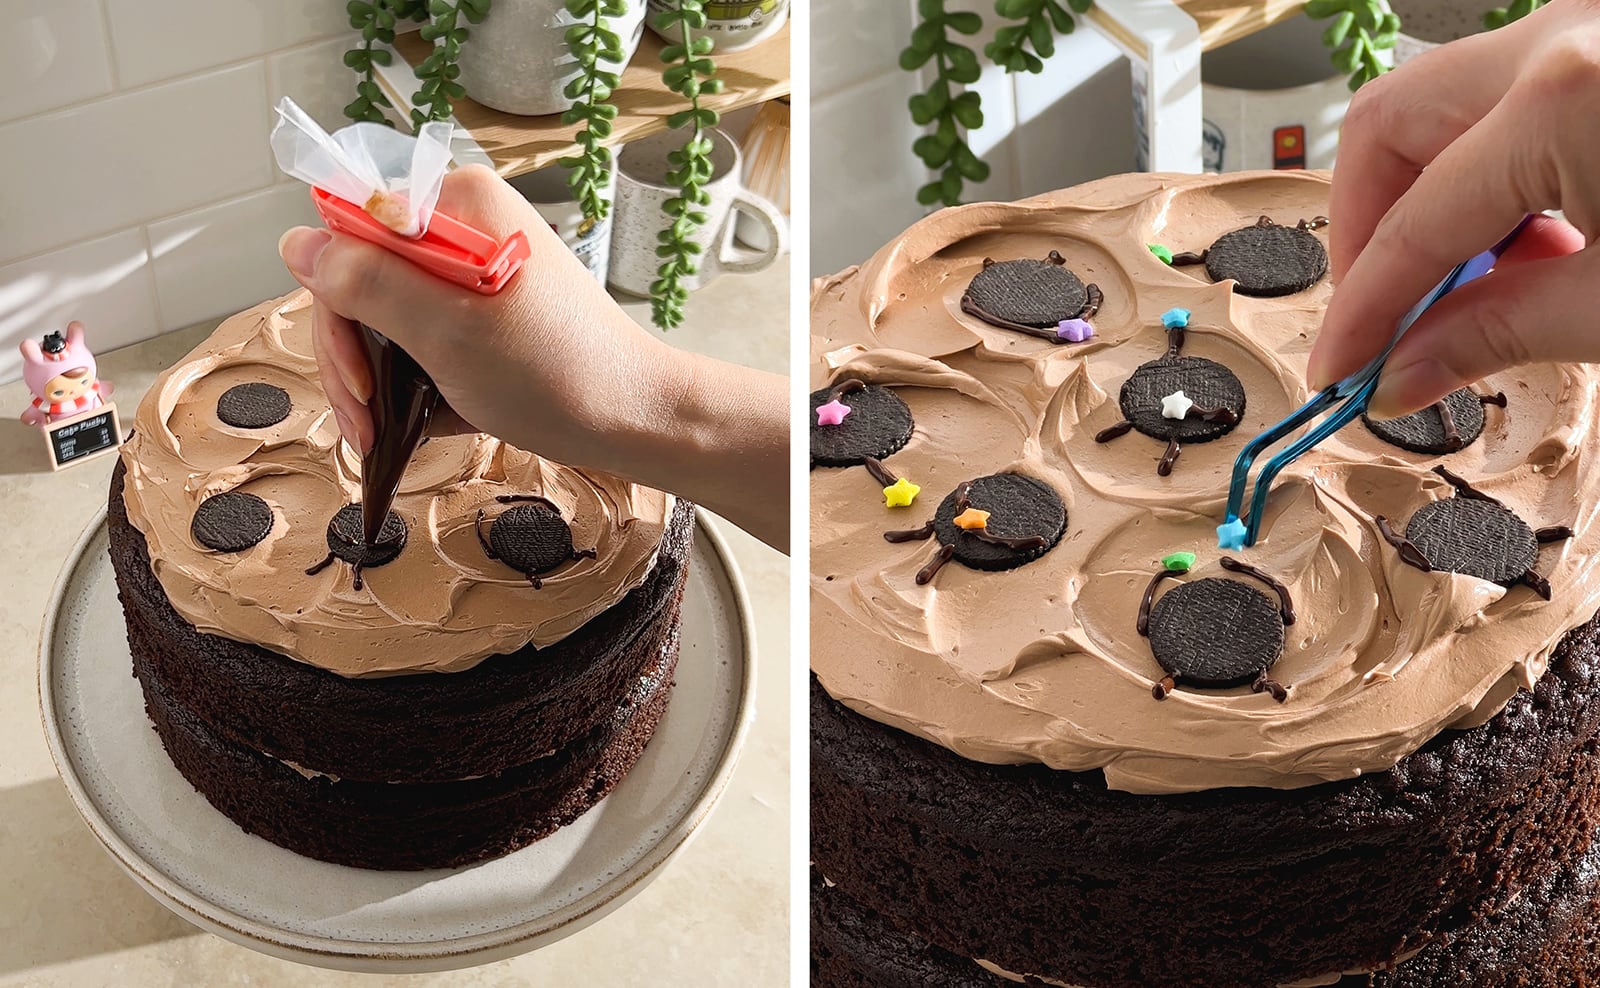
Storage
This soot sprite cake can be stored in an airtight container or wrapped in plastic wrap in the fridge for up to 5 days. Let it come back to room temperature before serving.
Freezing
Leftover cake slices can be frozen by placing them in an airtight container or wrapping them well in plastic wrap and/or aluminum foil. Freeze for up to 1 month.
Thaw overnight in the fridge or at room temperature for several hours. Let the cake come back to room temperature before serving.
Tips for success
- Use room temperature ingredients. Whenever indicated, you should really use room temperature ingredients. They will combine seamlessly together and make a better batter overall. Any time you are creaming butter and sugar together like for buttercream, your butter really needs to be at room temperature and softened otherwise it will be very difficult if not impossible to work with.
- Don't overmix cake batter. Mix just until you no longer see any floury patches in your batter. Overmixing encourages gluten formation and makes baked goods tough and dense.
- Use cake strips for flat cakes. These cakes actually already bake pretty flat on their own. If your cakes are prone to doming (due to differences in oven temperature, cake pans, etc), wrap cake strips soaked in water around your cake pans to help them bake more evenly.
- Beat buttercream for a long time. This is key to a creamy and smooth buttercream (especially with American buttercream). Beat the butter for 5-10 minutes before even adding anything to it. Unlike cake batter, you can't really overmix buttercream so keep going!
- Let the cake come to room temperature before serving. This cake should be stored in the fridge but you should always let the cake and cake slices come to room temperature before eating. It will soften and become the intended texture when it's at room temperature.

Frequently asked questions
To make a 3-layer 6" cake, use the recipe as is. To make a 2-layer 6" cake, halve the recipe. The exact conversion is about 0.7 but halving it eliminates any weird decimals.
Yes, you can make the cake layer 1-2 days ahead of time and store them in an airtight container or wrap them well in the fridge to prevent them from drying out. A finished cake can be made in advance and will be good in the fridge for 1-2 days before serving as long as it's in an airtight cake container.
More cake recipes to try
- Chocolate Cake with Peanut Butter Frosting
- Chocolate Orange Cake
- Matcha Strawberry Cake
- Strawberry Chiffon Cake
- Earl Grey Chiffon Cake
Recipe
Soot Sprite Cake
Equipment
Ingredients
Chocolate Cake
- 340 g all-purpose flour
- 130 g cocoa powder, sifted if clumpy
- 1 ½ teaspoons baking powder
- 1 teaspoon baking soda
- 1 teaspoon salt
- 200 g unsalted butter, melted
- 170 g light-tasting oil
- 170 g granulated sugar
- 170 g brown sugar
- 3 large eggs, room temperature
- 590 g milk, room temperature
Chocolate Buttercream Frosting
- 230 g unsalted butter, softened to room temperature
- 100 g powdered sugar
- 50 g dark chocolate, melted
- 1 teaspoon vanilla extract
Topping
- 8 mini oreos, halved (use the side with no filling)
- 25 g dark chocolate, melted
- 1 tablespoon rainbow star sprinkles
Instructions
Chocolate Cake
- Prep: Preheat oven to 350°F and line the bottom of two 8" cake pans with a round of parchment paper. Set aside.
- Mix flour mixture: In a medium bowl, stir together flour, cocoa powder, baking powder, baking soda, and salt. Set aside.
- Mix wet mixture: In a large mixing bowl, whisk together melted butter, oil, granulated sugar, and brown sugar. Whisk in the eggs until combined.
- Alternate adding flour mixture and milk: Add half of the flour mixture and whisk until almost combined. Add half of the milk and whisk again until barely incorporated. Repeat with the remaining flour mixture and milk and whisk until just combined. Don't overmix.
- Bake: Divide the batter into your two lined cake pans until about ¾ full. Bake cakes for 40-45 minutes or until a toothpick inserted in the middle comes out almost clean with some crumbs.
- Cool: Let the cakes cool in the pans for about 30-60 minutes. Run an offset spatula around the edges of the cakes and invert the pans to release the cakes. Let cakes cool completely on a wire rack before frosting.
Chocolate Buttercream Frosting
- Cream butter and sugar: In a large mixing bowl, use an electric hand mixer to beat softened butter until very creamy and pale in colour, about 5 minutes. Add powdered sugar and beat again until fluffy, about 3 minutes.
- Whip in melted chocolate: Pour in the melted chocolate and vanilla extract and beat again for another 5 minutes until silky and creamy.
Assemble Cake
- Level cake layers: Use a sharp serrated knife to level the cake layers if needed.
- Frost cake: Place the first cake layer down on a cake stand or serving plate. Add a generous amount of frosting and use an offset spatula to smooth evenly, without going all the way to the edges. Place the second cake layer on top. Pile the rest of the frosting on top and smooth evenly. Use your offset spatula to make "swoops" in the frosting.
- Decorate: Gently press mini oreos on top of the frosting. Transfer melted chocolate to a small piping bag and snip off the tip. Pipe long arms and legs on the oreos. Use tweezers to place down star sprinkles on the soot sprites' hands and more on the frosting.

Leave a comment or review