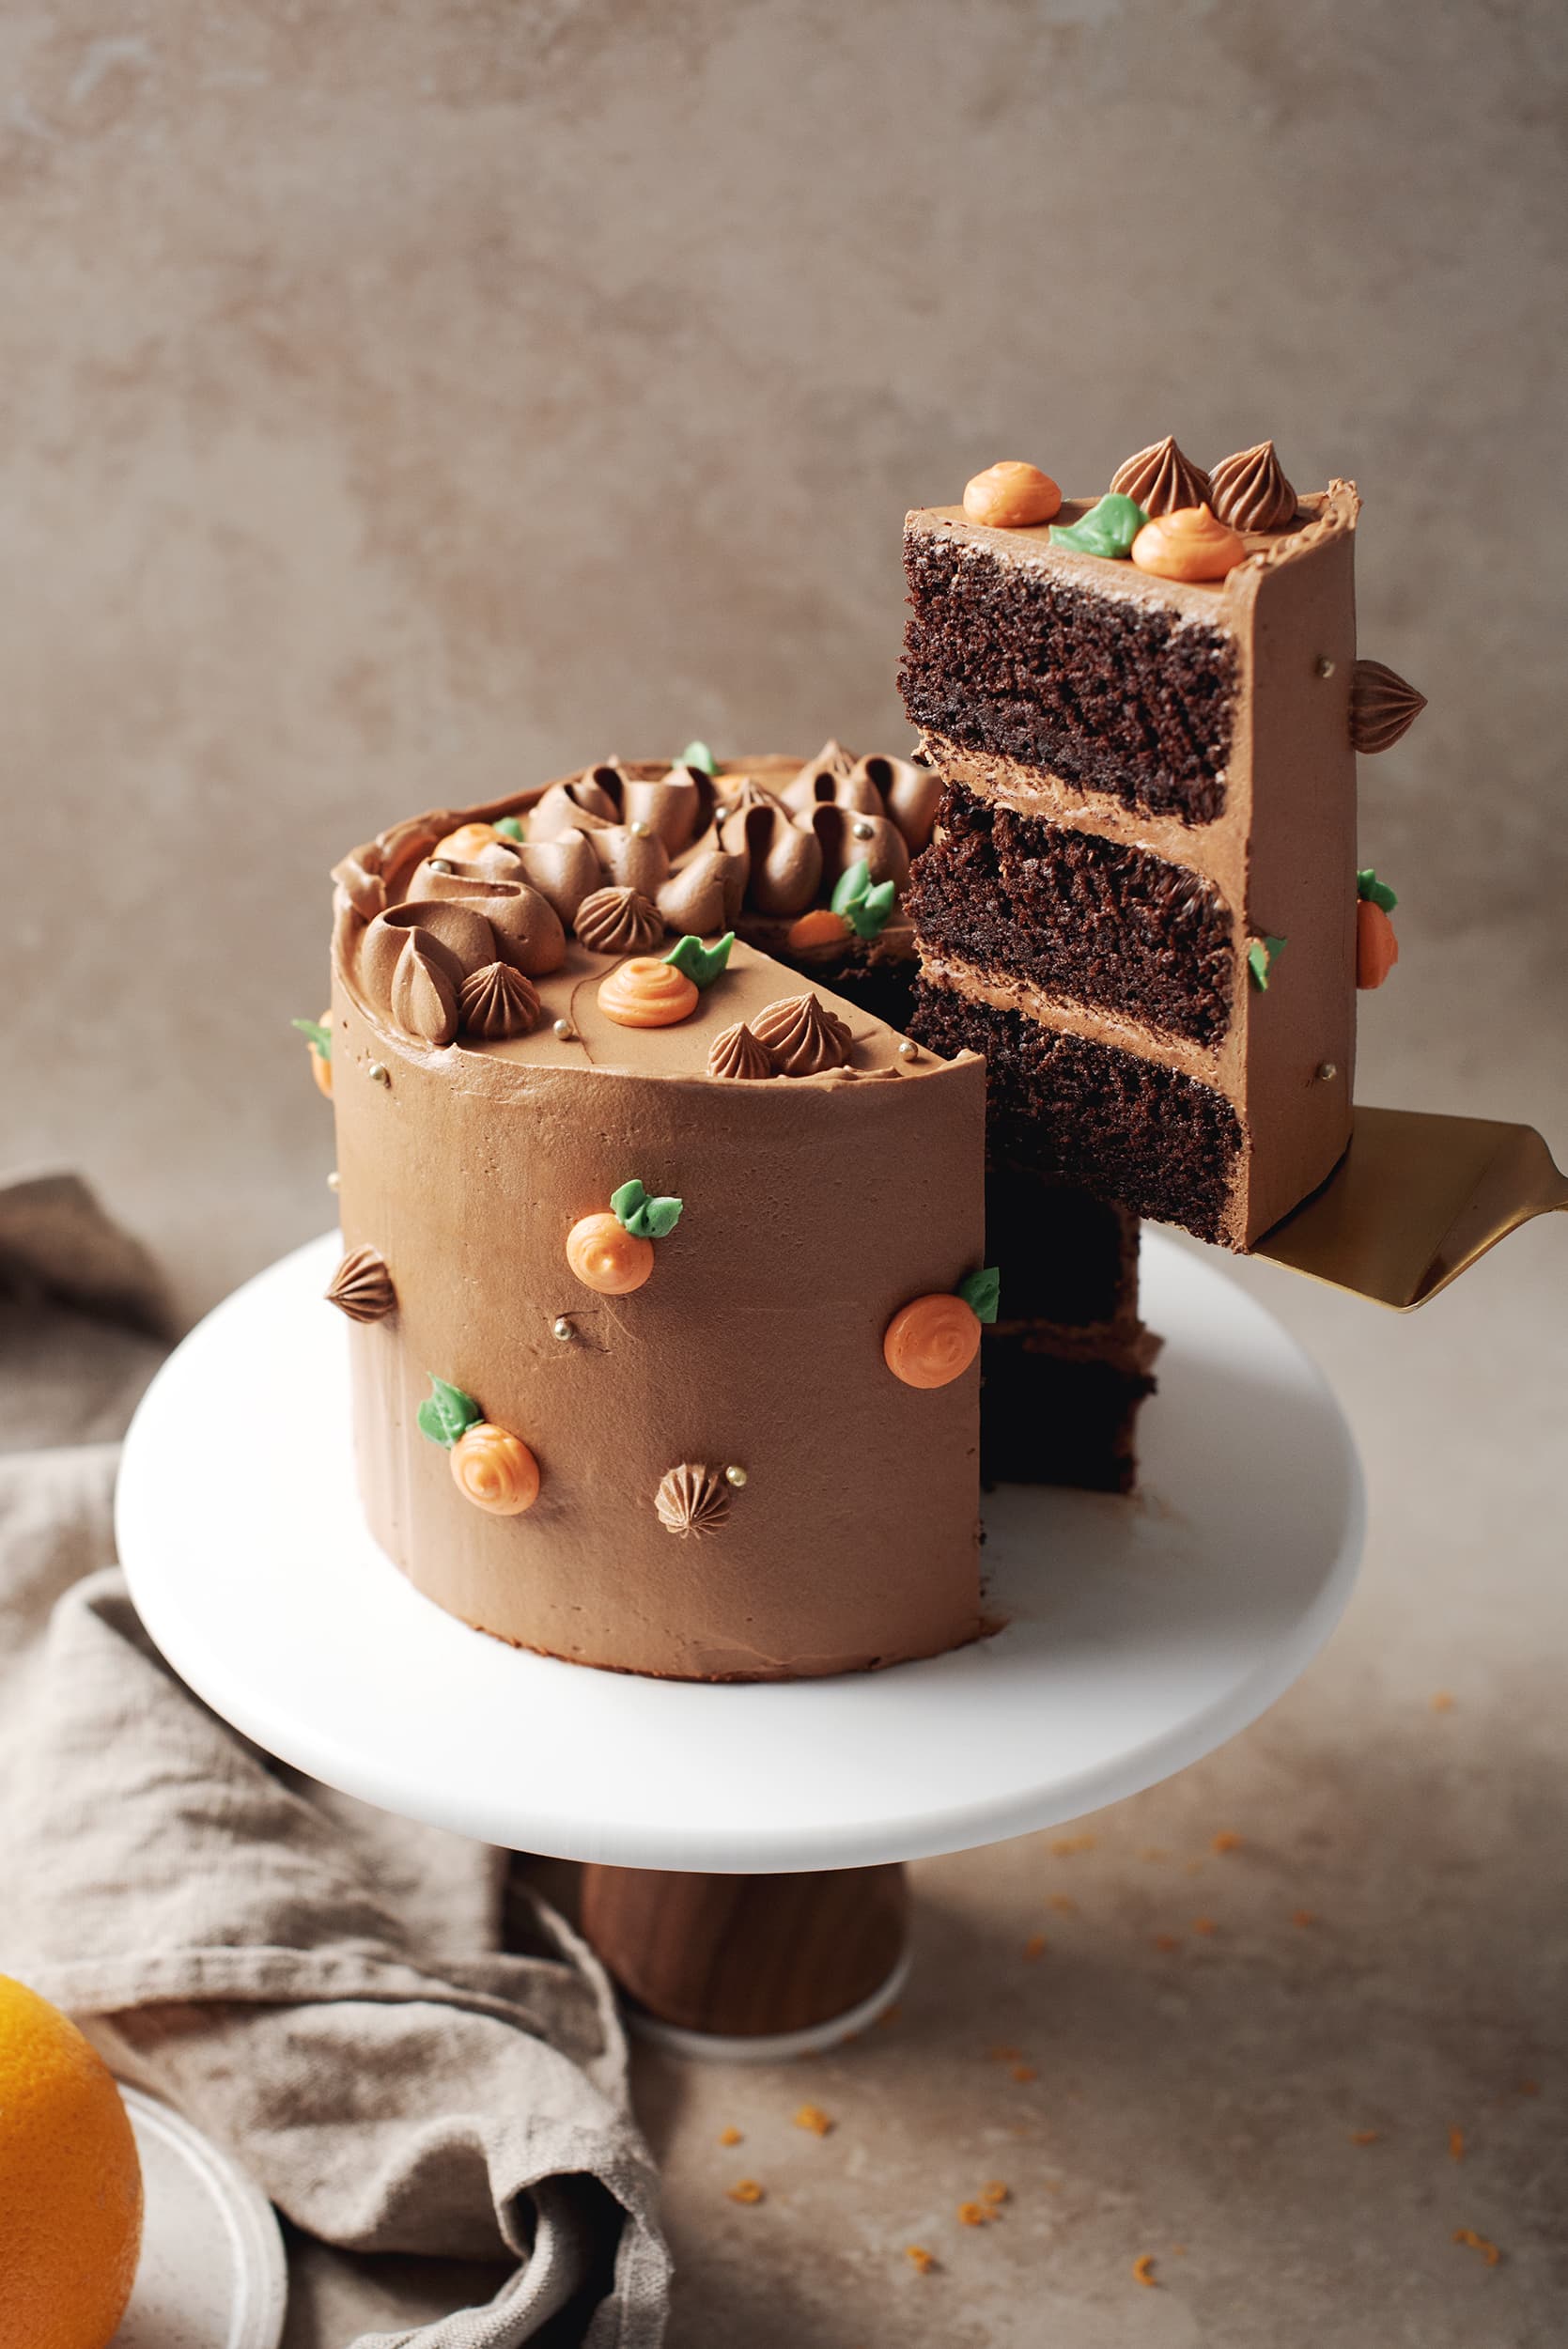
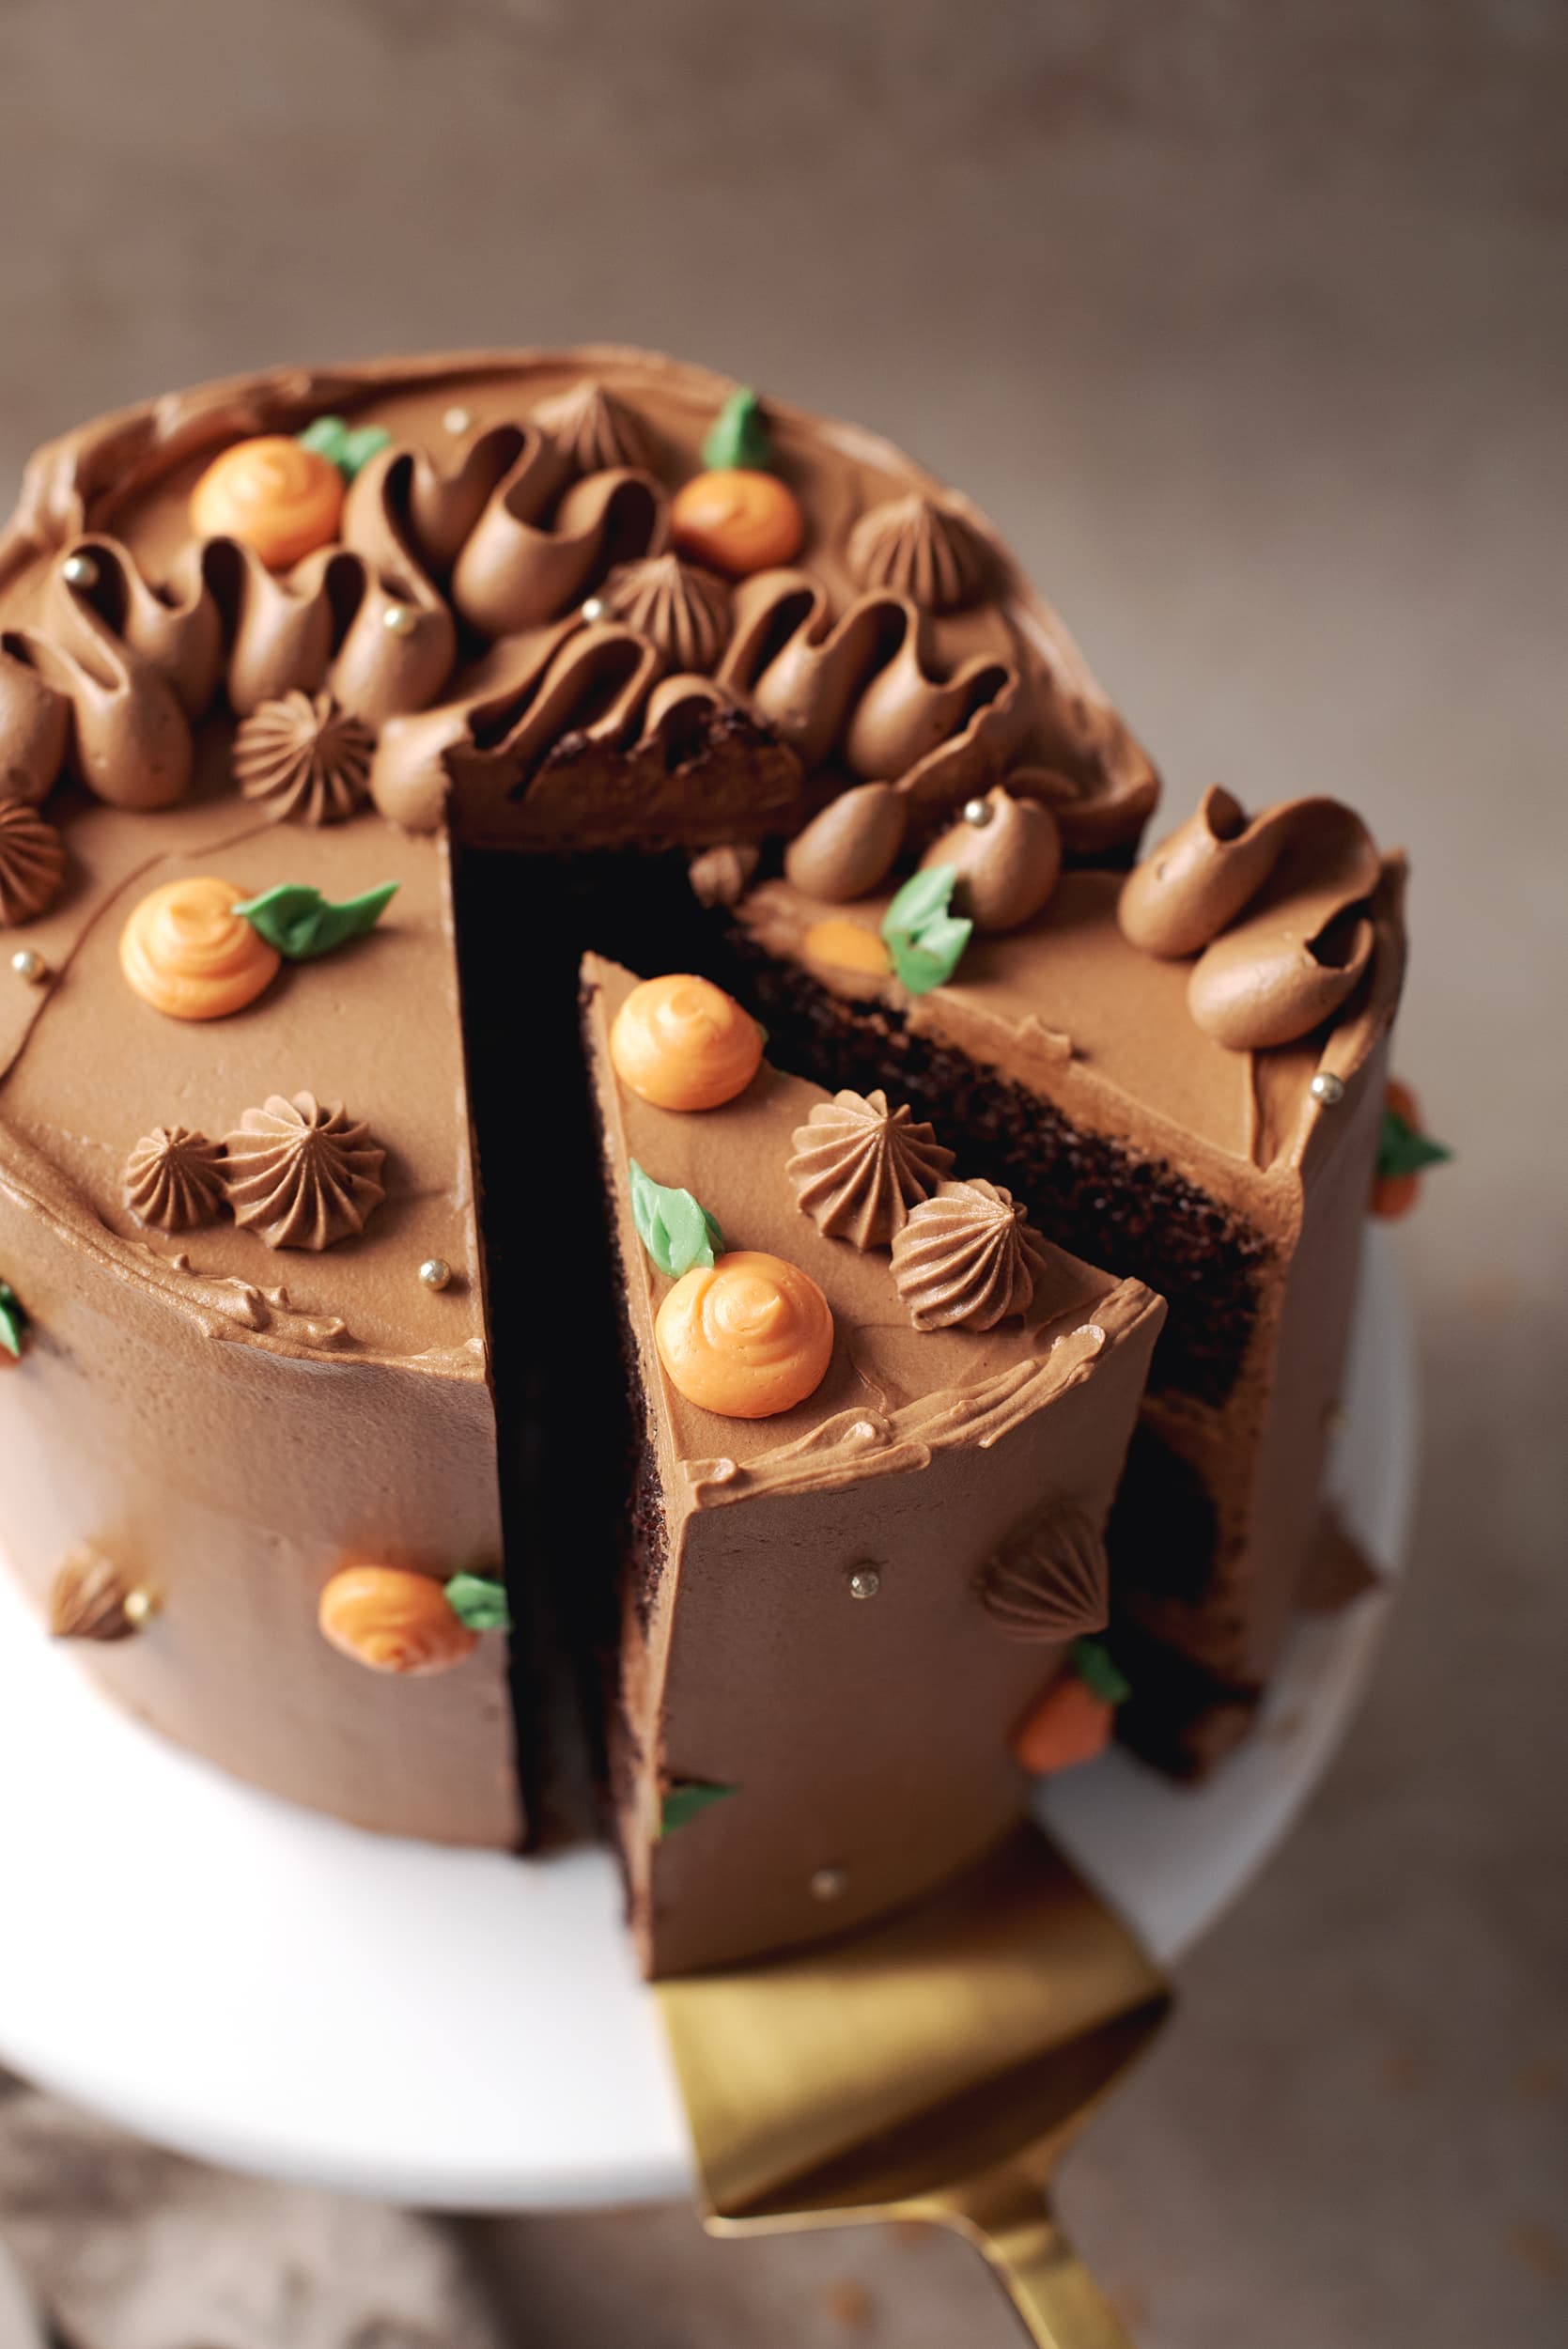
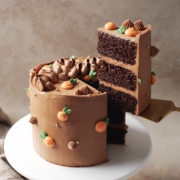
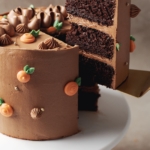
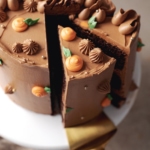
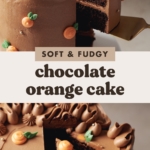
This chocolate orange cake has three layers of fudgy orange-infused chocolate cake that are soft and moist. The whole cake is covered in a silky and creamy dark chocolate buttercream frosting. The citrus is so fragrant and balances out the chocolate.
Jump to:
Chocolate and orange is one of my favourite flavour combinations of all time! If you love chocolate, this is just a great basic chocolate cake but with a hint of citrus that cuts through the richness of the chocolate and balances the sweetness. It’s just like eating a Terry’s chocolate orange - another favourite chocolate of mine when I was little.
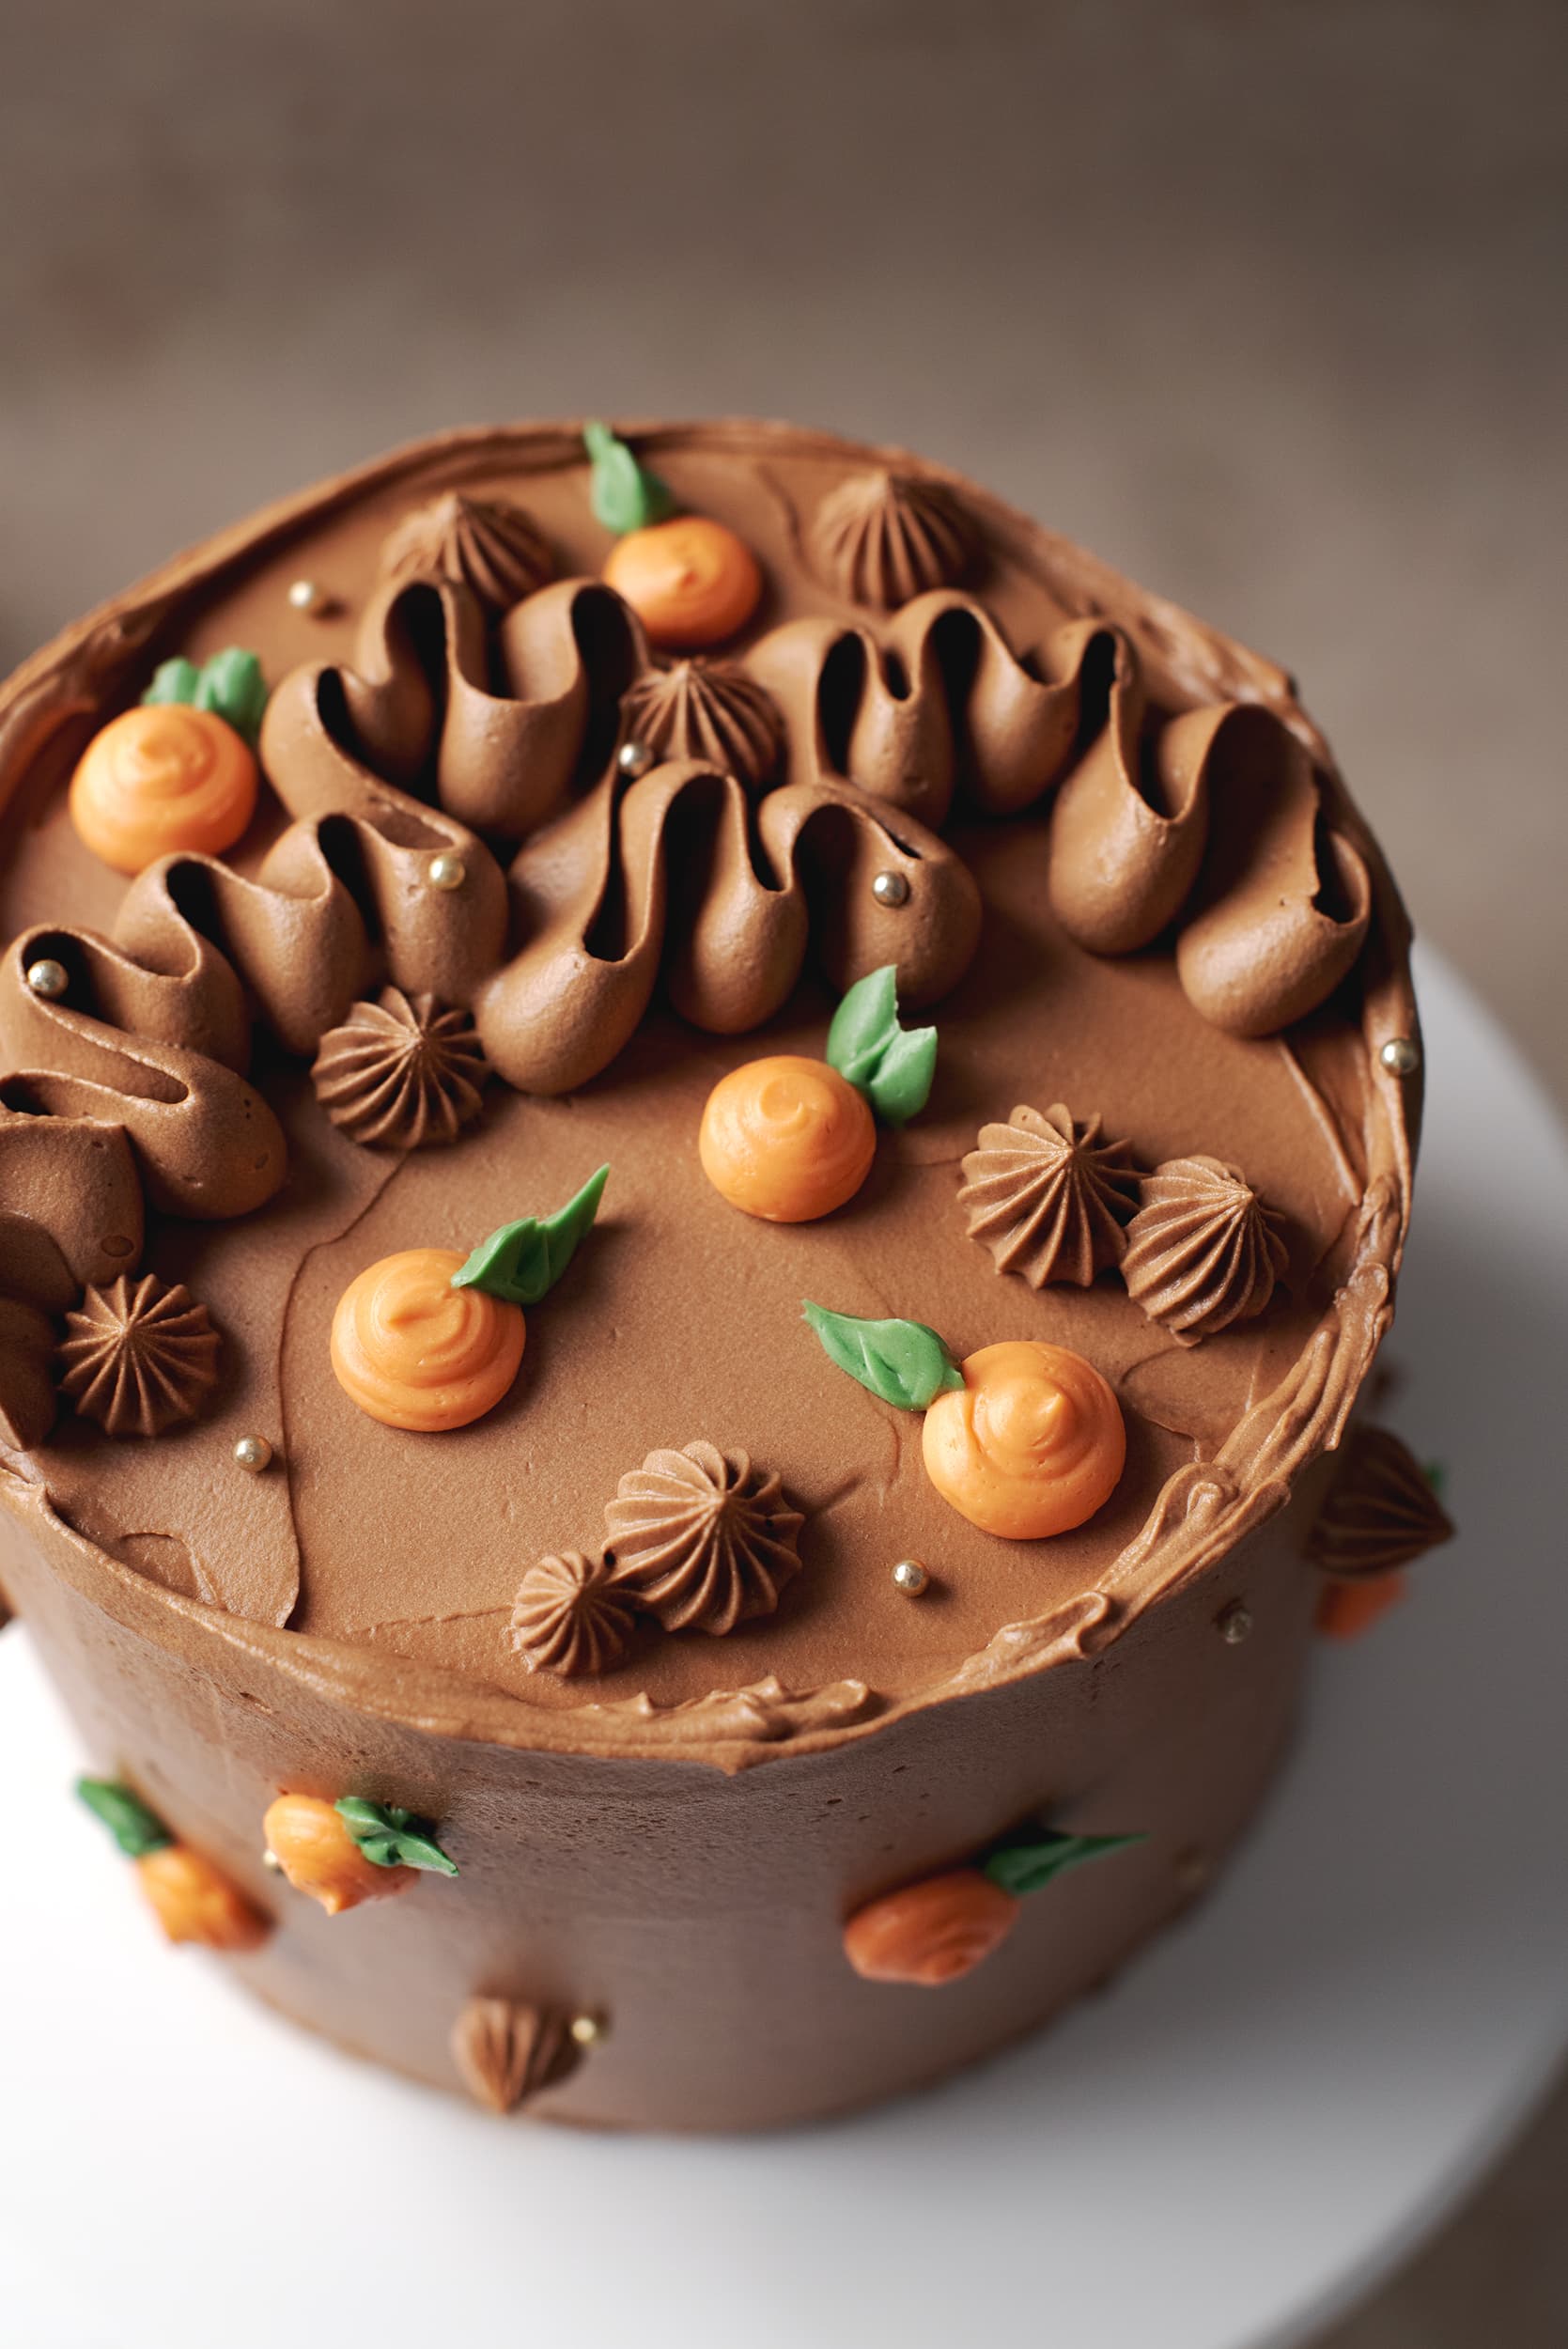
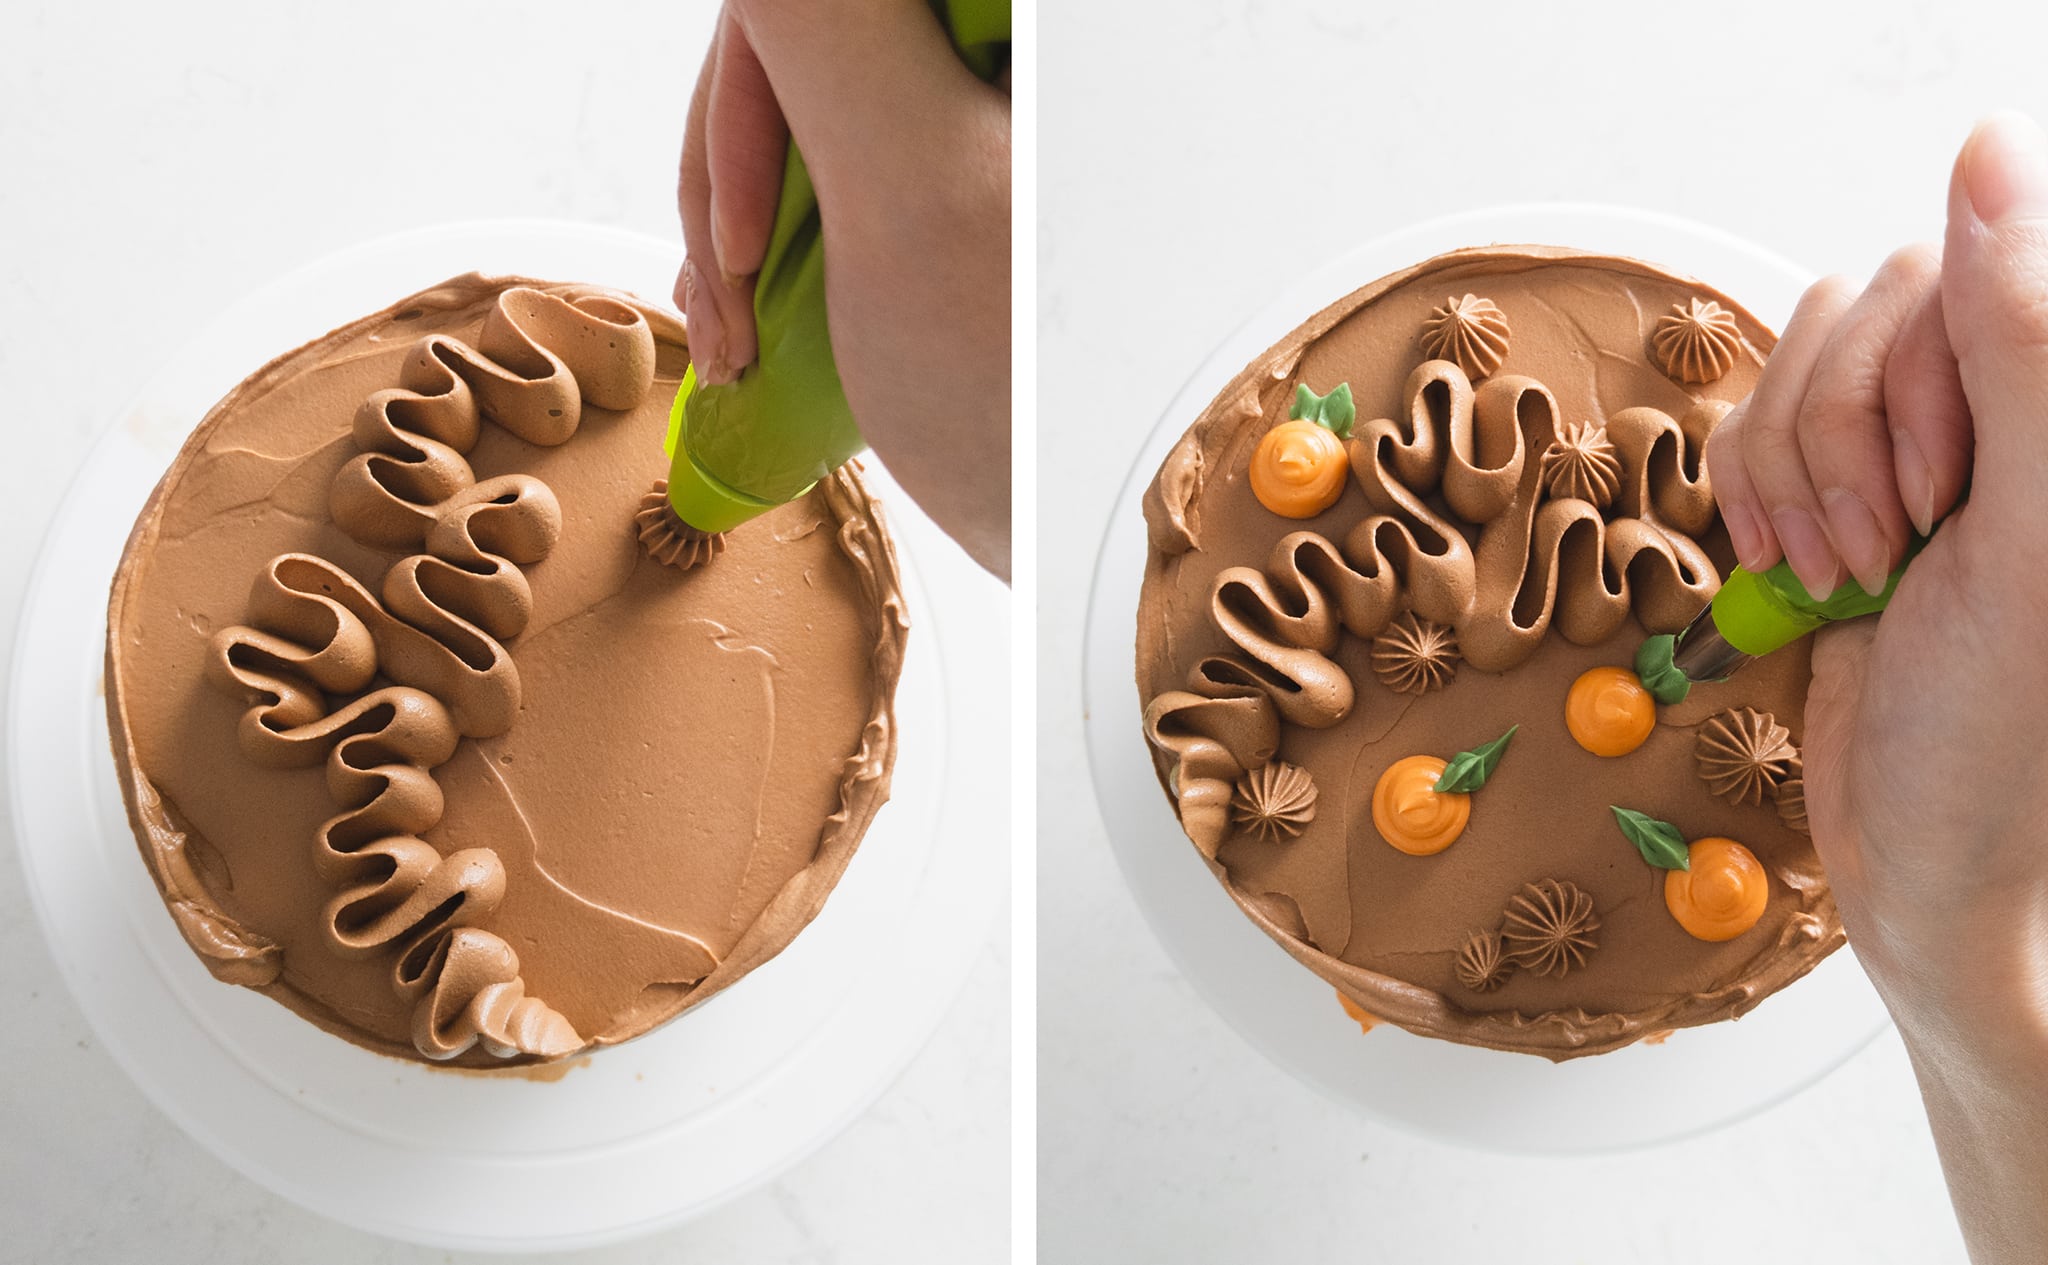
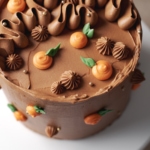
I decorated this cake with a freeform squiggle of dark chocolate buttercream and piped some cute little oranges with coloured vanilla buttercream. I finished it off with a few gold sprinkles.
That’s the beauty of cake decorating - the options are endless! You can make your cake as simple or intricate as you want when you have a good base to work on.
Why you’ll love this recipe
- This chocolate orange cake is so soft, moist, and almost fudgy without buttermilk or cake flour.
- It’s easy to make - just cake layers and buttercream.
- The chocolate buttercream is divine. It’s silky and not too sweet thanks to the slight bitterness of the dark chocolate that tones it down.
- It’s perfect for chocolate lovers and Terry’s chocolate orange fans.
Special tools you’ll need
- Stand mixer or electric hand mixer - You’ll need this to make the buttercream frosting. Since you need to beat the buttercream for at least 20 minutes in total, having a stand mixer is much easier for this but a hand mixer will also work. It’s just a little bit more work on your part!
- Three 6” cake pans - I love these ones from Crown.
- Cake turntable - This is not a necessary but it does make frosting cakes much easier.
- Offset spatula - For applying and smoothing frosting in between cake layers and around the whole cake
- Bench scraper - For smoothing the sides of the cake
- Piping bags - You can use ziploc bags if you’re in a pinch
- Piping tips - For this cake, I’ve used a Wilton #125 for the squiggle, Wilton 6B open star tip, Wilton #12 round tip, and a small leaf tip.
Ingredients you’ll need
- All-purpose flour - This cake is just as fluffy and soft without cake flour but you can also use cake flour if you’d like.
- Cocoa powder - Use natural cocoa powder, not dutch-processed cocoa powder.
- Baking soda
- Baking powder
- Salt
- Unsalted butter - Melt the butter in the microwave or in a small saucepan before using.
- Oil - Any flavourless oil will work like vegetable oil, avocado oil, or grapeseed oil.
- Granulated sugar
- Brown sugar
- Eggs - They should be at room temperature before adding to the batter. If you forget to take them out of the fridge ahead of time, let them sit in a bowl of warm-hot water for 3-5 minutes before using.
- Orange juice - Freshly squeezed orange juice is best! It’s much more fragrant and strong than store-bought orange juice and only takes a few extra minutes to squeeze.
- Orange zest - Use a microplane or grater to zest the oranges before you squeeze the juice from them. The zest makes the orange flavour stronger and more fragrant.
- Milk - Any dairy or non-dairy milk works here. I usually use almond milk or oat milk.
- Powdered sugar
- Dark chocolate - Dark chocolate is best because it balances out the sweetness of the buttercream. Melt it in the microwave or on the stovetop before adding to the buttercream.
- Gel food colouring - Optional. I used orange and green gel food colouring to pipe little buttercream oranges on the cake as decoration.
How to make a chocolate orange cake
For the chocolate orange cake layers
Preheat oven to 350°F and line the bottoms of three 6” cake pans with a round of parchment paper. Set aside.
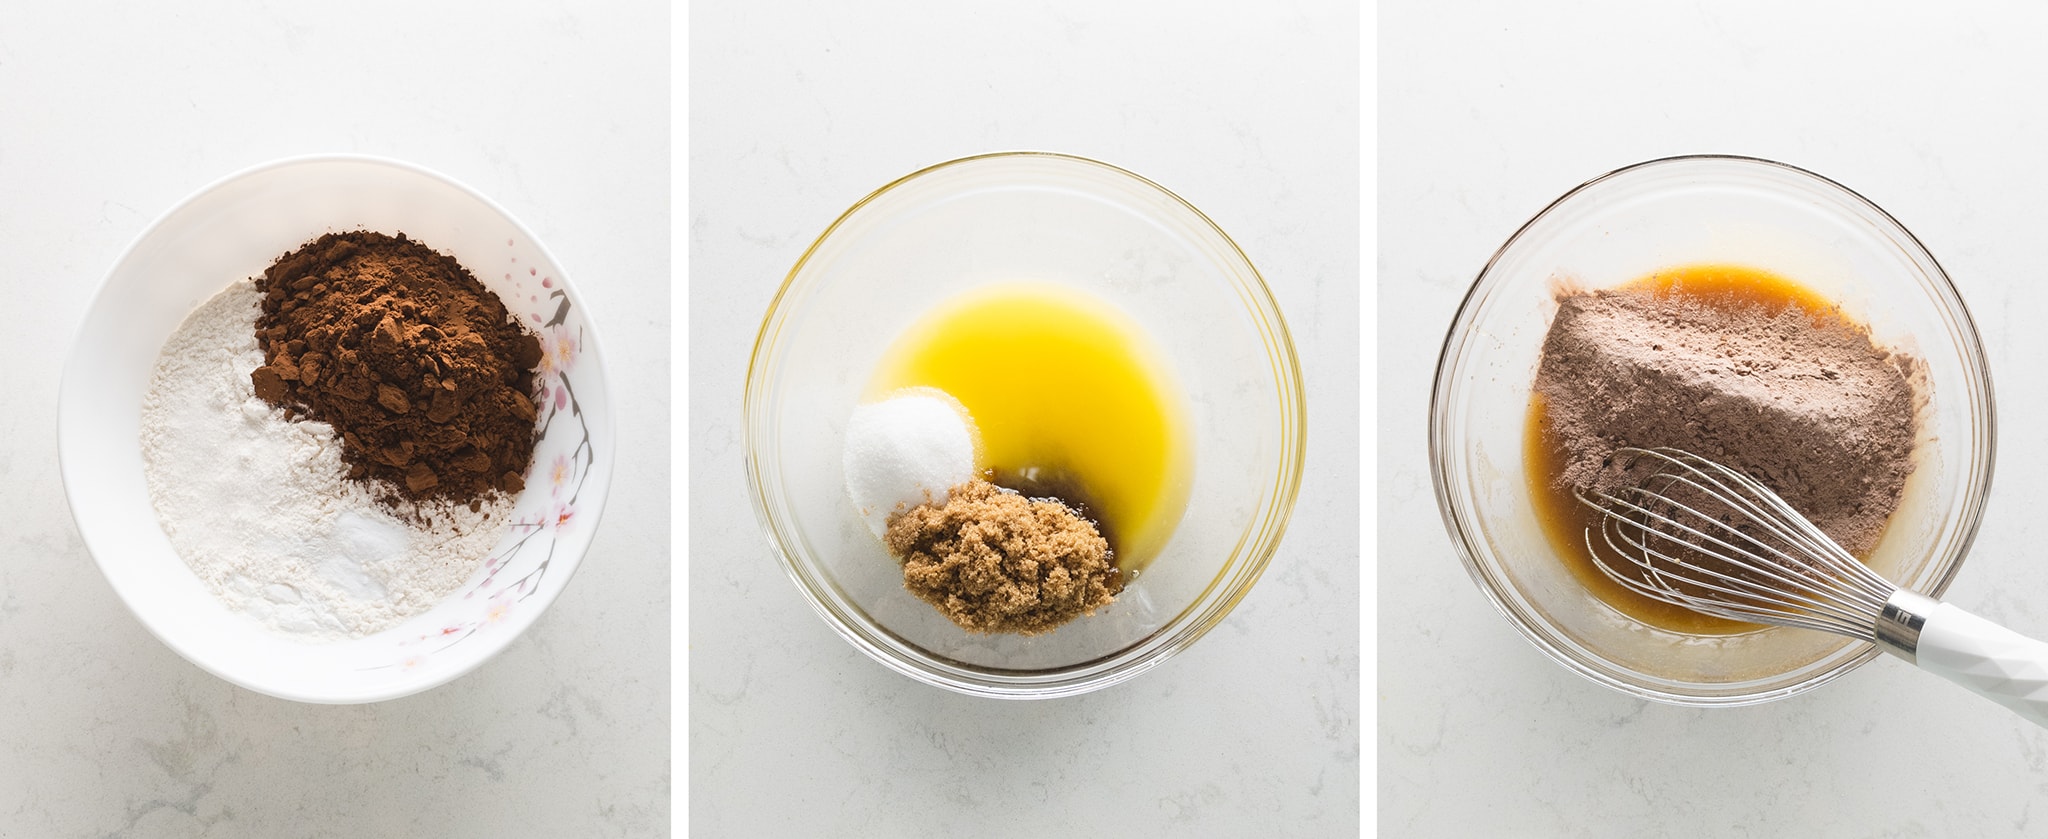
In a medium bowl, stir together flour, cocoa powder, baking soda, baking powder, and salt. Set aside.
In a large mixing bowl, whisk together melted butter, oil, granulated sugar, and brown sugar, and eggs until combined.
Add half of the flour mixture to the butter mixture and whisk together until just combined.
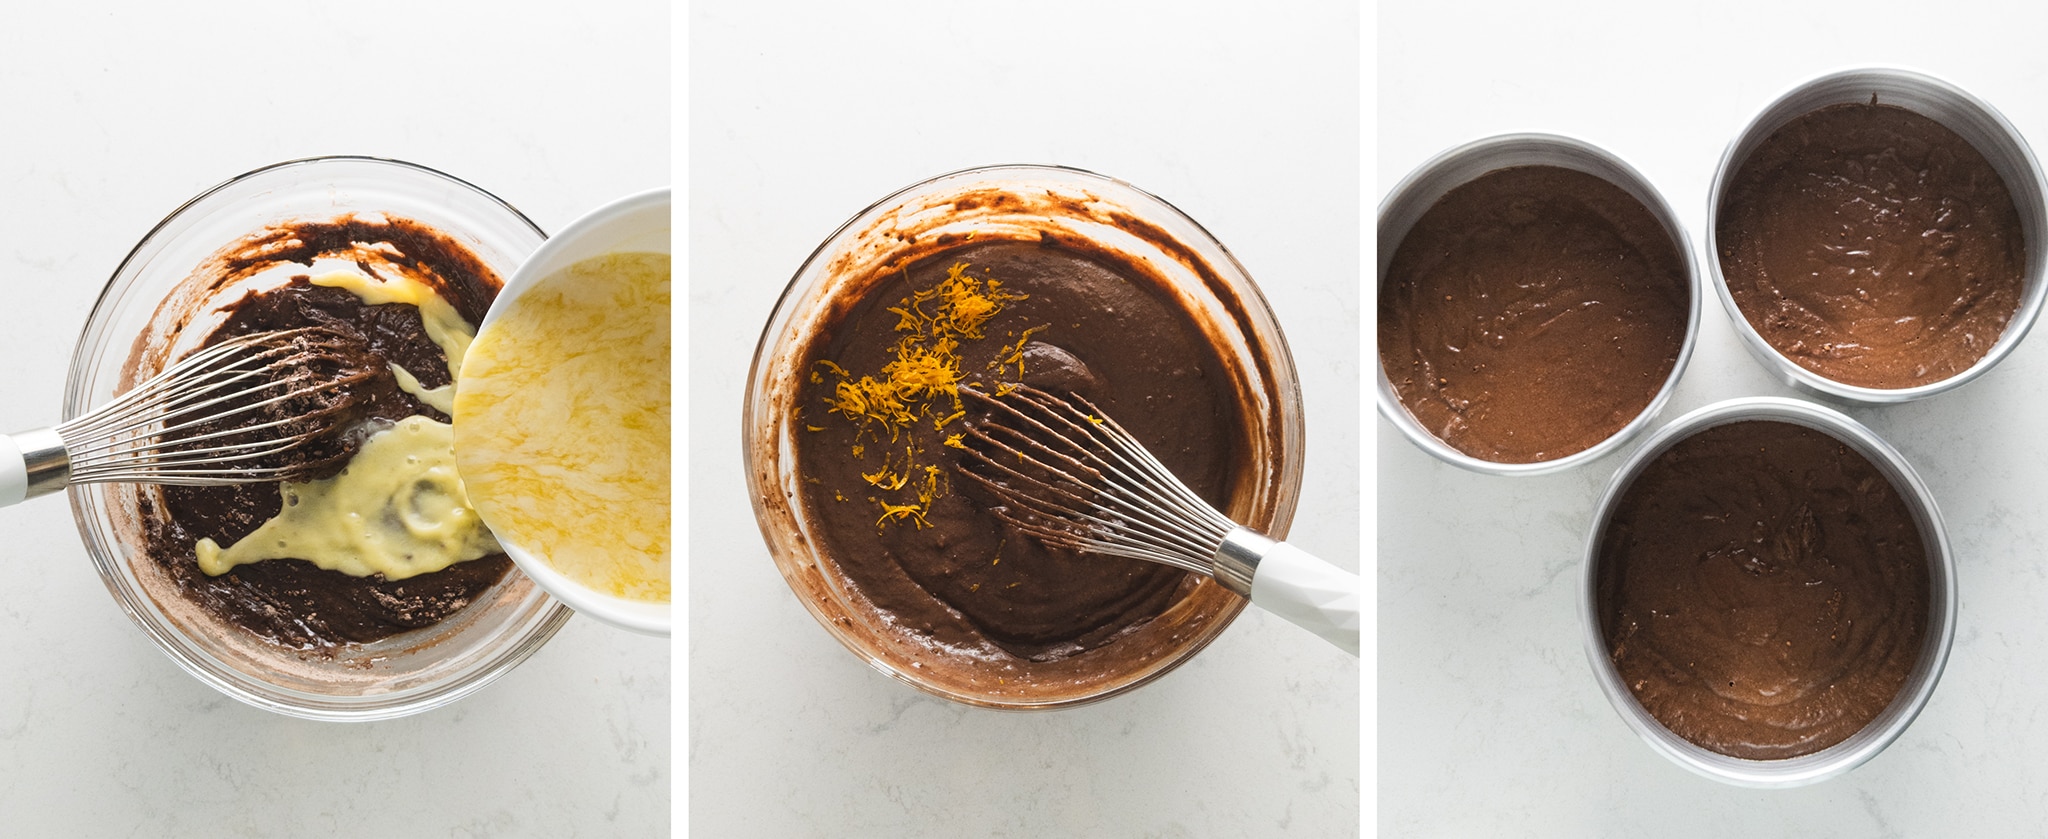
In a measuring cup, add in the orange juice, orange zest, and milk. Pour half of this orange juice mixture into the batter and whisk until just combined.
Add in the remaining flour mixture and then the orange juice mixture, whisking in between additions until just combined and the batter is smooth and glossy.
Divide the batter into your three lined cake pans until about ⅓ full (I portioned out about 360g of batter into each pan).
Bake cakes for 35-40 minutes or until a toothpick inserted in the middle comes out clean.
Let cakes cool in the pans for 10-15 minutes or until cool enough to handle. Run a knife around the edges of the cake pan. Invert the cake pans to release the cake layers onto a wire rack or parchment paper and let them cool completely while upside down before assembling cake.
For the dark chocolate buttercream frosting
In the mixing bowl of a stand mixer, use the paddle attachment to beat softened butter on medium-high speed for 10 full minutes until it becomes very creamy and pale in colour.
Add in the powdered sugar and beat on medium-high speed for another 10 minutes, scraping down the bowl when needed. If you’d like to colour your buttercream for decorating, remove a few spoons of buttercream at this point and transfer them to small bowls. Add gel food colouring and stir to mix thoroughly. Set aside.
To the rest of the buttercream, add in the melted dark chocolate. Beat again for 5 minutes until thoroughly mixed. Finish by smearing the buttercream around the bowl with a spatula to get rid of air bubbles.
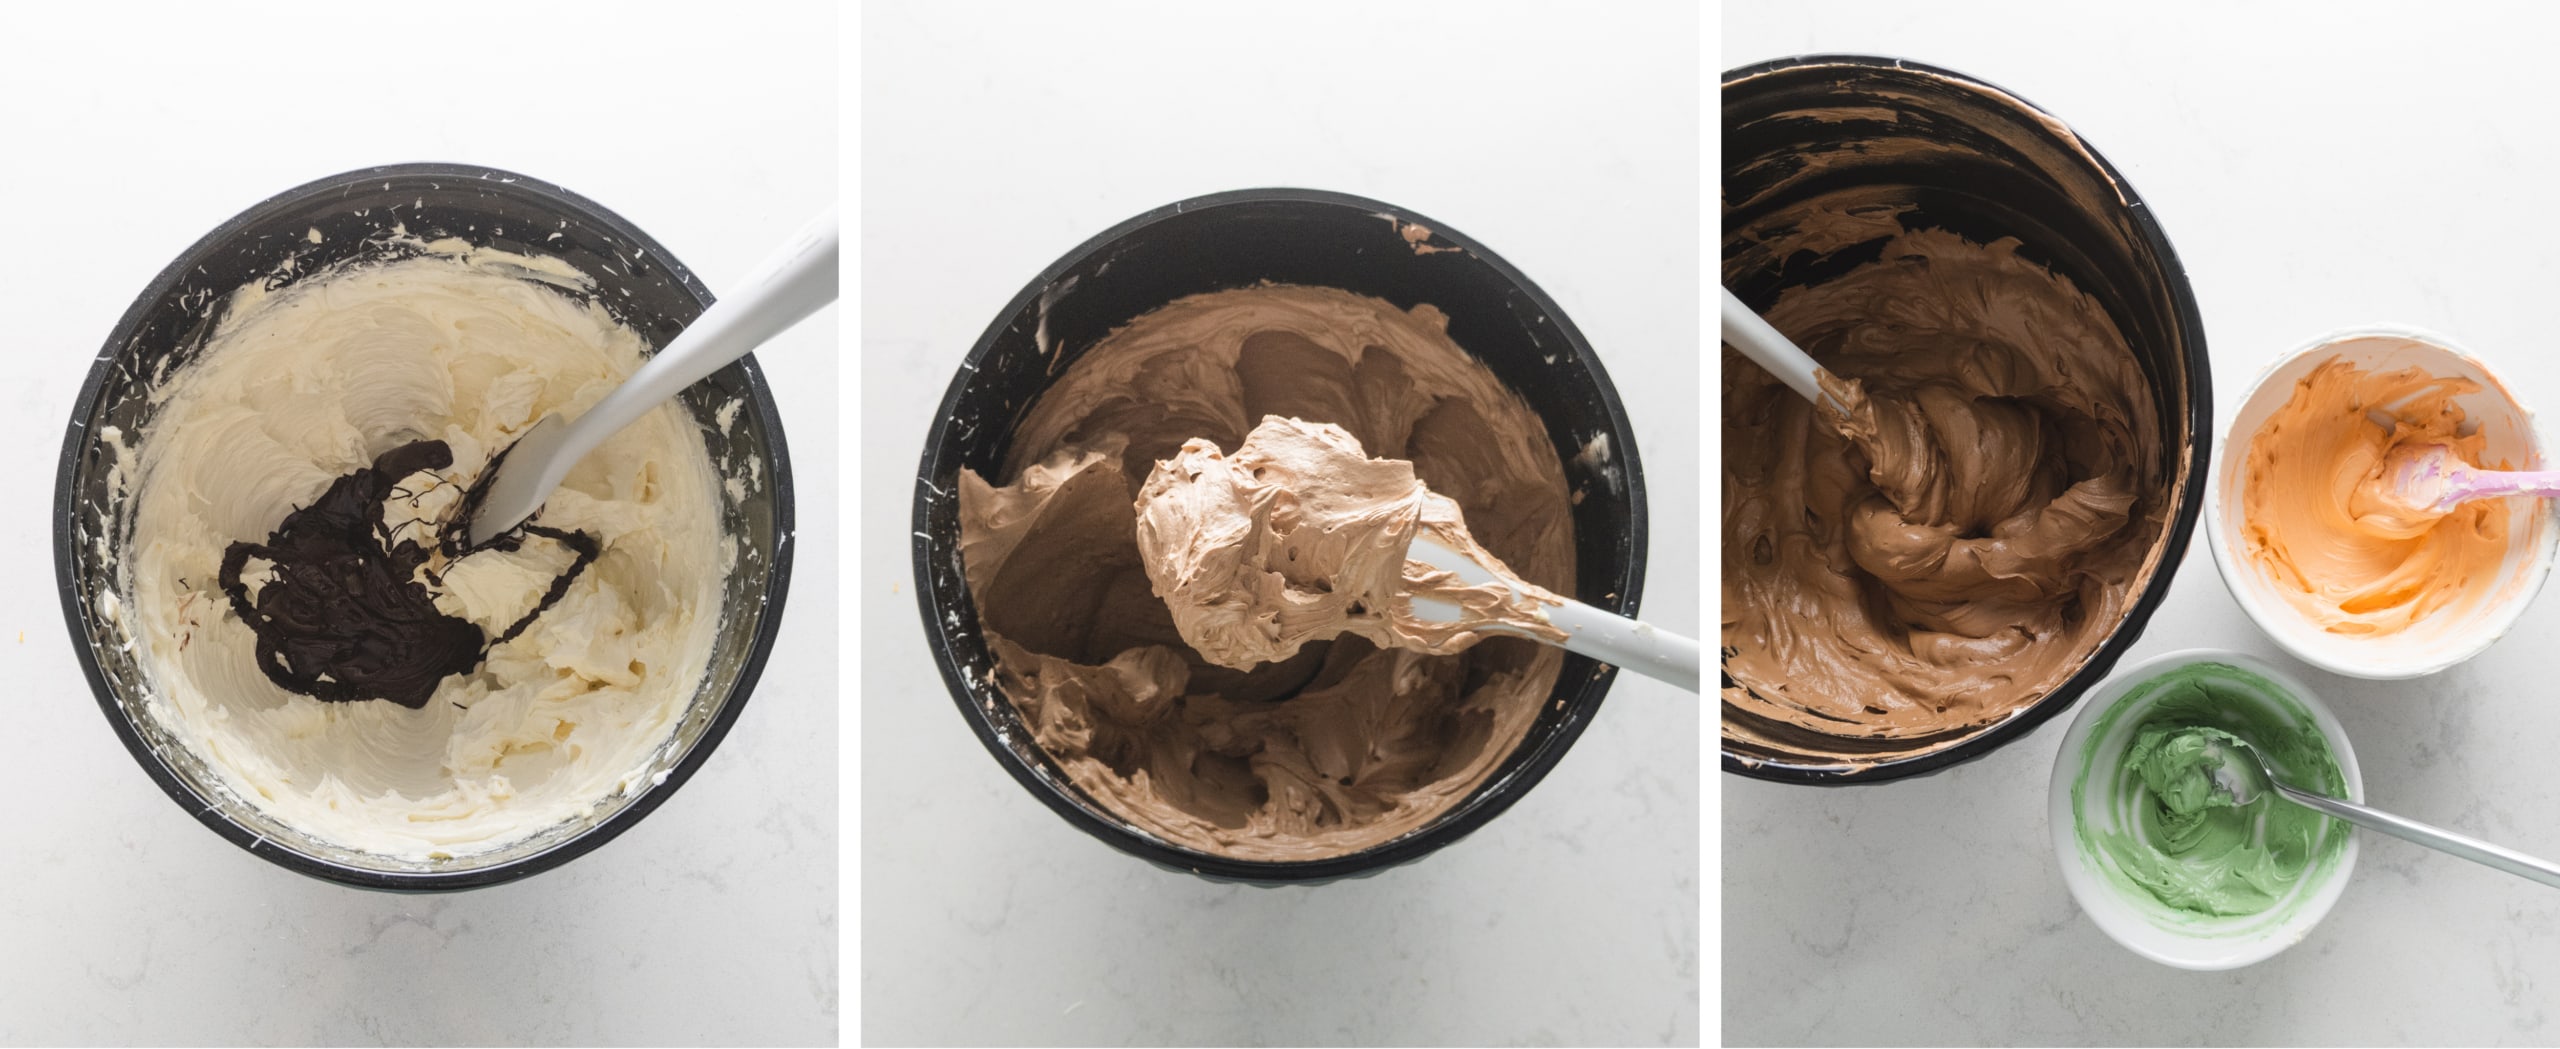
Assembling the cake
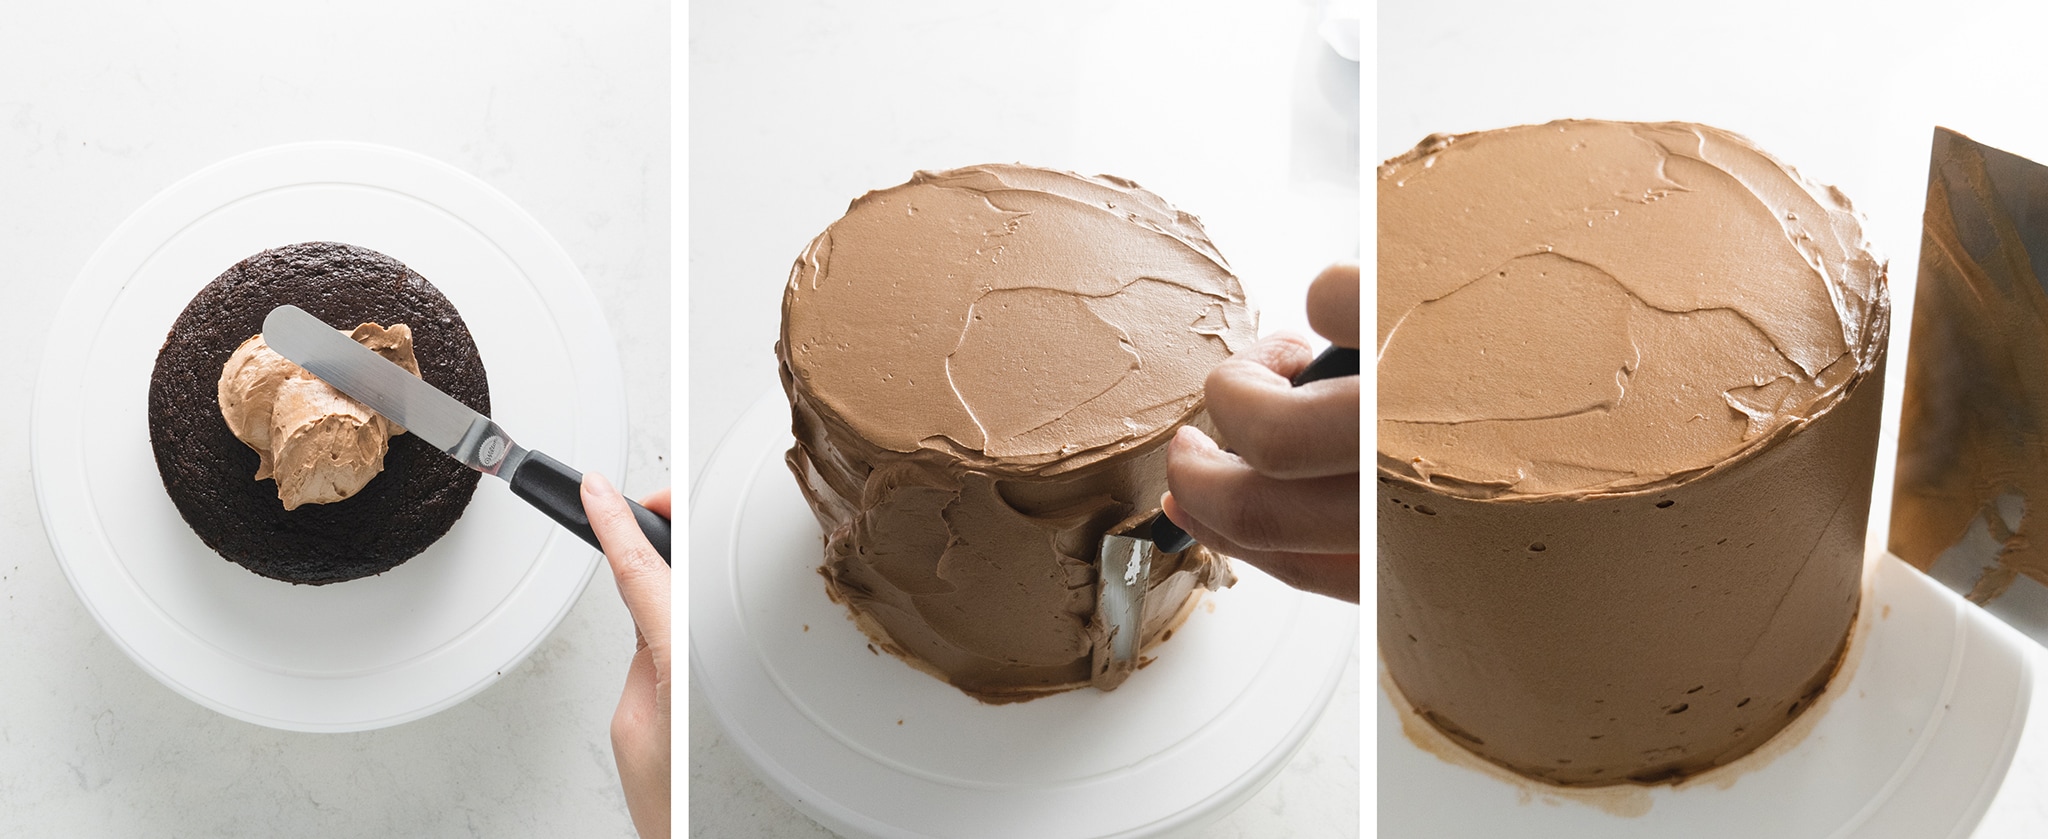
Lay down one cake layer on a turntable. Spread an even layer of buttercream on top with an offset spatula. Place the second cake layer on top. Repeat with all your cake layers.
Spread a thin crumb coat of buttercream on the top and sides of the cake and use a bench scraper to remove the excess. Chill in the fridge for 10 minutes until firm.
Spread a final layer of buttercream on the cake and smooth with a bench scraper.
Transfer the remaining buttercream and coloured buttercream to piping bags fitted with piping tips of your choice. Pipe your design on your cake.
Tips for making layer cakes
- Cake pans - The cake pans that you use matter! Different materials and even the same pans within the same brand conduct heat differently and can affect how your cake bakes up. I swear by these pans from Crown. My cakes barely dome up and they always cook evenly in these pans.
Tip: I usually don’t grease my cake pans as I find it can cause the cake to shrink away from the sides of the pan. I always line the bottom of the pans with a circle of parchment paper. Run a knife around the sides of the pan after baking and the cake will fall right out when you flip them over.
- Cake tools - Having the right cake making and decorating tools can make the process so much easier and more enjoyable. If you don’t already have them, consider picking up some essentials if you want to improve your cake skills. I would suggest having a cake turntable, offset spatula, bench scraper, piping bags, and a few piping tips.
- Silky buttercream - The key to silky and creamy buttercream is to beat it for a long enough time. Beat the butter for 10 whole minutes before you even add the powdered sugar - this is important!
Tip: For extra silky smooth buttercream, take 1-2 large dollops of buttercream and transfer it to a small bowl. Warm it in the microwave for about 10 seconds until it becomes shiny and melty on the outside. Add this melty buttercream back into the rest of the buttercream and stir together. Repeat as needed until your buttercream is glossy and creamy.
- Chill your cake - Taking the time to let your cake chill in the fridge after the crumb coat and before slicing allows the buttercream to firm up. You’ll keep crumbs out of your final coat of frosting, prevent your cake layers from sliding around when frosting, and you’ll get nice clean cuts when slicing. Always bring the cake back to room temperature before eating.
Frequently asked questions
Once frosted, you can store the whole cake in the fridge uncovered overnight or in an airtight cake container for longer. Note that leaving the cake uncovered for more than a day can dry out the cake.
You can store leftover cake slices wrapped or in an airtight container in the fridge for 3-4 days.
Yes! You can freeze the unfrosted cake layers and leftover frosted cake slices by wrapping them well in plastic wrap and/or aluminum foil. Freeze for up to 1 month. Thaw in the fridge overnight before using.
Yes! Cake layers freeze well and can be made and frozen for up to 1 month or stored in the fridge for 1-2 days. Be sure to wrap them well to prevent them from drying out.
Buttercream can be made ahead of time and stored in the fridge but it will need to be warmed up and mixed again to regain the smooth creamy texture. I prefer to make buttercream on the same I assemble the cake for this reason.
More layer cake recipes to try
Recipe
Chocolate Orange Cake
Ingredients
Cake
- 200 g all-purpose flour
- 75 g natural cocoa powder
- 1 teaspoon baking soda
- ½ teaspoon baking powder
- ½ teaspoon salt
- 115 g unsalted butter, melted
- 100 g flavourless oil
- 100 g granulated sugar
- 100 g brown sugar
- 2 large eggs, room temperature
- 200 g orange juice, freshly squeezed
- 1 tablespoon orange zest
- 145 g milk, dairy or non-dairy
Buttercream
- 430 g unsalted butter, room temperature
- 185 g powdered sugar
- 50 g dark chocolate, melted
- orange and green gel food colouring, optional
Instructions
Cake
- Preheat oven to 350°F and line the bottoms of three 6” cake pans with a round of parchment paper. Set aside.
- In a medium bowl, stir together flour, cocoa powder, baking soda, baking powder, and salt. Set aside.
- In a large mixing bowl, whisk together melted butter, oil, granulated sugar, and brown sugar, and eggs until combined.
- Add half of the flour mixture to the butter mixture and whisk together until just combined.
- In a measuring cup, add in the orange juice, orange zest, and milk. Pour half of this orange juice mixture into the batter and whisk until just combined.
- Add in the remaining flour mixture and then the orange juice mixture, whisking in between additions until just combined and the batter is smooth and glossy.
- Divide the batter into your three lined cake pans until about ⅓ full (I portioned out about 360g of batter into each pan).
- Bake cakes for 35-40 minutes or until a toothpick inserted in the middle comes out clean.
- Let cakes cool in the pans for 10-15 minutes or until cool enough to handle. Run a knife around the edges of the cake pan. Invert the cake pans to release the cake layers onto a wire rack or parchment paper and let them cool completely while upside down before assembling cake.
Buttercream
- In the mixing bowl of a stand mixer, use the paddle attachment to beat softened butter on medium-high speed for 10 full minutes until it becomes very creamy and pale in colour.
- Add in the powdered sugar and beat on medium-high speed for another 10 minutes, scraping down the bowl when needed. If you’d like to colour your buttercream for decorating, remove a few spoons of buttercream at this point and transfer them to small bowls. Add gel food colouring and stir to mix thoroughly. Set aside.
- To the rest of the buttercream, add in the melted dark chocolate. Beat again for 5 minutes until thoroughly mixed. Finish by smearing the buttercream around the bowl with a spatula to get rid of air bubbles.
Assembling the cake
- Lay down one cake layer on a turntable. Spread an even layer of buttercream on top with an offset spatula. Place the second cake layer on top. Repeat with all your cake layers.
- Spread a thin crumb coat of buttercream on the top and sides of the cake and use a bench scraper to remove the excess. Chill in the fridge for 10 minutes until firm.
- Spread a final layer of buttercream on the cake and smooth with a bench scraper.
- Transfer the remaining buttercream and coloured buttercream to piping bags fitted with piping tips of your choice. Pipe your design on your cake.

Mark
I made this today but my cakes didn’t rise. I’ve looked back and Im 99.9% sure I had all the right ingredients in the right quantities and followed the method. Any idea why they came out so flat? The only thing that may have been off is that my eggs may have been a bit colder than room temperature, would that make a big difference to rising?
Gail Ng
The cold eggs wouldn't have affected the rise. This is one of my cakes that rises naturally the most because of the reaction of the acidic orange juice and cocoa powder with the leaveners! Have you checked if your baking powder and baking soda are still working and not expired/old? And are you using natural cocoa powder (the most common kind)? If you used Dutch-processed cocoa powder, it's neutral so it won't react with the baking soda.
Amy
Is your pan bigger than 6 inches? that might be why, my pans were too big and that made them flatter.
MacKenzie
This is beautiful. The combination of chocolate and orange is amazing.
Sherrie
Iiiincredible!! The chocolate and orange pair so perfectly in this decadent cake! Perfect for a special get-together we had!
Genevieve
Aside from being totally delicious, this is SO beautiful! My piping skills can't match yours, but this was a wonderful recipe. Thank you!
Ksenia
GORGEOUS! My son loves the combo of chocolate and orange, and this was a huge hit with him. Of course, mine wasn’t half as pretty S yours
Kristen
The photos were so helpful and the cake turned out DELISH!! Will make it again. Thank you!!
Elissa
My mind exploded when I saw the nutrition chart 7,787 calories and 632 Carbohydrates is this accurate ?
Gail Ng
That’s for the entire cake! It’s automatically calculated based on the ingredients from a database so it’s just an estimate. Everyone slices a cake differently so a 3-layer 6” cake serves anywhere between 8-12 slices so you can divide the nutrition info accordingly.