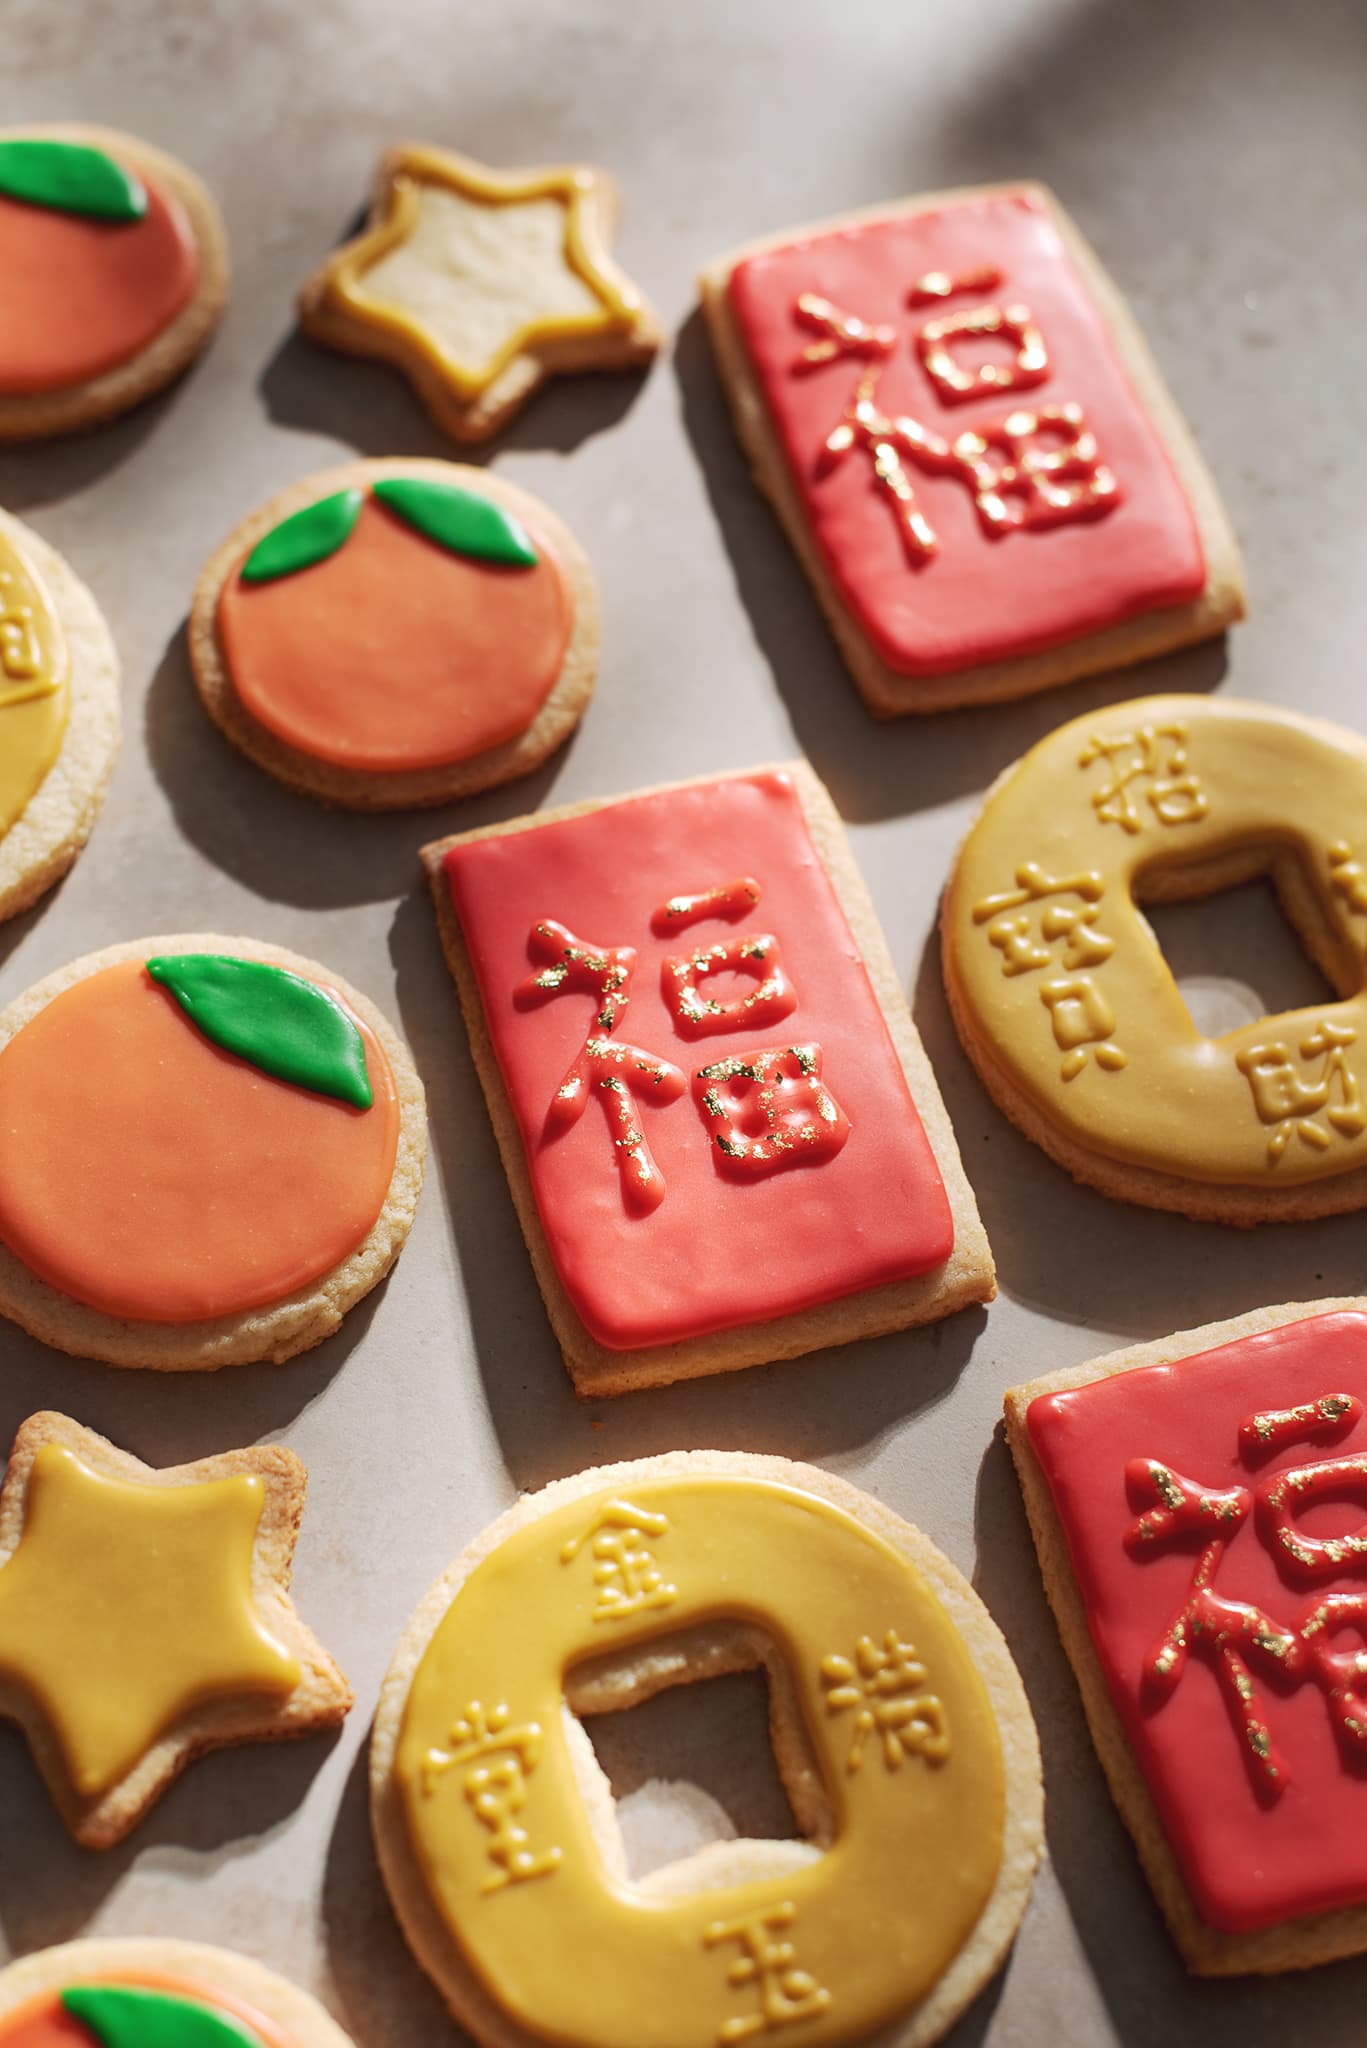
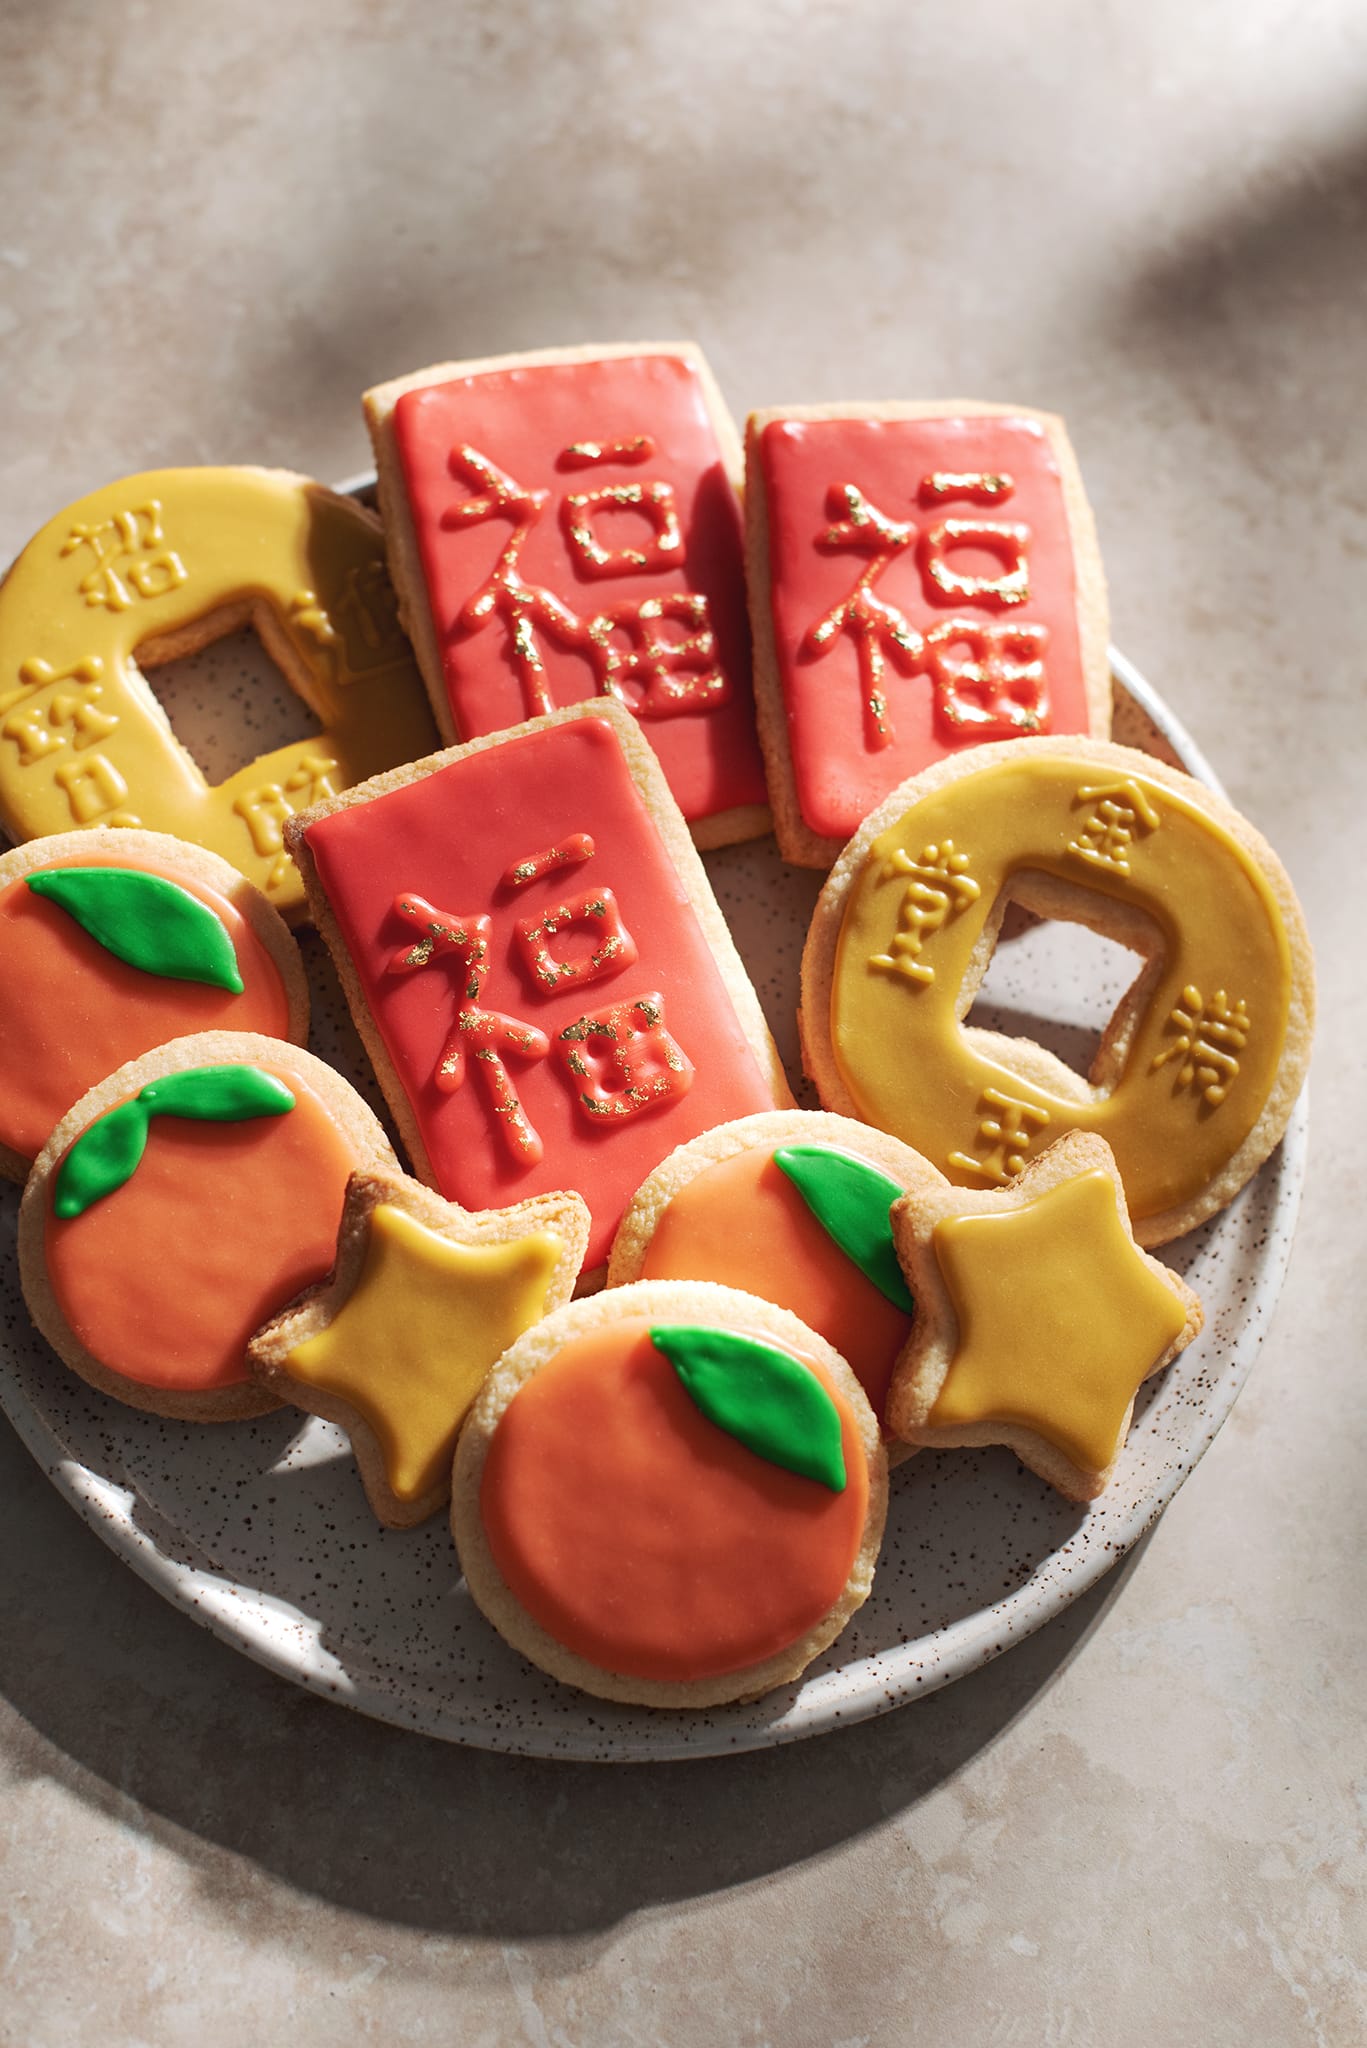
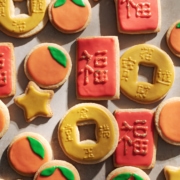
These Chinese New Year cookies are not traditional cookies that we would typically eat around the Lunar New Year but they are so much fun to decorate and eat. These almond flour sugar cookies are soft and buttery with a simple icing that’s easy to colour. These cookies are decorated as lucky red envelopes, mandarin oranges, and Chinese coins to symbolize good fortune and good luck.
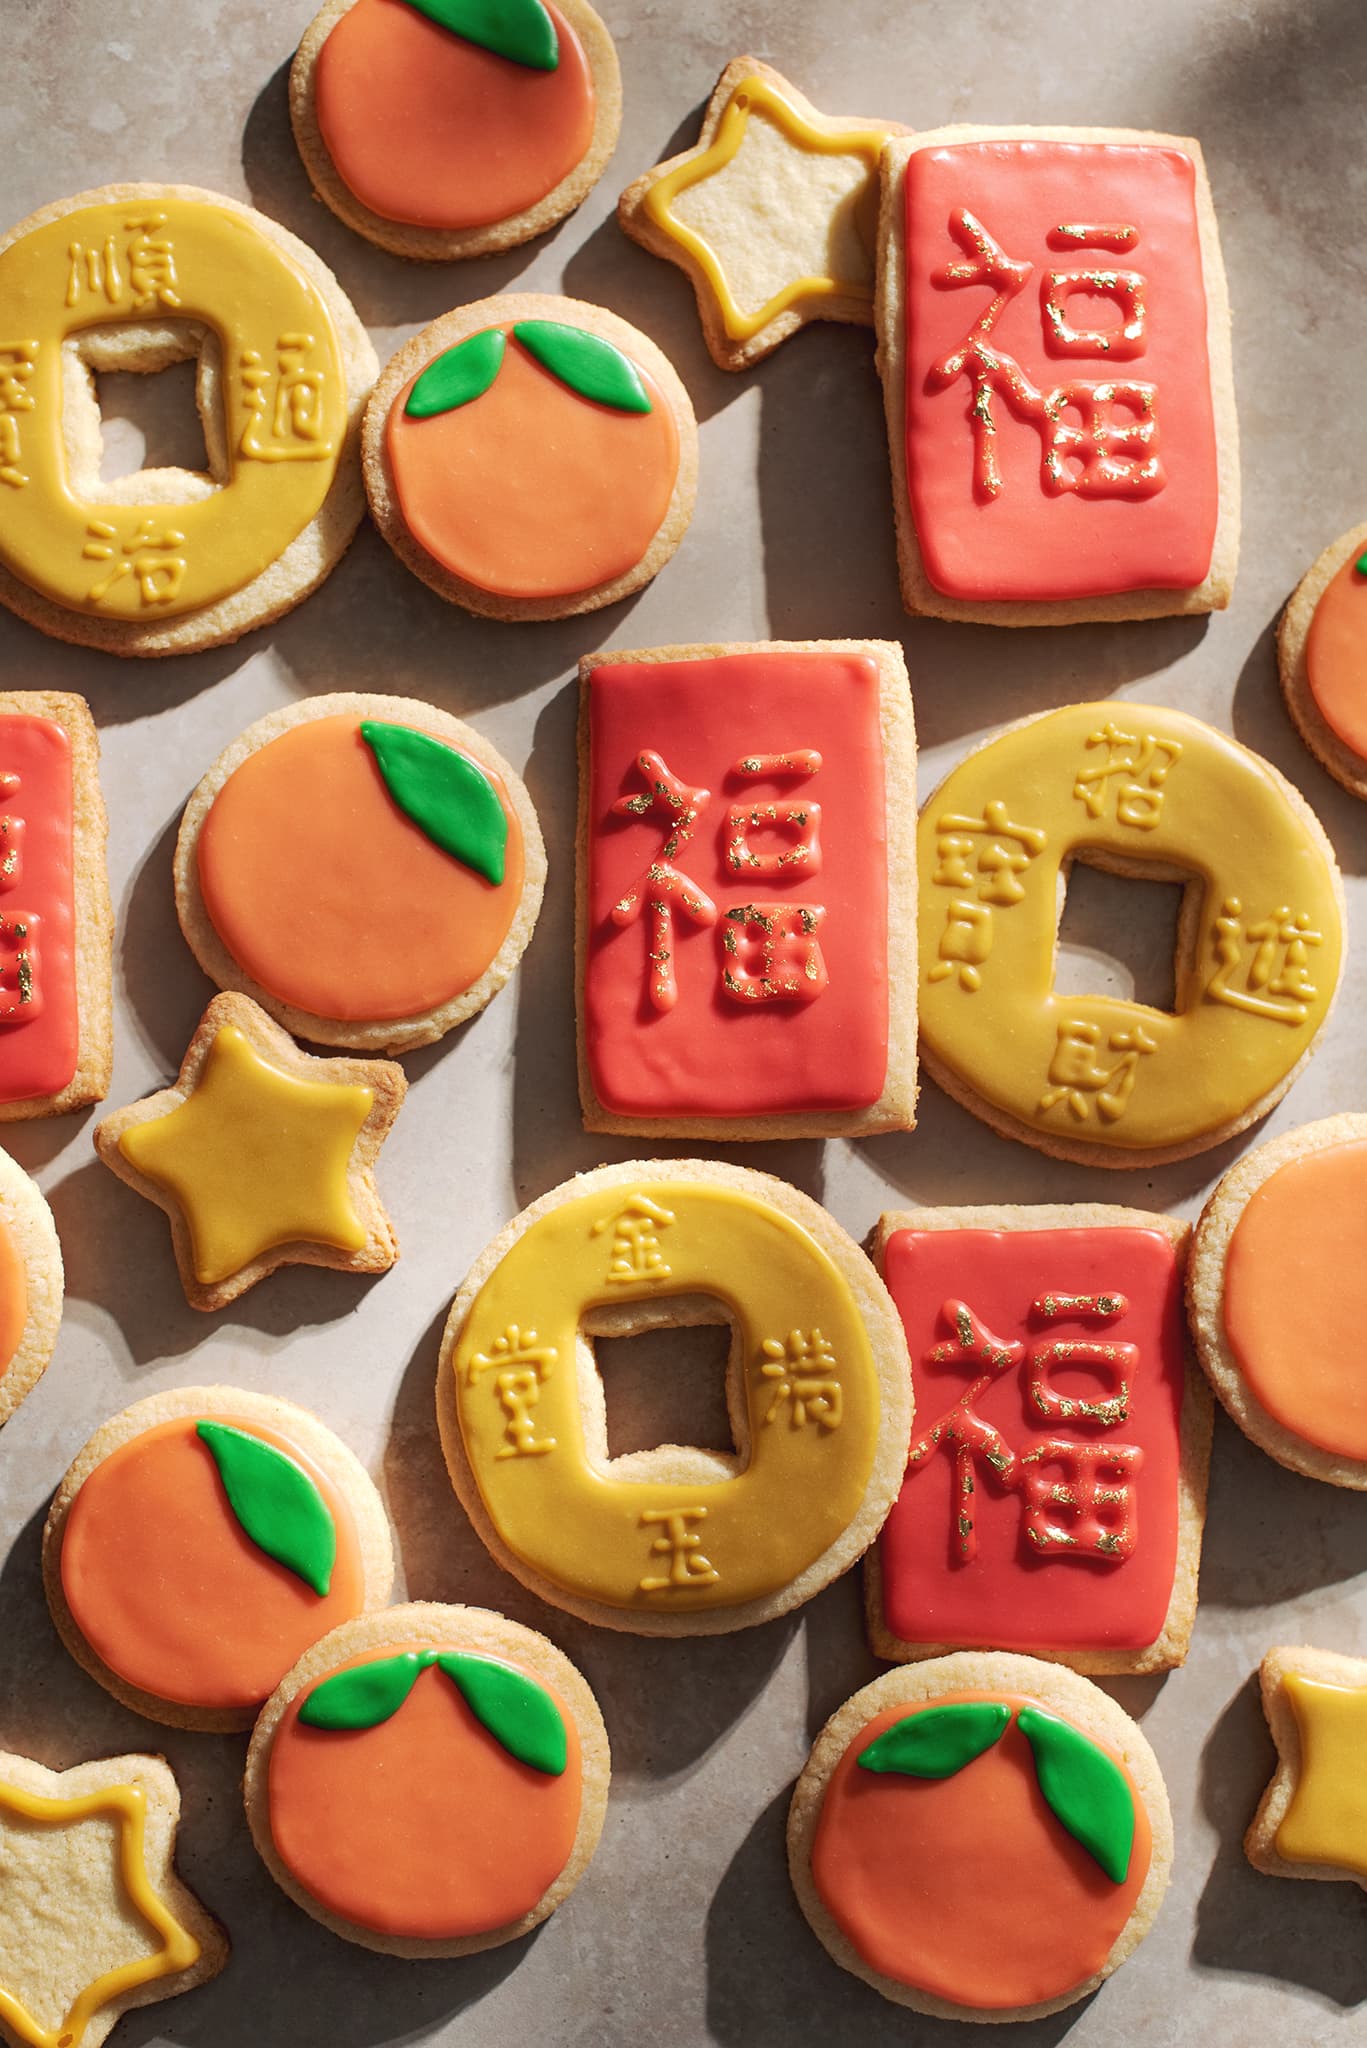
Inspired by Chinese almond cookies, I decided to make these Chinese New Year sugar cookies with almond flour to achieve the classic almond flavour and fragrant aroma. They are just as soft as regular sugar cookies but with an bit more bite and texture to them.
The sugar cookie icing designs can be customized according to your own creative ideas. The possibilities are endless! The icing is a simple 2-ingredient icing (plus gel food colouring of your choice) that doesn’t need meringue powder or eggs like royal icing. It’s a bit less stable than royal icing and not as great for fine details but you can still flood fill cookies with it and it dries completely hard. I just love how easy it is!
Why you’ll love this recipe
- These sugar cookies are made with almond flour so they happen to be gluten-free (if you use coconut flour or a gluten-free flour to dust your surfaces). Plus they taste and smell like almonds!
- This recipe is great for cut-out sugar cookies because they keep their shape when baked.
- The icing is super simple to make and dries hard so you can stack your cookies.
- You can decorate these cookies however you like! Get creative! Make them Chinese New Year themed or for any other occasion!
Ingredients you’ll need
- Unsalted butter - This needs to be at room temperature and soft enough to be able to beat it.
- Granulated sugar
- Egg - Just one large egg at room temperature.
- Vanilla extract
- Almond flour - Use super-fine almond flour. No need to sift it like when making macarons.
- Baking powder - Makes the cookies rise slightly so that they have a nice puffed surface and rounded edges.
- Salt
- Powdered sugar
- Milk - Use any kind of dairy or non-dairy milk. You only need a little bit. I use almond milk or oat milk because that’s what I have on hand.
- Gel food colouring - Be sure to use gel colouring, not liquid colouring otherwise it will thin out your icing and it won’t harden or pipe properly. I’ve used a mixture of red, yellow, orange, brown, and green gel colours for my particular designs.
- Edible gold leaf - Optional. Edible gold leaf is delicate and difficult to work with if you’ve never used it before but it looks beautiful and perfect if you’re making the classic red and gold lucky envelope design.
How to make Chinese New Year cookies
For the sugar cookies
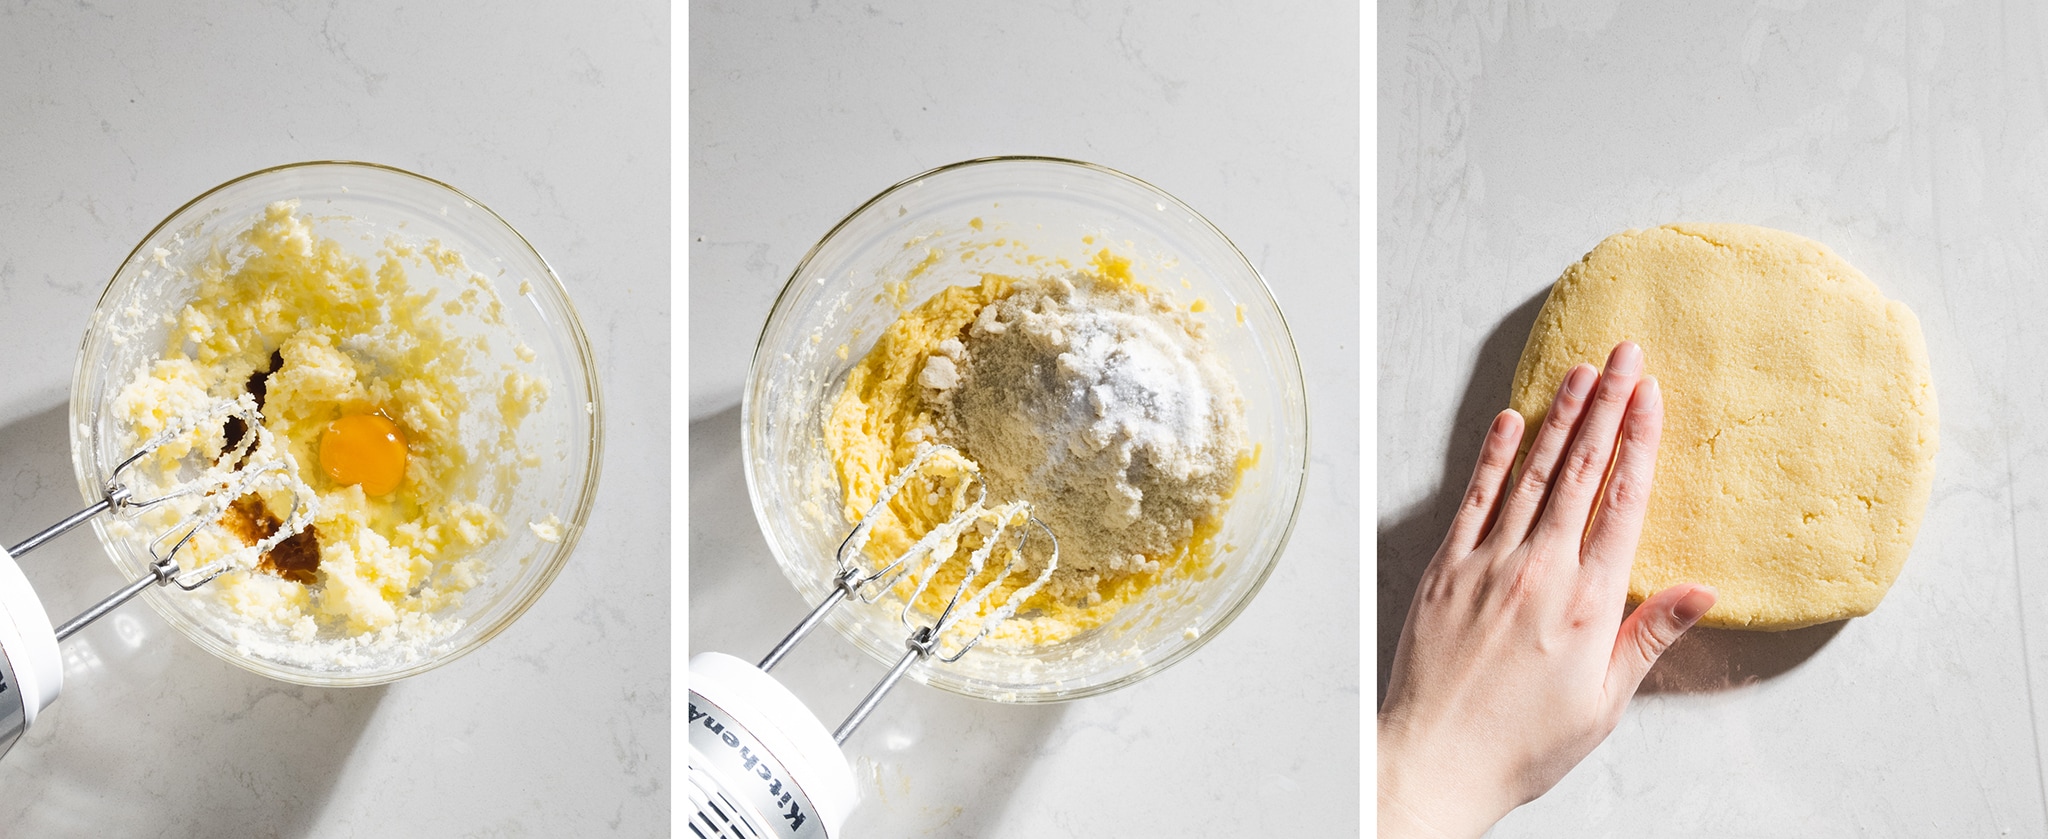
In a medium mixing bowl, use an electric mixer to beat softened butter until creamy. Add granulated sugar and beat until combined. Add in the egg and vanilla extract. Beat until combined.
Add in the almond flour, baking powder, and salt. Beat on low speed until it forms a soft dough.
Turn the dough out onto a sheet of plastic wrap. Use your hands to press the dough into a flattened disc shape. Wrap with plastic wrap and chill in the fridge for 1 hour.
Preheat oven to 350°F and line a baking sheet with parchment paper. Set aside.
Place the chilled dough on a well-floured surface. Roll out with a rolling pin until about ⅛” thick. Cut out your cookies with cookie cutters of your choice and transfer cut outs to baking sheet. Re-roll the dough scraps and repeat.
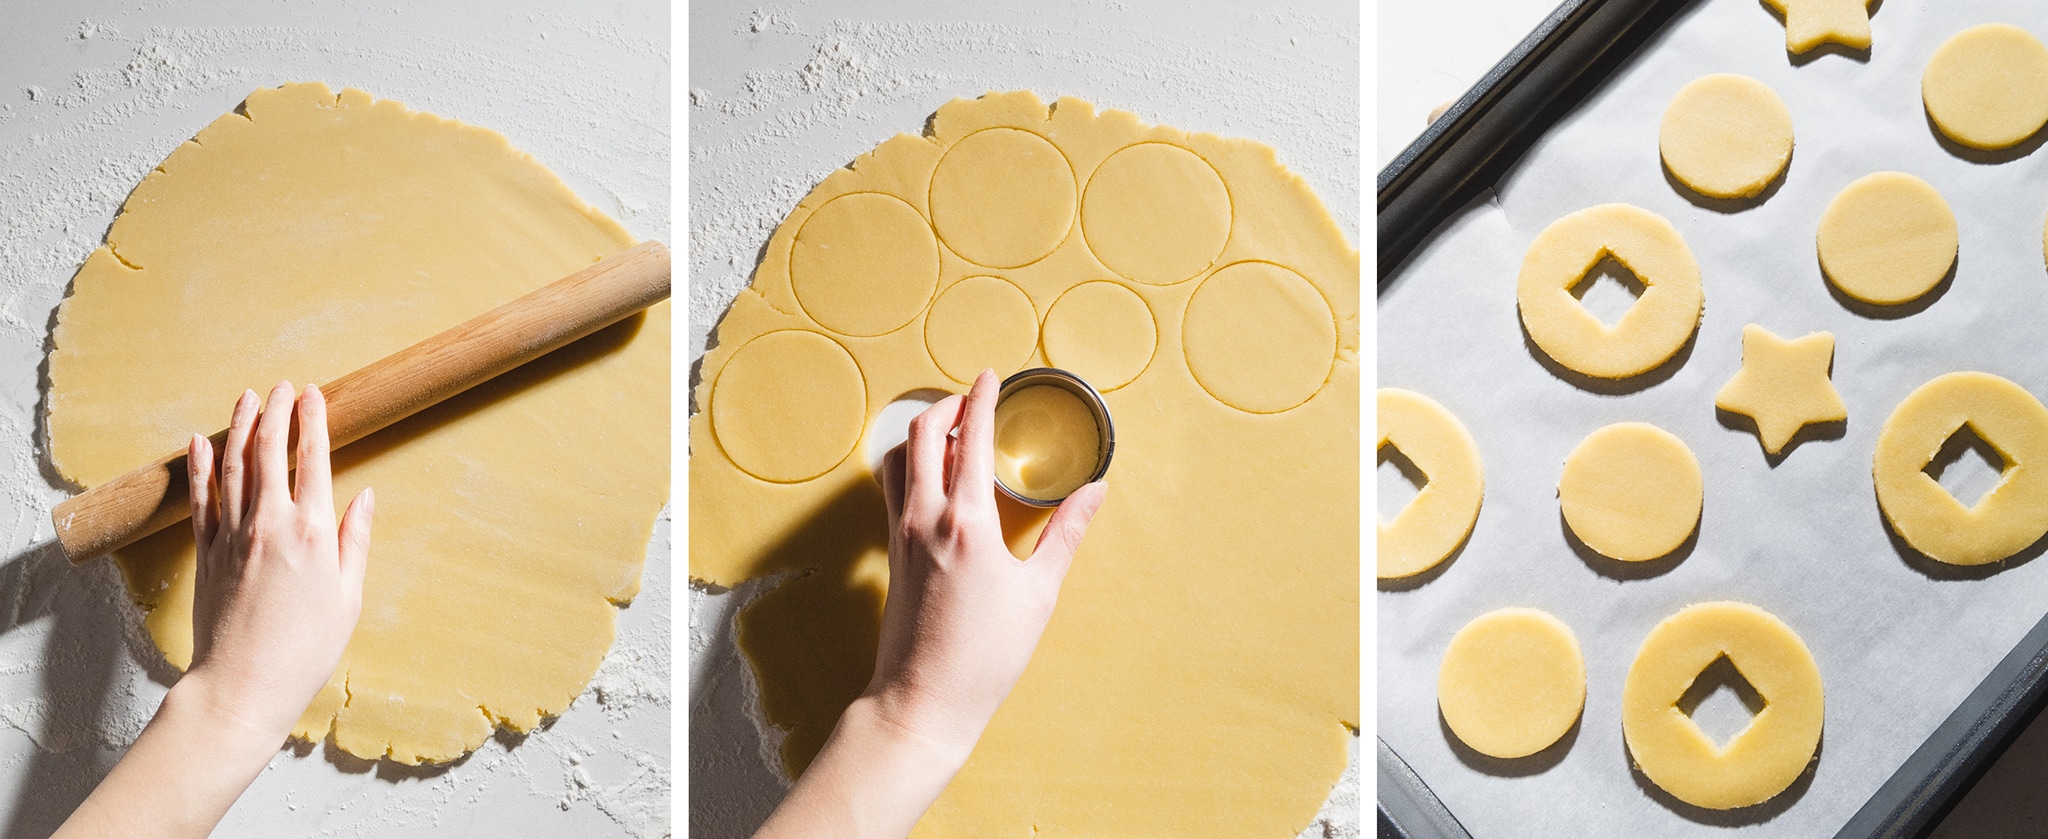
Bake cookies for 10-12 minutes or until the edges just begin to brown. Let cookies cool on the baking sheet for at least 10 minutes until they’re firm enough to handle. Transfer them to a wire rack to cool completely.
For the icing
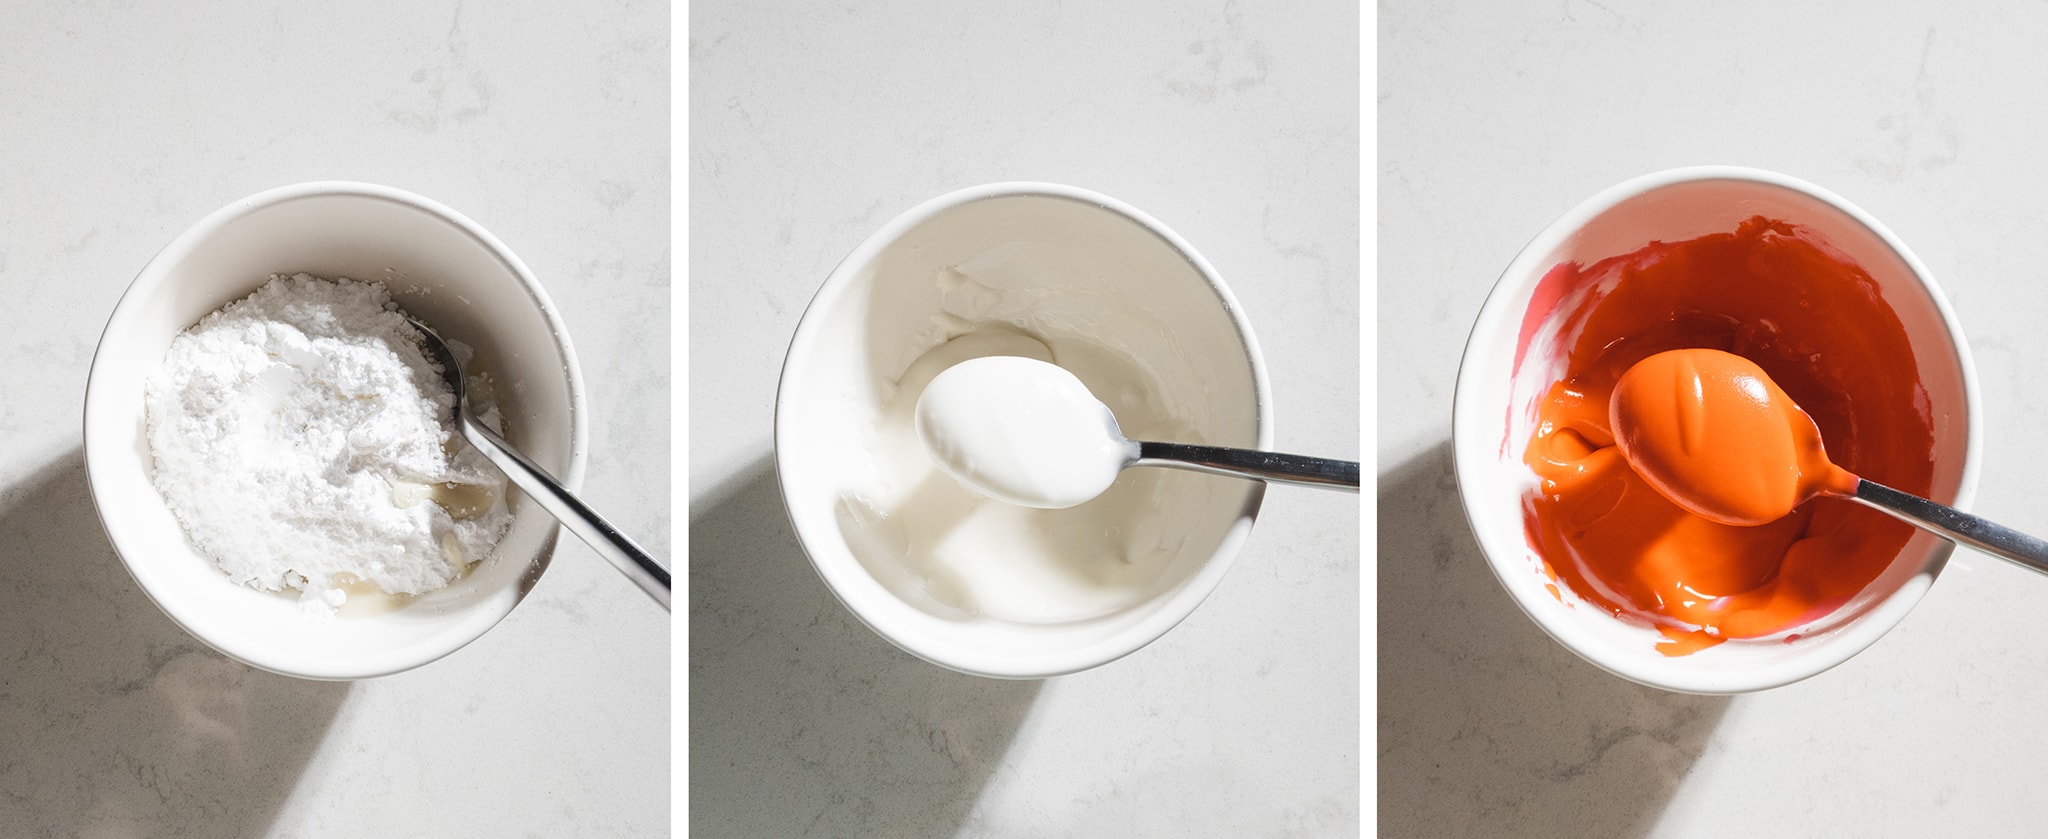
In a small bowl, stir together powdered sugar and milk. It should be a thick paste when stirring around but looks smooth and glossy if you leave it undisturbed. Let the icing drizzle off the spoon - it should be thick enough for the drizzles to hold their shape for several seconds and then “melt” back into the icing.
Divide the icing into several smaller bowls and mix in gel food colouring into each bowl, depending on your designs. Note that adding a lot of gel colouring to the icing may make it thinner so add more powdered sugar as needed to maintain the thick consistency.
Transfer icing to small piping bags and cut off the tips to make a small opening. Cover any icing that isn’t being used so that it doesn’t dry out.
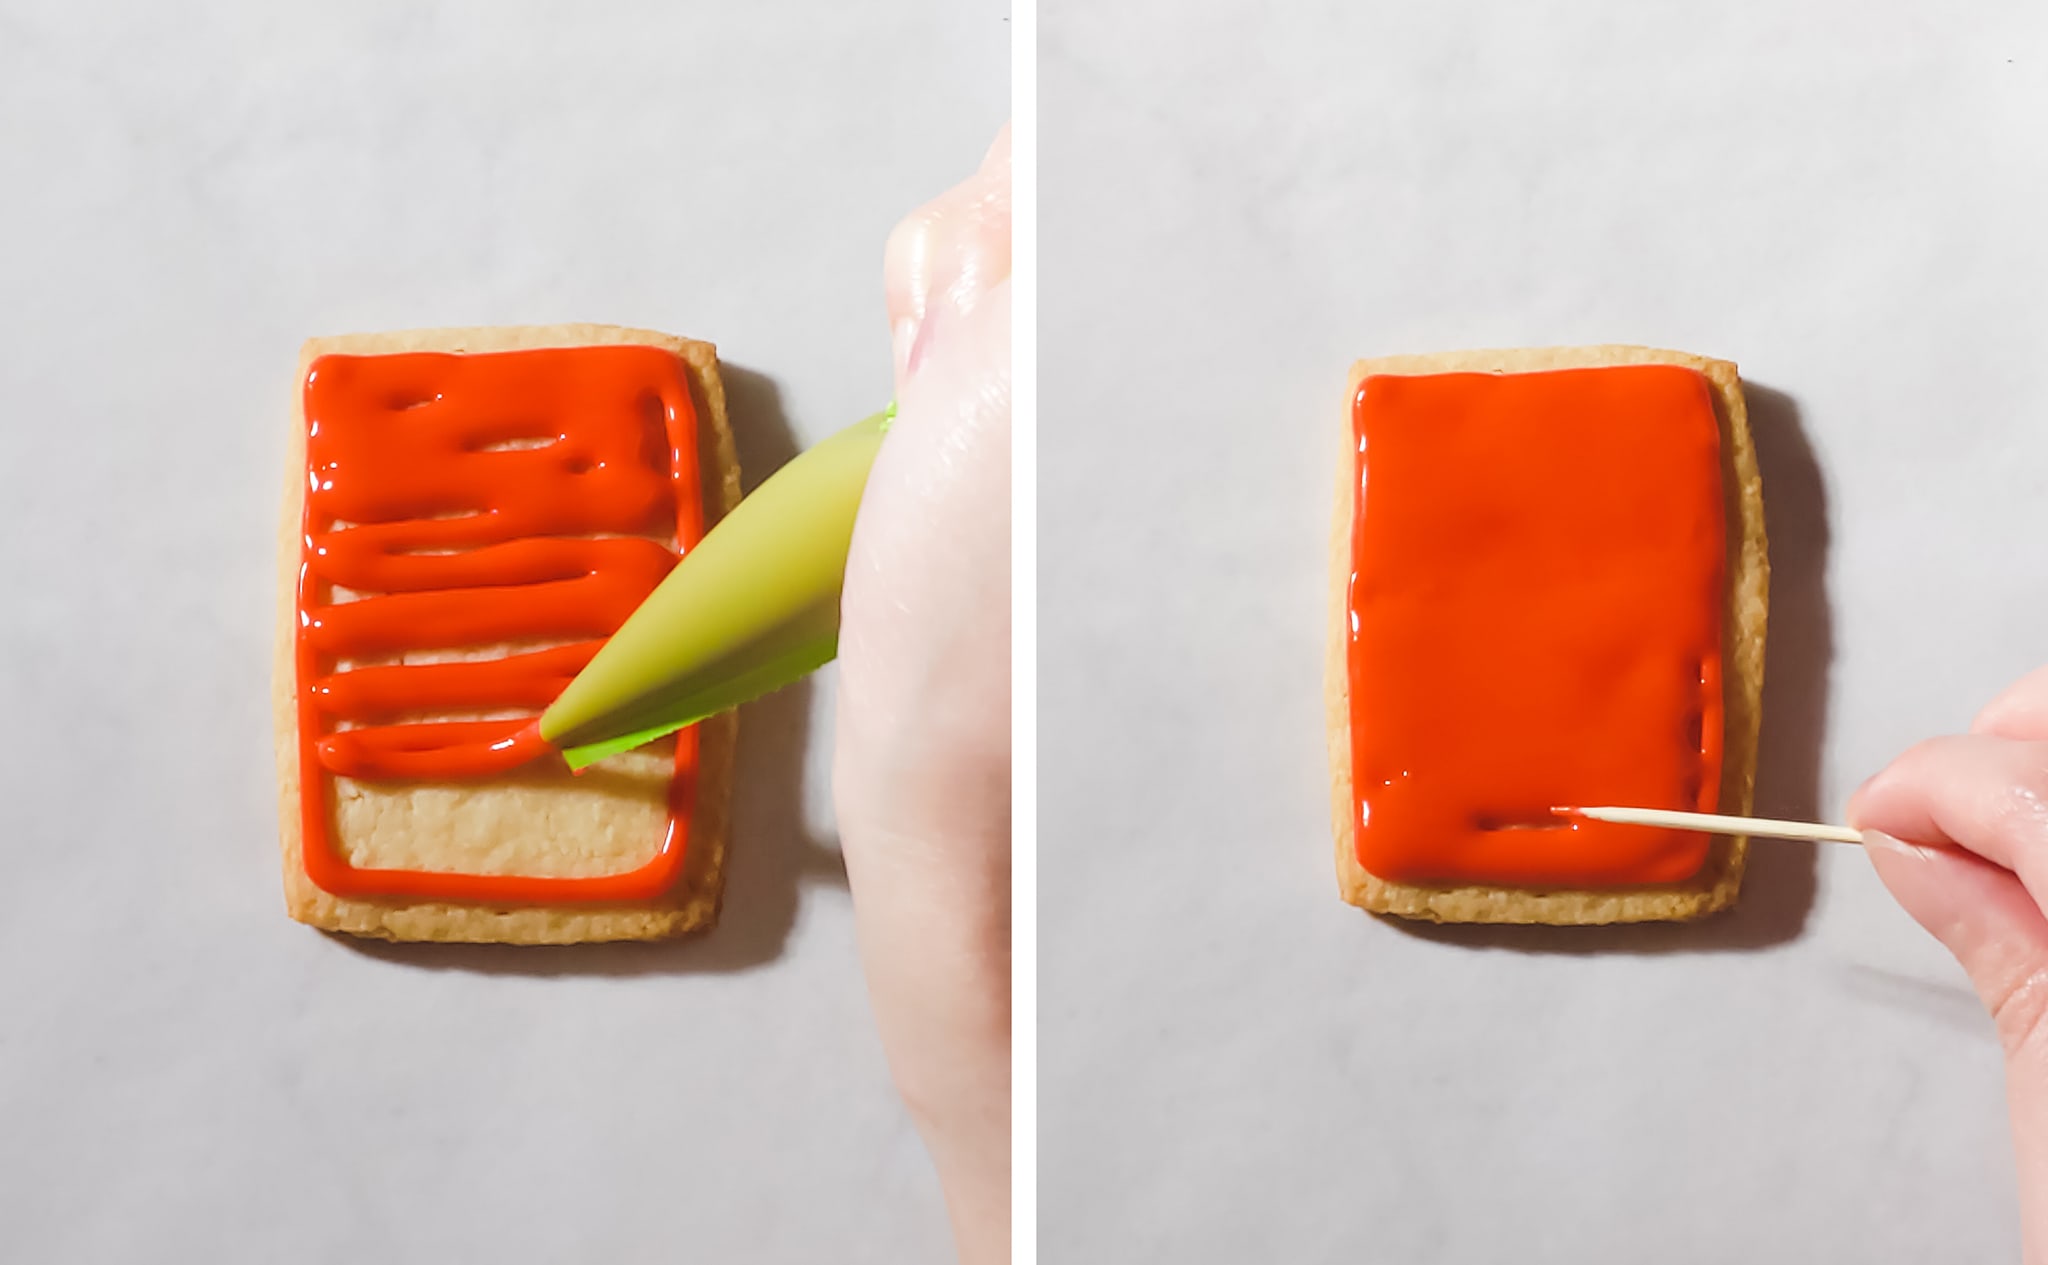
Pipe an outline of icing onto a cookie and fill it in with icing. Use a toothpick to move the icing aorund any gaps until it smooths out by itself. Repeat with all cookies and let them dry for at least 30 minutes to 1 hour before applying the second layer of your design.
Let iced cookies dry completely for 6-8 hours or overnight, preferably.
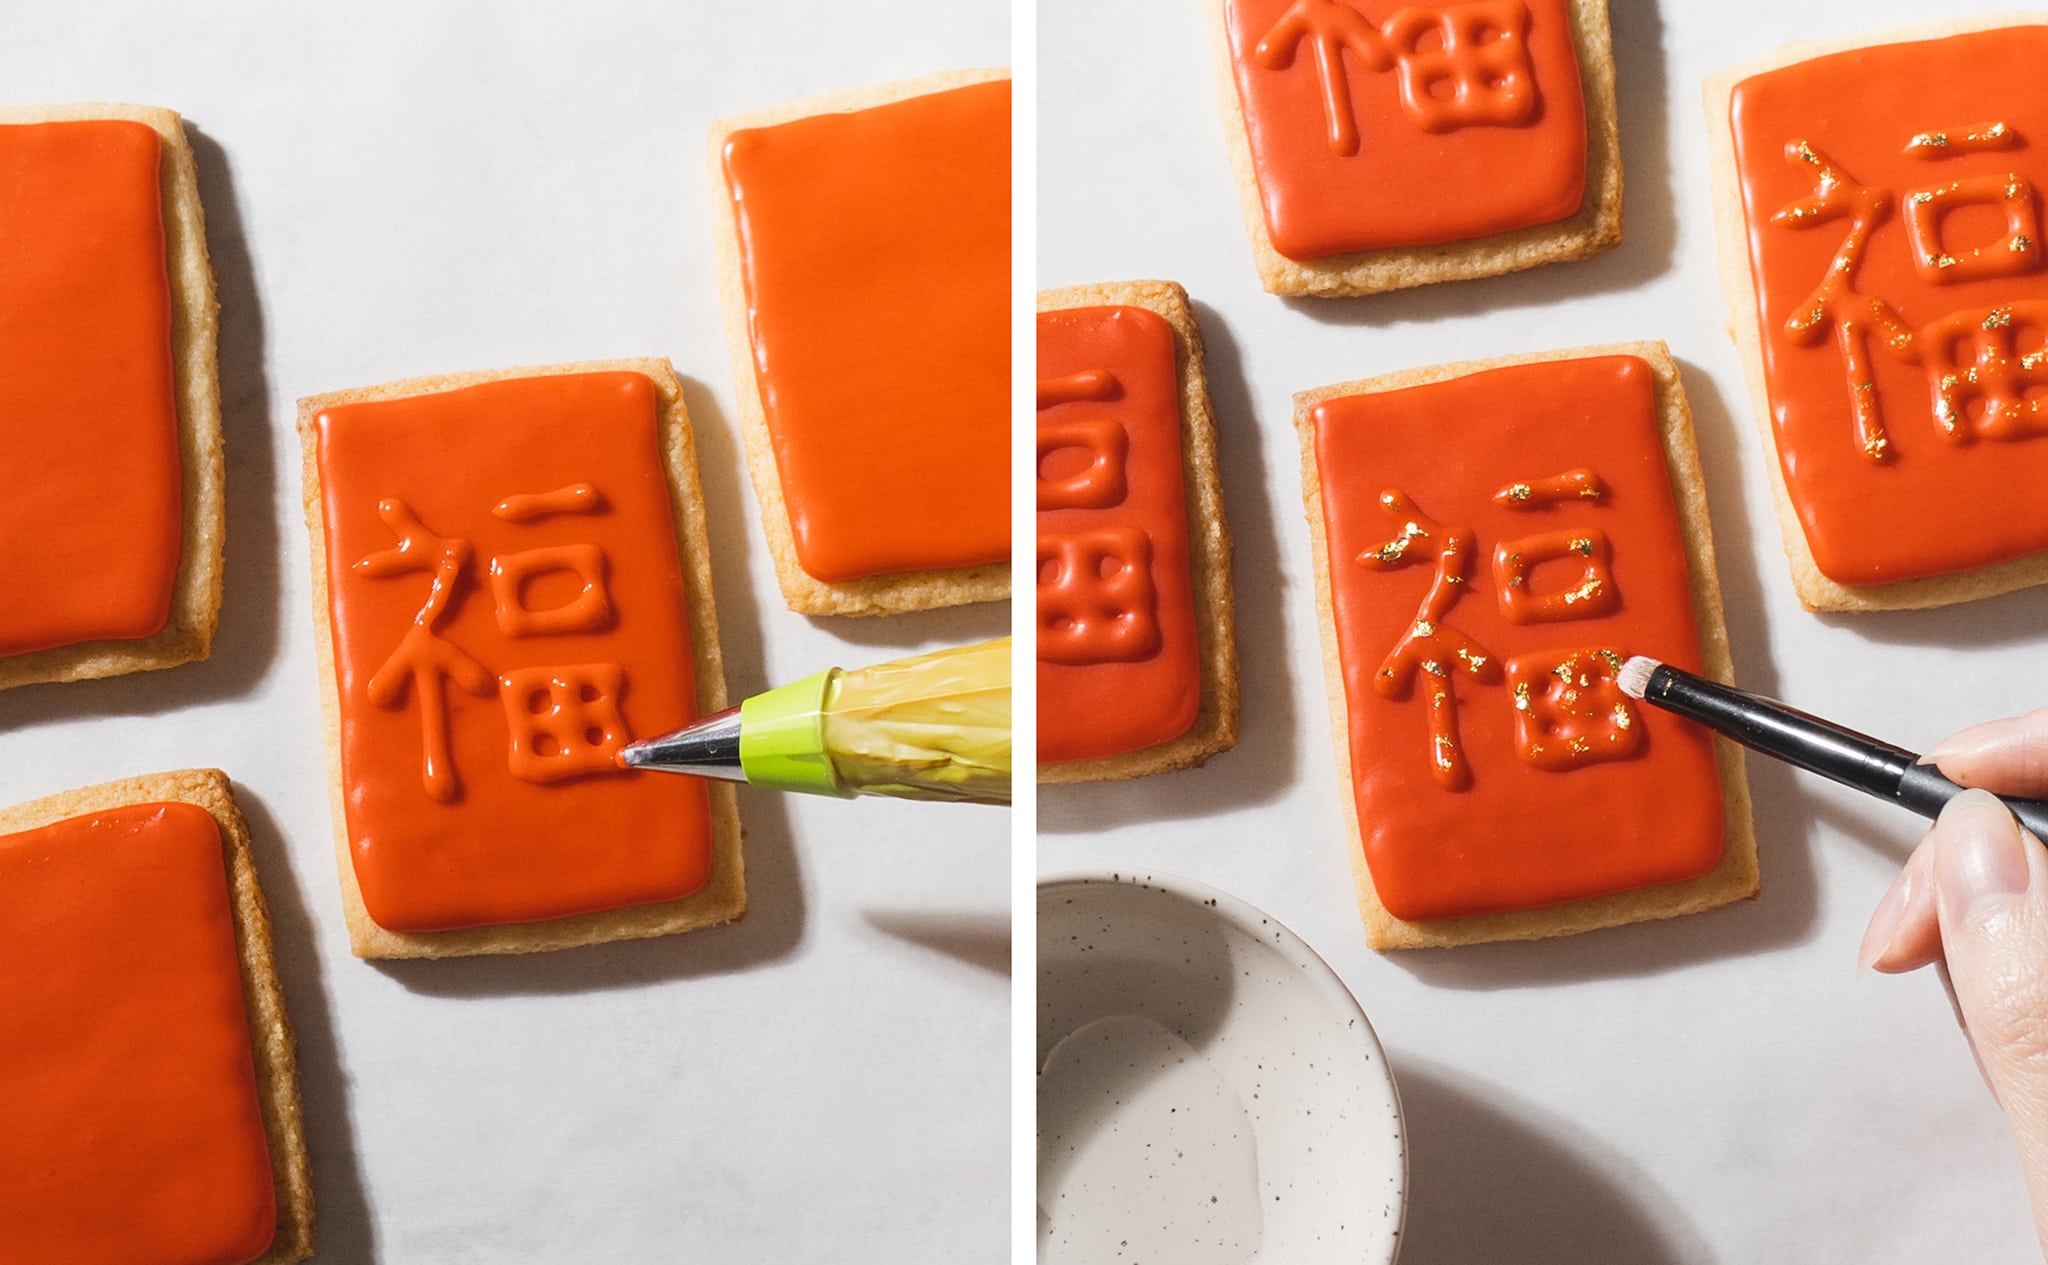
To apply gold leaf to sugar cookies, dab a paintbrush in water and dab off the excess on a paper towel. Apply a very thin layer of water to the areas of the cookie where you want the gold leaf to stick.
Dry off the paintbrush and very gently dab onto the sheet of gold leaf to lift a small piece off. Touch the gold leaf to the wet areas to apply.
Tips & tricks
- Chill your cookie dough - This dough is quite soft and should be chilled in the fridge for about 1 hour before rolling it out. Chilling it will make it easier to handle.
- Flour your surfaces well - Sprinkle a layer of flour over your surfaces and rolling pin to prevent the dough from sticking. Lift and turn the dough as you’re rolling. Use an offset spatula to slide underneath your cookie cut outs to lift them from the counter onto your baking sheet.
- Shape cookies after baking - These cookies will be soft for a few minutes after they come out of the oven. This is the perfect time to clean up your cookie shapes if they’ve deformed during baking and to get straight lines and corners. Use a spatula to nudge the sides of the cookies until they’re the perfect shape.
- Use small piping tips - This icing is a bit more liquidy than royal icing so fine details tend to meld together after a few minutes. This is great for flooding cookies to get a smooth surface but not so great for thin lines and details. Use a smaller piping tip than you think you’ll need or cut a very small opening to start with. You can always cut more of the piping bag tip if you want a bigger hole.
- Let icing dry between layers - A little patience goes a long way when decorating sugar cookies. If you’re making a raised design like the Chinese writing on these cookies, you’ll want to let the first layer of icing dry for at least 30 minutes to 1 hour before piping the second layer on top. It will still be delicate at this point so be careful not to press into it too hard. When you’re done, let the icing completely dry overnight or for 6-8 hours before stacking them.
Frequently asked questions
Store your decorated sugar cookies in an airtight container at room temperature for up to 5 days. If the icing is still drying, lay the cookies out in a single layer and cover them with an upside down baking tray so that nothing touches the surface of the cookies.
Yes! Store cookies in an airtight container or freezer bag and freeze for up to 1 month. Thaw cookies in the fridge overnight before eating.
These cookies will dry out more if they don’t have icing on them. Once they have icing on them, the cookies will absorb some of the moisture from the icing and become softer. To keep them soft, always store them in an airtight container or cover them so that they aren’t exposed to the air. Don’t store cookies uncovered in the fridge.
More cookie recipes to try
- Matcha White Chocolate Cookies
- Ruby Chocolate Shortbread Cookies
- Salted Chocolate Sablé Cookies
- Matcha Linzer Cookies
Recipe
Chinese New Year Cookies
Ingredients
Sugar Cookies
- 115 g unsalted butter, room temperature
- 150 g granulated sugar
- 1 large egg, room temperature
- 1 teaspoon vanilla extract
- 400 g almond flour
- ½ teaspoon baking powder
- ½ teaspoon salt
Icing
- 280 g powdered sugar
- 48 g milk, dairy or non-dairy
- gel food colouring
- edible gold leaf, optional
Instructions
Sugar Cookies
- In a medium mixing bowl, use an electric mixer to beat softened butter until creamy. Add granulated sugar and beat until combined.
- Add in the egg and vanilla extract. Beat until combined.
- Add in the almond flour, baking powder, and salt. Beat on low speed until it forms a soft dough.
- Turn the dough out onto a sheet of plastic wrap. Use your hands to press the dough into a flattened disc shape. Wrap with plastic wrap and chill in the fridge for 1 hour.
- Preheat oven to 350°F and line a baking sheet with parchment paper. Set aside.
- Place the chilled dough on a well-floured surface. Roll out with a rolling pin until about ⅛” thick. Cut out your cookies with cookie cutters of your choice and transfer cut outs to baking sheet. Re-roll the dough scraps and repeat.
- Bake cookies for 10-12 minutes or until the edges just begin to brown. Let cookies cool on the baking sheet for at least 10 minutes until they’re firm enough to handle. Transfer them to a wire rack to cool completely.
Icing
- In a small bowl, stir together powdered sugar and milk. It should be a thick paste when stirring around but looks smooth and glossy if you leave it undisturbed. Let the icing drizzle off the spoon - it should be thick enough for the drizzles to hold their shape for several seconds and then “melt” back into the icing.
- Divide the icing into several smaller bowls and mix in gel food colouring into each bowl, depending on your designs. Note that adding a lot of gel colouring to the icing may make it thinner so add more powdered sugar as needed to maintain the thick consistency.
- Transfer icing to small piping bags and cut off the tips to make a small opening. Cover any icing that isn’t being used so that it doesn’t dry out.
- Pipe an outline of icing onto a cookie and fill it in with icing. Use a toothpick to move the icing aorund any gaps until it smooths out by itself. Repeat with all cookies and let them dry for at least 30 minutes to 1 hour before applying the second layer of your design.
- Let iced cookies dry completely for 6-8 hours or overnight, preferably.
- If applying gold leaf to cookies, dab a paintbrush in water and dab off the excess on a paper towel. Apply a very thin layer of water to the areas of the cookie where you want the gold leaf to stick.
- Dry off the paintbrush and very gently dab onto the sheet of gold leaf to lift a small piece off. Touch the gold leaf to the wet areas to apply.




Leave a comment or review